This is a tutorial on Text in JavaFX.
Using the Text Class, you can create and display Text in a JavaFX GUI. The JavaFX Text Class is a subset of the Shape class, so it shares many of it’s stroke and fill properties. All the special properties and functions are used to customize and modify the appearance of the displayed Text in JavaFX.
The JavaFX Text Class is represented by javafx.scene.text.Text.
JavaFX Text Example
To create a JavaFX Text object, you need to pass the text that you wish to be displayed on screen, into the Text class. Once the object is created, add it into the layout you have selected.
The setX() and setY() functions are used to position the text inside the GUI window. Keep in mind, that these functions will only work on certain Layouts.
package application;

import javafx.application.Application;
import javafx.stage.Stage;
import javafx.scene.Scene;
import javafx.scene.control.Label;
import javafx.scene.layout.Pane;
import javafx.scene.text.Font;
import javafx.scene.text.Text;
import javafx.scene.paint.Color;


public class Tutorial extends Application  {
	public static void main(String args[]){
		 launch(args);
	}

	@Override
	public void start(Stage primaryStage) throws Exception {

		Text text = new Text("This is a JavaFX Text example");
		text.setY(100);
		text.setX(50);

        Pane layout = new Pane(text);
		Scene scene = new Scene(layout, 250, 250);

		primaryStage.setTitle("CodersLegacy");
		primaryStage.setScene(scene);
		primaryStage.show();
    }
}
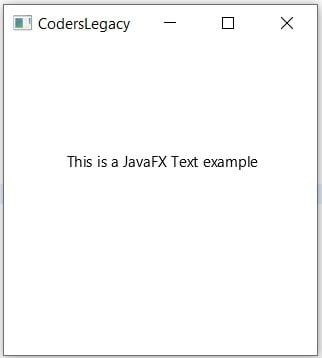
The GUI output of the above JavaFX Text example:

Now that we’ve created and displayed Text, in the next few sections we’ll work on actually customizing and improving it’s appearance.
Set Stroke and Fill
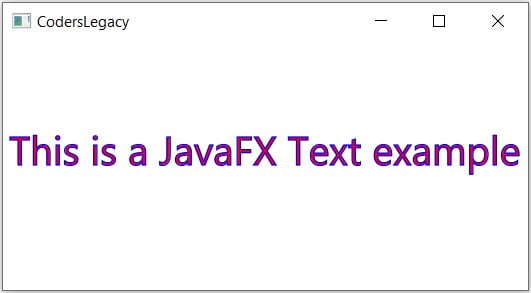
Passing a Color object into the setStroke() function will set the border of the Text to the color of assigned to the Color object. In the below case, only the edges of the text will become blue, not the insides as well.
text.setStroke(Color.BLUE);
The setFill() function is used to “fill” the insides of JavaFX Text with a specified color. Simply pass a color object with the color of your choice to achieve this effect.
text.setFill(Color.RED);
The output of the GUI, after running both commands.

Some slight changes to the size of the Scene and Text were made to show the above changes properly. The “Stroke” and “Fill” will not be shown clearly unless the Text is of a large enough size.
MultiLine Text
There are two ways to handle multi-line text in JavaFX. You can either use the newline character "\n" at places throughout the text, or you can make use of the setWrappingWidth() function to have the text automatically move to a new line after a certain number of characters.
An example using new line characters.
Text text = new Text("This is a JavaFX Text example.\n Here we will
                      demonstrate the use of Multiline Text. \n ... ");
An example using the setWrappingWidth function.
Text text = new Text("This is a JavaFX Text example.\n Here we will
                      demonstrate the use of Multiline Text. \n ... ");
text.setWrappingWidth(80);
With this, the number of characters in a line will never exceed 50. If a word is incomplete and has hit the 50 character limit, the whole word will be shifted to the next line.
Another method that’s important when you’re using multi-line text is the setLineSpacing() method. It manages the amount of space between consecutive lines.
text.setLineSpacing(20);
Font Class
The Font Class is responsible for handling most of the styling and customization of the Text in JavaFX. It gives you a variety of options and parameters, allowing you to modify the Font-Family, the font-size, bold, italicization using the JavaFX setFont function.
You can read a much more detailed tutorial on the Font class in a separate dedicated article here.
package application;

import javafx.application.Application;
import javafx.stage.Stage;
import javafx.scene.Scene;
import javafx.scene.layout.Pane;
import javafx.scene.text.Font;
import javafx.scene.text.FontPosture;
import javafx.scene.text.Text;


public class Tutorial extends Application  {
	public static void main(String args[]){
		 launch(args);
	}

	@Override
	public void start(Stage primaryStage) throws Exception {

		Text text = new Text("  Hello World.\n JavaFX Font Example.");

		text.setY(100);
		text.setX(20);
		text.setFill(Color.RED);

		text.setFont(Font.font("Lucida Sans Unicode", FontPosture.ITALIC, 20));

        Pane layout = new Pane(text);
		Scene scene = new Scene(layout, 250, 200);

		primaryStage.setTitle("CodersLegacy");
		primaryStage.setScene(scene);
		primaryStage.show();
    }
}
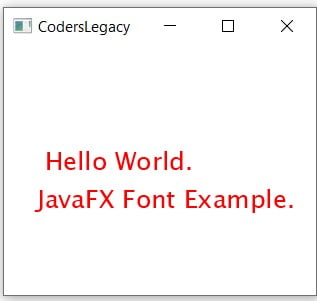
The GUI output of the above example:

While the JavaFX Text class has the ability to make many changes to the appearance of the text, it can’t do many things. For this we have a separate class, in charge of styling called the JavaFX Font Class.
It can do things like change the font size and font family type which is extremely important when it comes to customizations.
Extra Text Functions
Some of the other small, but useful Text related functions.
Text StrikeThrough
Passing the Boolean value “true” into the setStrikethrough() will give your text an strikethrough property. Passing false will remove/disable this property.
text.setStrikethrough(true);
Text Underline
Passing the Boolean value “true” into the setUnderLine() will give your text an underlined property. Passing false will remove/disable this property.
text.setUnderline(true);
By default this value is false.
Text Anti-Aliasing
Anti Aliasing is a technique used to make the rough edges in shapes appear smoother. JavaFX has support for Anti Aliasing with it’s setFontSmoothingType() function.
There are two different modes of Anti-Aliasing that you can pick. You can use either FontSmoothingType.GRAY or FontSmoothingType.LCD.
text.setFontSmoothingType(FontSmoothingType.GRAY);
Try both modes, and pick the one that suits your program the most.
This marks the end of the JavaFX Text article. Any suggestions or contributions for CodersLegacy are more than welcome. Questions regarding the article content can be asked in the comments section below.
