
Vectors in C++ are a pretty handy feature, and often are a better alternative compared to other C++ containers such as Arrays. Like most other containers in C++, you can create or “initialize” a Vector a variety of different ways, each with their unique twist or way of initializing the Vector. In this tutorial, we will discuss how to Initialize a 2D Vector in C++!
Creating a 2D Vector in C++
Let’s first take a look at how to create a 2D array in C++. The concept is pretty simple, which typically just involves nesting a vector within a vector. So basically you have a vector, where each of it’s “slots” are individual vectors to which elements can be added. Thus, a 2D vector is created.
vector<vector<int>> vec;
Currently, the Vector has been created, but not really initialized. To “initialize” is usually when a Vector is assigned some starting or “initial” values upon it’s creation.
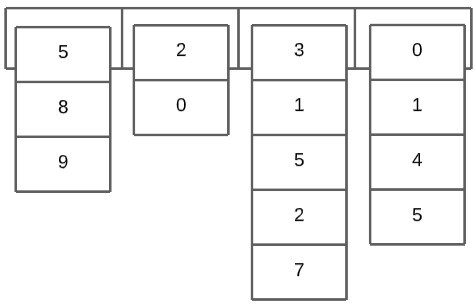
Here’s a nice image showing what a 2D vector might look like after some values have been inserted into it randomly.
Using Initializer Lists
A very popular and common way of initializing Vectors nowadays is through the use of C++ Initializer Lists.
Initializers Lists are actually used to initialize all manner of containers and variables, and are used in Arrays and Classes. The syntax is pretty straightforward, which is simply to use curly brackets enclosing the value(s) you wish to insert into the vector.
For a regular vector we would use the following format:
vector<int> vec { 1, 2, 3 };
However, since we are dealing with 2D Vectors here, we need to nest Curly brackets as shown in the example below. This creates a 2D Vector, with three Vectors in it, initialized to { 1, 1, 1 }, { 2, 2, 2 } and { 3, 3, 3 } respectively.
vector<vector<int> > vec { { 1, 1, 1 },
                           { 2, 2, 2 },
                           { 3, 3, 3 } };
Using Fill Constructor
Next up is the Fill constructor. This is another very recommended approach on how to initialize a 2D Vector in C++.
Below we have the syntax required to initialize a 2D Vector using the fill array. The ROW_COUNT is an integer which decides how many vectors will be in the array, and COLUMN_COUNT decides the starting size of each vector.
vector<vector<int> > vec{ ROW_COUNT, vector<int>(COLUMN_COUNT) }; If you want to initialize the vector with some values (other than the default 0), then all you need to do is add an extra integer, which decides the initial value as shown below.
vector<vector<int> > vec{ ROW_COUNT, vector<int>(COLUMN_COUNT, 1) };Here is a short example showing how to initialize a Vector of dimensions (3, 5) with all values being 1. We have also included the code required to print out a 2D Vector.
#include <iostream>
#include <vector>
using namespace std;


int main() {

    vector<vector<int> > vec{ 3, vector<int>(5, 1) };


    for (int i = 0; i < vec.size(); i++) {
        for (int j = 0; j < vec[i].size(); j++) {
            cout << vec[i][j] << " ";
        }
        cout << endl;
    }
}
1 1 1 1 1
1 1 1 1 1
1 1 1 1 1
Note, that the Fill constructor can be used for both normal Vectors and 2D Vectors. To learn more about the Fill constructor, check out the C++ Fill Constructor tutorial.
Using resize() function
In this example we will use the resize() function, which can be used to adjust the size of a Vector. We gave the 2D vector an initial size of “3” using the fill constructor for 1D vectors. Alternatively, we could have simply declared the vector normally, and then used resize on it.
Next, we iterate over each vector in the 2D Vector, and resize it to size “5”. You can also pick a default value to fill in the Vector, as we have done below.
#include <iostream>
#include <vector>
using namespace std;


int main() {
    int rows = 3;
    int cols = 5;

    vector<vector<int> > vec(rows);

    for (int i = 0; i < rows; i++) {
        vec[i].resize(cols, 3);
    }

    for (int i = 0; i < rows; i++) {
        for (int j = 0; j < cols; j++) {
            cout << vec[i][j] << " ";
        }
        cout << endl;
    }

}
3 3 3 3 3
3 3 3 3 3
3 3 3 3 3
Not as efficient as the other solutions mentioned here, but it gets the job done in a pretty simple manner without any fancy syntax.
This marks the end of the How to Initialize a 2D Vector in C++ Tutorial. Any suggestions or contributions are more than welcome. Questions regarding the tutorial content can be asked in the comments section below.