
Welcome to the getting started with Python Article. In this article we’ll explain how to set up and install Python from scratch. This will be followed by an piece on how to set up and install an IDE for Python.
Once you have everything setup, head over to the Main Python page, where we have a list of all python tutorials available on our site!
Installing Python
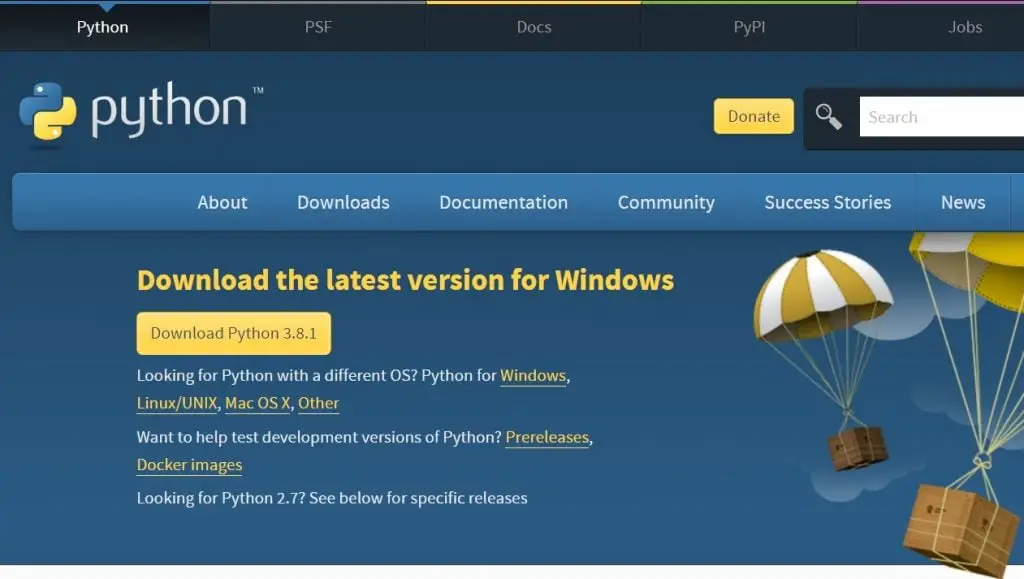
- To get started head over to the Python download page. You should see the screen as shown below (or something very similar).
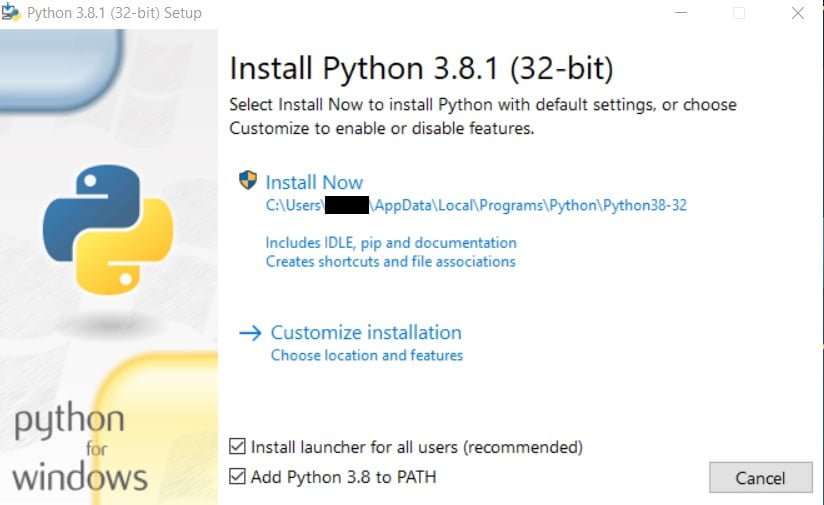
2. Download and run the setup file. Your screen should be showing the following when the setup starts. Make sure to tick the “Add to PATH” option. This will prove very useful later on.
3. Once the setup completes, let’s run a test to make sure we got everything working correctly. Create a regular text file on your PC, and change it’s extension to “.py”. This changes it to a Python file.
If you’re having trouble changing extensions, open File explorer and make sure you have the “File name extensions” option ticked. (This is for windows 10).

4. Type the following line into the file and then run it by pressing the “run” option or using the shortcut F5.
print ("Hello world")
If all goes well you should see the words “Hello World” pop after the program executes.
Downloading and Installing a Library
While not technically part of setting up python, since many new python learners face difficulty in downloading and installing external libraries for Python, I’ve added a short guide on it here.
Open the command prompt, (Be sure to run it as administrator) and type in the following command.
pip install tkinter
pip – the name of the python installertkinter – name of the library we’re downloading.
And that’s all. The library should now download and install itself.
(The command required may vary from OS to OS. “pip” is basically a package/library downloader. On Ubuntu for example, it is not included in the standard python installation, unlike windows).
Remember that we ticked the “Add to Path” option while installing python? This is where it comes in handy. If we hadn’t done this, then you would have had to navigate to the exact directory in the command prompt where the python.exe was located, and then run that command. What adding to path does, is add the path of the python.exe to a list of default paths that your computer will check when you run that command.
If you already have python installed, and you didn’t enable the add to path option, this 2 min video will explain the entire process of adding it manually.
Installing an IDE – Optional
As explained in the “Which IDE to choose” Article, IDE’s play a critical role in programming and the development of software. Unless your just a casual programmer and not aiming to be developing actual applications or software, this is a must follow step.
The standard Python IDE that comes with the Python Installation is pretty handy for writing small code quickly, but becomes burdensome once you begin proper projects.
To get an IDE up and running, you must first go through the first step. This is because the IDE is just a set of tools and features that latch themselves onto the python installation. The IDE will not install Python for you (usually). Be sure to keep track of the filepath where you installed python, so you can configure the IDE to locate it if it doesn’t do so automatically.
We’ll be demonstrating how to install the Python IDE, Pycharm. You can reach more about it in our Article on IDE’s.

First step is to download the PyCharm setup from it’s download page. Run the setup and follow the steps until the setup is completed.
Once it is installed, PyCharm will automatically try to locate your python.exe file so that it can link to it. However, there is a chance that it will be unable to do so and you’ll have to manually point PyCharm towards the python.exe file in the settings tab.
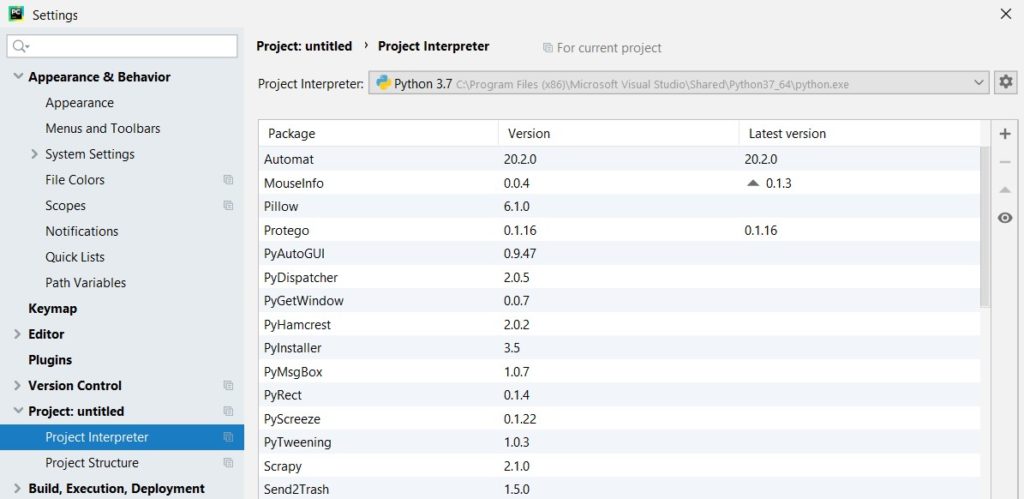
Next head over to the project interpreter tab. Next to project interpreter you can see the file path for my Python installation. You’ll need to simply change whatever it is currently set to, to the location of your python.exe.
An extra benefit of PyCharm is that it simplifies the process of downloading and installing Libraries. It removes the need to have to go to the Command prompt, instead offering its own custom page with a GUI where you can search and install new libraries.
This marks the end of the Python – Getting Started Article. Any suggestions or contributions for CodersLegacy are more than welcome. Relevant questions can be asked in the comments section below.
Check out our Python Resources for Beginners if you need other resources to help you on your journey to be a Python expert.
This seems to me anything but introductory and quite likely to lead to immense frustration on the part of the user.
Sorry to hear that. Upon a review of the tutorial, it turns out a step was missing, which has been corrected. A few other elaborations and improvements have also been made.
Always open to suggestions on how to improve our tutorials!
ty very much i have been trying to install pygame with no success this helped