
This article explains how to get started with the VB.NET programming language.
Introduction
Normally, we would first talk about how to install the programming language files, and then move on to installing a suitable IDE. However, in VB.NET’s case, we will be combining both of these steps. This is because Visual Basic comes with it’s own full IDE.
Usually we install IDE’s due to the lack of features on the standard IDE’s (in some cases there are none) of a programming language. However, since Visual Studio is already full with all the features you’ll ever need we won’t be installing anything else.
This also makes the installation of VB.NET much easier, as Visual Studio, the IDE for VB.NET will handle everything for you.

- First visit the official Visual Studio download page by Microsoft. You can download the appropriate version of Visual Studio for your PC over there.
2. Follow the instructions given to you by the set up until you reach the following point shown in the image below. This is the selection page, where you get to pick what to include with the visual studio installation.
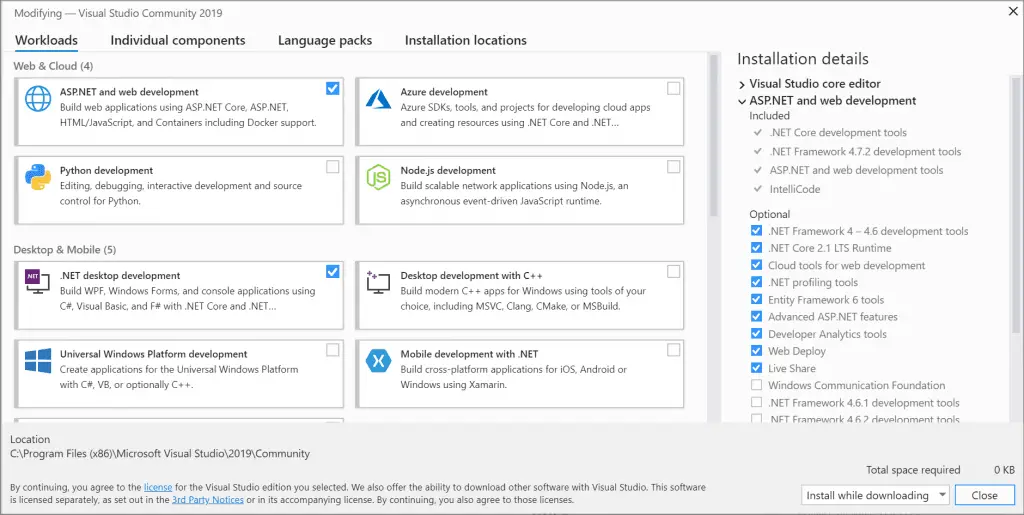
3. You’ll want to tick anything .NET related. If you have future plans to begin development in either Python, C++ or some other language, you can download those too.
Once you complete the set up, your all done. You can now direct yourself to the homepage and begin a new VB.NET project. The visual studio IDE will help you throughout your coding process with helpful suggestions, advanced debugging tools such as breakpoints and step into etc. It will be worthwhile to take tutorials regarding the use of this IDE to make the most of it.
Modifying your current Visual Studio Installation
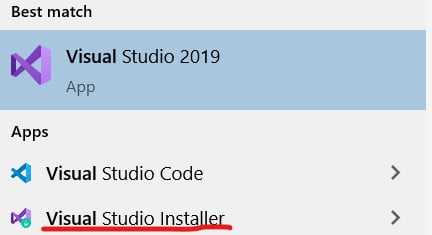
A common issue that arises is when someone already has a visual studio installation and is trying to add VB.NET or something language to it. Or perhaps you want to remove a currently existing language or package. The method is quite simple. You just have to locate the Visual Studio Installer and run it.
If you’re using Windows 10, you can locate it through the search bar.
You now see the following window showing you your Visual Studio Installation(s). Navigate to the “Modify” button and click on it.
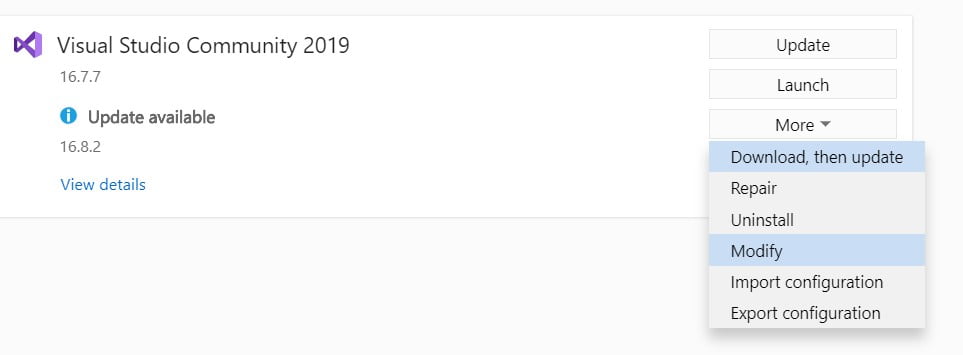
Once you do this, you’ll see the same window that you did during the installation. You can now select or deselect whichever modules you wish to install or uninstall and then click the “Modify” button.
Happy Programming!
This marks the end of the Getting started with VB.NET Guide. Any suggestions or contributions to CodersLegacy are more than welcome. Any questions about the article content can be asked below in the comments section.