In this wxPython Tutorial, we will demonstrate how to use the StaticLine Widget, alongside it’s various styles, features and functions. A complete list of options will be included here, alongside several code examples for your convenience.
The StaticLine Widget is a simple line that is drawn on the Window. The size of this line can be manipulated through the use of parameters.
wxPython StaticLine Syntax
The syntax required to create a StaticLine widget.
line = wx.StaticLine(parent, id, pos, size, style)parent: This is the Widget to which it is parented, such as a Panel.id: Widget ID. Default value is ID_ANY, which gives it the next available ID.pos:A tuple which contains the coordinates of where the line should begin from.size:A tuple which defines the dimensions of the line.style:Used for styling the line (such as Alignment)
StaticLine Styles
A list of Styles available for the StaticLine Widget.
| Widget Style | Description |
|---|---|
| wx.LI_HORIZONTAL | Aligns the Line Horizontally |
| wx.LI_VERTICAL | Aligns the Line Vertically |
Code Example
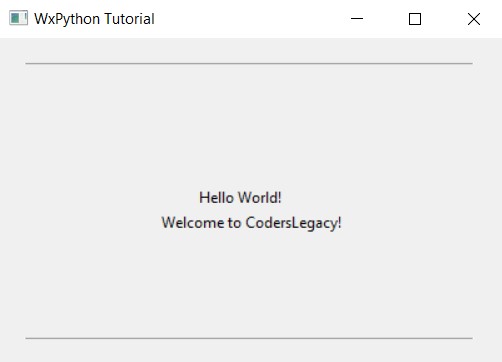
A simple code example where we create two StaticLine Widgets to add some style into our window. It’s a simple widget and has little practical purpose besides simply serving as a separator between widget and adding some décor to your window.
import wx

class Window(wx.Frame):
    def __init__(self, title):
        super().__init__(parent = None, title = title, size = (420, 300))
        self.panel = wx.Panel(self)

        wx.StaticLine(self.panel, pos=(20, 20), size=(360,1))

        text1 = wx.StaticText(self.panel, label = "Hello World!", pos = (160, 120))
        text2 = wx.StaticText(self.panel, label = "Welcome to CodersLegacy!", pos = (130, 140))

        wx.StaticLine(self.panel, pos=(20, 240), size=(360,1))

        self.Centre()
        self.Show()

app = wx.App()
window = Window("WxPython Tutorial")
app.MainLoop()
The output:

Changing Alignment
Let’s try changing the Alignment on our StaticLine Widgets to make them Vertical. Interestingly, changing the style to wx.LI_VERTICAL option does not change the orientation of the widget in any way.
In order to change it’s orientation, you need to change the size values. Instead of something like (300, 1) we need to use values like (1, 300). The only thing the style appears to change is the result of the IsVertical() method that can be used on the widget to determine orientation.
import wx

class Window(wx.Frame):
    def __init__(self, title):
        super().__init__(parent = None, title = title, size = (420, 300))
        self.panel = wx.Panel(self)

        wx.StaticLine(self.panel, pos=(20,20), size=(1,220), style = wx.LI_VERTICAL)
        wx.StaticLine(self.panel, pos=(20,240),size=(360,1), style = wx.LI_HORIZONTAL)

        text1 = wx.StaticText(self.panel, label = "Hello World!", pos = (160, 120))
        text2 = wx.StaticText(self.panel, label = "Welcome to CodersLegacy!", pos = (130, 140))

        wx.StaticLine(self.panel, pos=(380,20), size=(1,220), style = wx.LI_VERTICAL)
        wx.StaticLine(self.panel, pos=(20,20), size=(360,1), style = wx.LI_HORIZONTAL)

        self.Centre()
        self.Show()


app = wx.App()
window = Window("WxPython Tutorial")
app.MainLoop()
The ouput:

This marks the end of the wxPython StaticLine Widget Tutorial. Any suggestions or contributions for CodersLegacy are more than welcome. Questions regarding the tutorial content can be asked in the comments section below.
