
If you’re working with HTML in Python, the BeautifulSoup library is an excellent choice for parsing and manipulating HTML content. Most people only know about BeautifulSoup in the context of “parsing” HTML content. Little do they know, that BeautifulSoup can also be used for changing (replacing) tags and HTML content in Python.
For example, let’s assume you want to swap out all of the “h2” tags for “h3” tags inside some HTML content. BeautifulSoup can automate that for you. There is obviously alot more that it can do, which we will explore throughout this article.
Let’s get started.
Getting started
First, we’ll need to import the necessary modules. We’ll be using bs4 for parsing HTML and requests to fetch a web page to work with. In case you didn’t know, BeautifulSoup can’t actually acquire the HTML content. It just parses it.
from bs4 import BeautifulSoup
import requests
Also, I hope you actually have BeautifulSoup installed. It’s not part of the standard Python Library, so needs to be downloaded and installed separately.
For the purposes of this tutorial, we’ll be using a simple HTML file that contains a few HTML tags. Its easier to explain things this way.
html = """
<!DOCTYPE html>
<html>
  <head>
    <title>My Web Page</title>
  </head>
  <body>
    <p>Hello, world!</p>
  </body>
</html>
"""
It’s stored in a multiline string by the way. Another cool thing you can do is just copy paste this into a separate HTML file, and read it from there. Reduces the clutter a bit, especially when you have larger HTML files.
Changing HTML tags with BeautifulSoup
Now that we have our environment setup, we can begin using BeautifulSoup to parse and manipulate it. We won’t be doing too much parsing here, mostly changing and replacing tags. So if you want to learn more about parsing, selectors, and other bs4 concepts, check out our main tutorial.
Back to the tutorial.
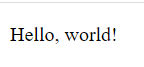
I rendered the HTML from earlier into our browser, just so we can take a look at how it currently looks. Before we make any modifications.
First we will boot up our parser, by loading the HTML content into it.
from bs4 import BeautifulSoup

html = """
<!DOCTYPE html>
<html>
  <head>
    <title>My Web Page</title>
  </head>
  <body>
    <p>Hello, world!</p>
  </body>
</html>
"""

soup = BeautifulSoup(html, "html.parser")
Our very first goal, will be to change that paragraph tag into an H1 tag. To do this, we must first locate the paragraph tag, and then change it.
There are two ways we can do this. Here is the first method:
p_tag = soup.find('p')
p_tag.name = 'h1'
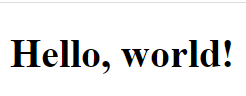
Printing out this HTML content, as shown below, proves it was successfully changed.
print(soup.prettify())
<!DOCTYPE html>
<html>
 <head>
  <title>
   My Web Page
  </title>
 </head>
 <body>
  <h1>
   Hello, world!
  </h1>
 </body>
</html>
I also rendered this HTML content in the browser so we could get a look at the real thing.
We can also change the content of the tag in a similar way. Instead of modifying the “name” attribute, just change the “string” attribute.
p_tag = soup.find('p')
p_tag.name = 'h1'
p_tag.string = 'CodersLegacy'
I’ll just directly show you the HTML rendered output.
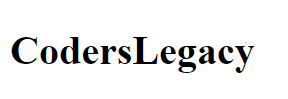
Cool right?
The other way of doing this is using the replace_with() method. This method is a bit more complex so we will discuss it in a separate section, along with some other concepts.
Creating Tags in BeautifulSoup
Before we talk about replace_with(), I want to discuss how to “create” and “add” tags into BeautifulSoup. Earlier we just talked about modifying existing tags, this time we will be creating actual HTML elements, and adding them into our content.
There are two ways of creating new Tags. Either using the Tag class, or the new_tag() method. I don’t want to make an extra import for the Tag class, so lets stick to the new_tag() method, available on the soup object.
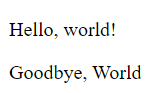
Here is an example, where we have created a “p” tag, along with a bunch of attributes, such as an ID and Class. I don’t actually intend to use these attributes; they are just here for demonstration purposes.
p_tag = soup.new_tag("p", attrs = [("id", "1"), ("class", "meow")])
p_tag.string = "Goodbye, World"
The tag is created empty by default, so we added some text into it. Now that we have this tag, we want to add it into our HTML content somehow.
To do this, we will first select an HTML element into which we want to add this. Let’s go ahead and add this into our “body” tag, alongside the other paragraph element. To do so, we will use the “append” method.
First we locate the tag:
body_tag = soup.find("body")
Then call the append() method:
body_tag.append(p_tag)
Here is the output HTML content.
!DOCTYPE html>
<html>
 <head>
  <title>
   My Web Page
  </title>
 </head>
 <body>
  <p>
   Hello, world!
  </p>
  <p class="meow" id="1">
   Goodbye, World
  </p>
 </body>
</html>
And here is the rendered version.
Replacing Tags in BeautifulSoup with replace_with()
The replace_with() method in BeautifulSoup can be used to replace an HTML tag or its contents. This method is called on the tag you wish to replace, and takes as a parameter, the tag you wish to place into the HTML content. It takes a secondary (optional) parameter on the content of the tag. If you do not define this, the tag will be created with no content (an empty tag).
Here’s an example of how to replace a tag:
from bs4 import BeautifulSoup

html = """
<!DOCTYPE html>
<html>
  <head>
    <title>My Web Page</title>
  </head>
  <body>
    <p>Hello, world!</p>
  </body>
</html>
"""

soup = BeautifulSoup(html, 'html.parser')
p_tag = soup.find('p')
p_tag.replace_with(soup.new_tag('h1'), "This is a new Paragraph")
<!DOCTYPE html>
<html>
 <head>
  <title>
   My Web Page
  </title>
 </head>
 <body>
  <h1>
  </h1>
  This is a new Paragraph
 </body>
</html>
If you only want to change the text inside an HTML tag, you can do:
soup = BeautifulSoup(html, 'html.parser')
p_tag = soup.find('p')
p_tag.string.replace_with('Goodbye, world!')
This keeps the tag the same, but changes the inner content.
This marks the end of the “Changing HTML tags and content with Python BeautifulSoup” Article. Any suggestions or contributions for CodersLegacy are more than welcome. Questions regarding the tutorial content can be asked in the comments section below.