
Toolbars are a staple of many desktop applications, providing users with quick access to common actions. In this tutorial, we’ll walk you through the process of creating a quick access toolbar widget with several common actions (e.g. copy, cut, paste) in Tkinter, Python’s standard GUI library.
Pre-requisites
Before we dive into the code, ensure you have the required libraries. Tkinter is part of the Python standard library, so there’s no need for installation. However, we’ll be using Pillow to handle images for the toolbar icons, which you can install via:
pip install pillowPillow is vastly superior compared to the native Tkinter image module, hence why we are opting to use it. The rest of the libraries and dependencies will be available within the Python Standard Library, so don’t worry.
You will however, need some nice icons to use for your Toolbar buttons (unless you don’t want to have graphics on your Toolbar). We will provide you with some downloadable icons, otherwise you may use your own.
How to create a Quick-Access Toolbar in Tkinter
We will now proceed to create an actual (but basic) text editor with various features such as “Cut”, “Copy”, “Paste”, etc.
Let’s start coding!
class ToolbarTutorial:
    def __init__(self, root):
        self.root = root
self.root.title("Toolbar Tutorial")- Class Definition: We define a class called
ToolbarTutorialto encapsulate our application. - init Method: This method initializes the application. We set
rootas the main window and give it a title.
Configuring Widget Styles
        s = ttk.Style()
        # Create style used by default for all Frames
        s.configure('TFrame', background='grey')
s.configure('TButton', background='grey')- Style Object: A style object (
s) is created usingttk.Style(). - Frame and Button Styles: We set a grey background for all frames and buttons. This gives a uniform look to our toolbar and main content areas.
Creating Frames for the Toolbar and Main Content
        # Create the toolbar frame
        self.toolbar_frame = ttk.Frame(root)
        self.toolbar_frame.pack(fill=tk.X)

        # Create the main frame
        self.main_frame = ttk.Frame(root)
self.main_frame.pack(fill=tk.BOTH, expand=True)- Toolbar Frame: A frame is created for the toolbar. It is packed to fill the horizontal space (
fill=tk.X). - Main Frame: Another frame is created for the main content (text widget). It fills both the horizontal and vertical space and expands as the window grows.
Adding a Text Widget
        # Create a Text widget
        self.text_widget = tk.Text(self.main_frame)
self.text_widget.pack(fill=tk.BOTH, expand=True)- Text Widget: This widget is added to the main frame. It is where the user can type or view text.
- Pack Options: The text widget is set to fill all available space and to expand with the window.
Adding Toolbar Buttons with Icons
For each toolbar button (New, Cut, Copy, and Paste), we perform similar steps:
a. The “New” button:
        self.new_image = Image.open("New.bmp")
        self.new_tkimage = ImageTk.PhotoImage(self.new_image)
        self.new_button = ttk.Button(self.toolbar_frame, image=self.new_tkimage, command=self.new_file)
self.new_button.grid(row=0, column=0, padx=5, pady=5)- Open and Convert Image: The “New.bmp” image is opened and converted into a Tkinter-compatible image.
- Button Creation: A button is created using this image. The button is linked to the
new_filemethod. - Grid Placement: The button is placed in the toolbar using a grid layout because it’s a good layout to use when laying out widgets in pattern-like way.
b. The “Cut” button:
        self.cut_image = Image.open("Cut.bmp")
        self.cut_tkimage = ImageTk.PhotoImage(self.cut_image)
        self.cut_button = ttk.Button(self.toolbar_frame, image=self.cut_tkimage, command=self.cut_text)
self.cut_button.grid(row=0, column=1, padx=5, pady=5)- Cut Image and Button: Similar to the new button, the “Cut.bmp” image is loaded and used to create the Cut button. It calls the
cut_textmethod when pressed.
c. The “Copy” button:
        self.copy_image = Image.open("Copy.bmp")
        self.copy_tkimage = ImageTk.PhotoImage(self.copy_image)
        self.copy_button = ttk.Button(self.toolbar_frame, image=self.copy_tkimage, command=self.copy_text)
self.copy_button.grid(row=0, column=2, padx=5, pady=5)- Copy Button: The process is repeated for the Copy button. It uses the “Copy.bmp” image and links to the
copy_textmethod.
d. The “Paste” button:
        self.Pasteimage = Image.open("Paste.bmp")
        self.Pastetkimage = ImageTk.PhotoImage(self.Pasteimage)
        self.Pastebutton = ttk.Button(self.toolbar_frame, image=self.Pastetkimage, command=self.paste_text)
self.Pastebutton.grid(row=0, column=3, padx=5, pady=5)- Paste Button: The Paste button is created with the “Paste.bmp” image. It is linked to the
paste_textmethod.
Defining Action Methods
The methods below define what happens when a toolbar button is pressed.
a. Clearing the Text Widget
    def new_file(self):
self.text_widget.delete(1.0, tk.END)- new_file Method: When the New button is pressed, this method deletes all text in the text widget. It uses
delete(1.0, tk.END)to remove text from the start to the end.
b. Copying Text
    def copy_text(self):
        try:
            selected_text = self.text_widget.get("sel.first", "sel.last")
            self.root.clipboard_clear()
            self.root.clipboard_append(selected_text)
        except:
pass- copy_text Method: This method copies the selected text. It first gets the selected text from the text widget. Then, it clears the clipboard and appends the selected text to it. If no text is selected, it does nothing.
c. Pasting Text
    def paste_text(self):
        pasted_text = self.root.clipboard_get()
self.text_widget.insert("insert", pasted_text)- paste_text Method: This method retrieves text from the clipboard and inserts it at the current cursor position in the text widget.
d. Cutting Text
    def cut_text(self):
        try:
            selected_text = self.text_widget.get("sel.first", "sel.last")
            self.root.clipboard_clear()
            self.root.clipboard_append(selected_text)
            self.text_widget.delete("sel.first", "sel.last")
        except:
pass- cut_text Method: Similar to copying, this method gets the selected text and places it on the clipboard. It then deletes the selected text from the widget. The
try-exceptblocks help avoid errors when no text is selected.
Starting the Application
root = tk.Tk()
app = ToolbarTutorial(root)
root.mainloop()- Creating the Root Window: The main application window is created using
tk.Tk(). - Instantiating the Application: An instance of
ToolbarTutorialis created, passing the root window. - Main Loop: Finally,
root.mainloop()starts the Tkinter event loop. This loop keeps the window open and handles user interactions.
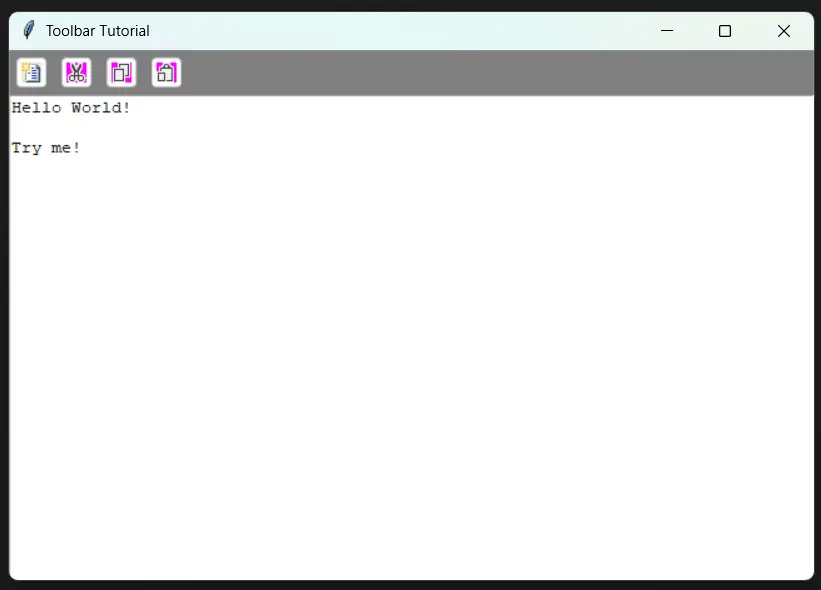
Here’s the end result:
Complete Code Listing
Below is the full code that integrates everything explained above:
import tkinter as tk
from tkinter import ttk
from PIL import Image, ImageTk

class ToolbarTutorial:
    def __init__(self, root):
        self.root = root
        self.root.title("Toolbar Tutorial")

        s = ttk.Style()
        # Create style used by default for all Frames
        s.configure('TFrame', background='grey')
        s.configure('TButton', background='grey')

        # Create the toolbar frame
        self.toolbar_frame = ttk.Frame(root)
        self.toolbar_frame.pack(fill=tk.X)

        # Create the main frame
        self.main_frame = ttk.Frame(root)
        self.main_frame.pack(fill=tk.BOTH, expand=True)

        # Create a Text widget
        self.text_widget = tk.Text(self.main_frame)
        self.text_widget.pack(fill=tk.BOTH, expand=True)

        # New Button
        self.new_image = Image.open("New.bmp")
        self.new_tkimage = ImageTk.PhotoImage(self.new_image)
        self.new_button = ttk.Button(self.toolbar_frame, image=self.new_tkimage, command=self.new_file)
        self.new_button.grid(row=0, column=0, padx=5, pady=5)

        # Cut Button
        self.cut_image = Image.open("Cut.bmp")
        self.cut_tkimage = ImageTk.PhotoImage(self.cut_image)
        self.cut_button = ttk.Button(self.toolbar_frame, image=self.cut_tkimage, command=self.cut_text)
        self.cut_button.grid(row=0, column=1, padx=5, pady=5)

        # Copy Button
        self.copy_image = Image.open("Copy.bmp")
        self.copy_tkimage = ImageTk.PhotoImage(self.copy_image)
        self.copy_button = ttk.Button(self.toolbar_frame, image=self.copy_tkimage, command=self.copy_text)
        self.copy_button.grid(row=0, column=2, padx=5, pady=5)

        # Paste Button
        self.Pasteimage = Image.open("Paste.bmp")
        self.Pastetkimage = ImageTk.PhotoImage(self.Pasteimage)
        self.Pastebutton = ttk.Button(self.toolbar_frame, image=self.Pastetkimage, command=self.paste_text)
        self.Pastebutton.grid(row=0, column=3, padx=5, pady=5)

    def new_file(self):
        self.text_widget.delete(1.0, tk.END)

    def copy_text(self):
        try:
            selected_text = self.text_widget.get("sel.first", "sel.last")
            self.root.clipboard_clear()
            self.root.clipboard_append(selected_text)
        except:
            pass

    def paste_text(self):
        pasted_text = self.root.clipboard_get()
        self.text_widget.insert("insert", pasted_text)

    def cut_text(self):
        try:
            selected_text = self.text_widget.get("sel.first", "sel.last")
            self.root.clipboard_clear()
            self.root.clipboard_append(selected_text)
            self.text_widget.delete("sel.first", "sel.last")
        except:
            pass

root = tk.Tk()
app = ToolbarTutorial(root)
root.mainloop()
This complete example creates a simple Tkinter application with a toolbar that includes New, Cut, Copy, and Paste buttons. Each button is linked to a specific function that manipulates the text widget. Enjoy experimenting with this code and feel free to customize it further!
25 August 2025
Do you agree with the perspective or information presented? Why or why not?