
This tutorial is an introduction to JavaFX.
JavaFX is a software platform for creating and delivering desktop applications, as well as rich Internet applications. The applications built in JavaFX, can run on multiple platforms including Web, Mobile and Desktops.
JavaFX was introduced in 2008 as a successor to the GUI Library Swing. Swing is still the more developed and mature (older) GUI library, but JavaFX is newer and is even compatible with Swing in many ways. Furthermore, JavaFX works better with Mobile Platforms than Swing and across all operating systems such as MacOS, Linux and Windows.
Our Introduction to JavaFX guide here will walk you through the entire process of setting up and installing JavaFX.
Setting up JavaFX
Java installations can get very complicated and annoying very fast due to the various methods and various software. I personally use Eclipse for my Java development as do many other Java developers.
An advantage with Eclipse is that it has it’s support for many libraries such as JavaFX. Furthermore, there are countless tutorials and setup guides for setting up JavaFX on Eclipse, so that’s another bonus.
You’re free to use any other method, but in the guide below we’ll be downloading and installing JavaFX in Eclipse. You can skip ahead to the next section for JavaFX if you already have it installed or plan to install it through a different method.
If you’re completely new to Java and haven’t installed Eclipse or Java yet read through our Java Installation guide first.
Downloading JavaFX
You are going have to download the JavaFX SDK (Standard development kit) from their website.
Once you’re there, navigate to the download page. You should see something like the image below.
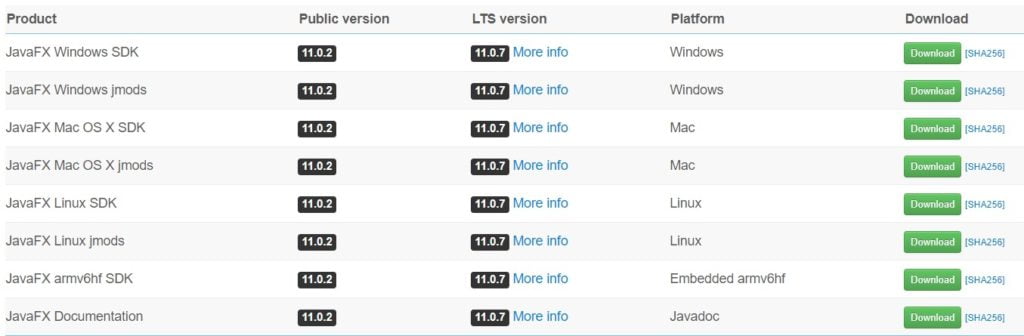
Pick the SDK for the operating system you’re currently using. Since we are using windows we’re going to download the first option.
Once it has downloaded, extract the files and place them somewhere where you can remember it. You’ll need the file path to this location in the future.
Eclipse Marketplace
The Eclipse Marketplace Client is an interface for browsing and installing Eclipse based solutions listed on the Eclipse Marketplace portal. Using the marketplace we’re going to install a JavaFX solution into our IDE. Think of it as bringing in support for JavaFX directly into Eclispe.
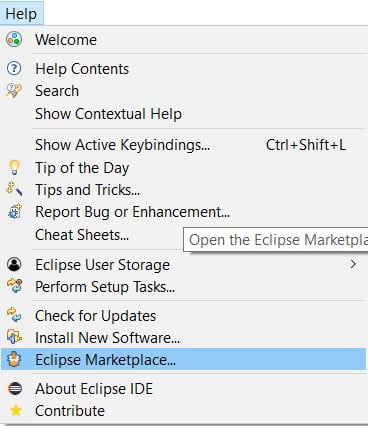
First navigate to the Eclipse marketplace through the Help menu.
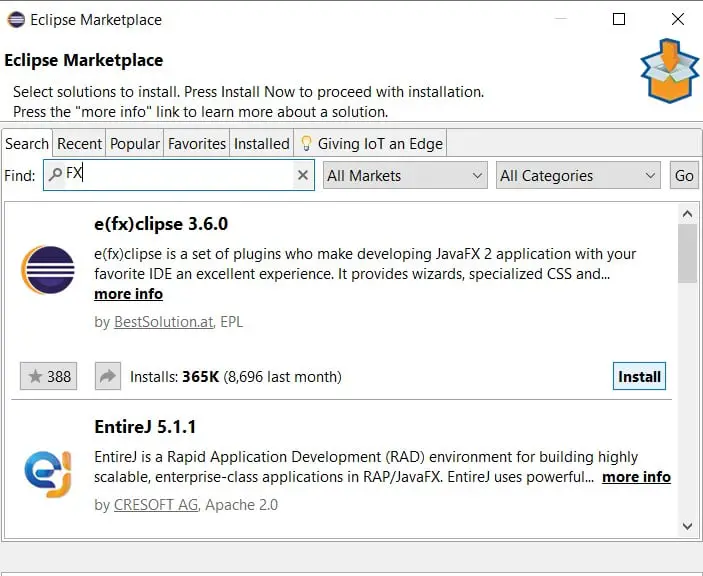
Now the Eclipse marketplace should open up. Type FX into the search bar and the e(fx)clipse solution should appear. Install it and proceed to the next section.
Configuring JavaFX
This part should also be easy, so long as you follow the exact instructions.
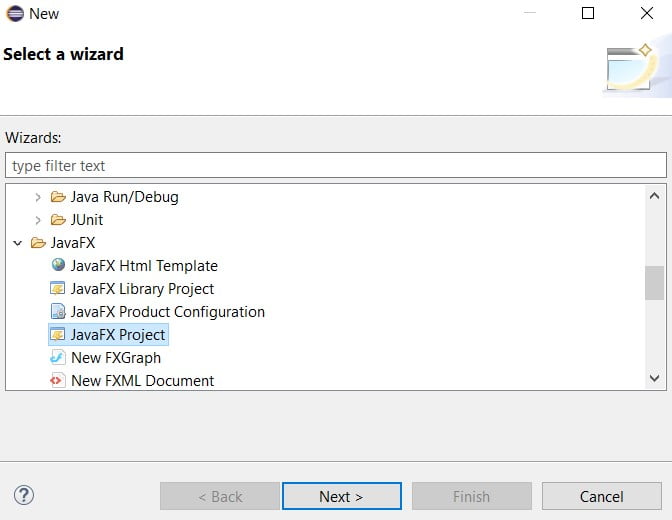
First up, you head over to File and “New” and create a new project.
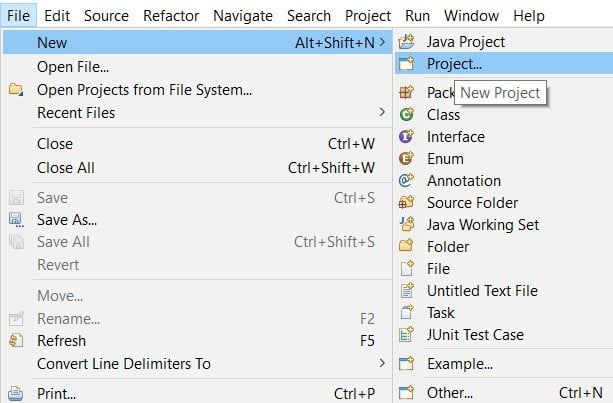
Next you navigate down to “JavaFX” and select JavaFX project. This option is now available to us since we downloaded JavaFX from the marketplace.
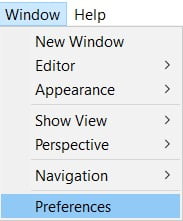
Next navigate to Windows >> Preferences.
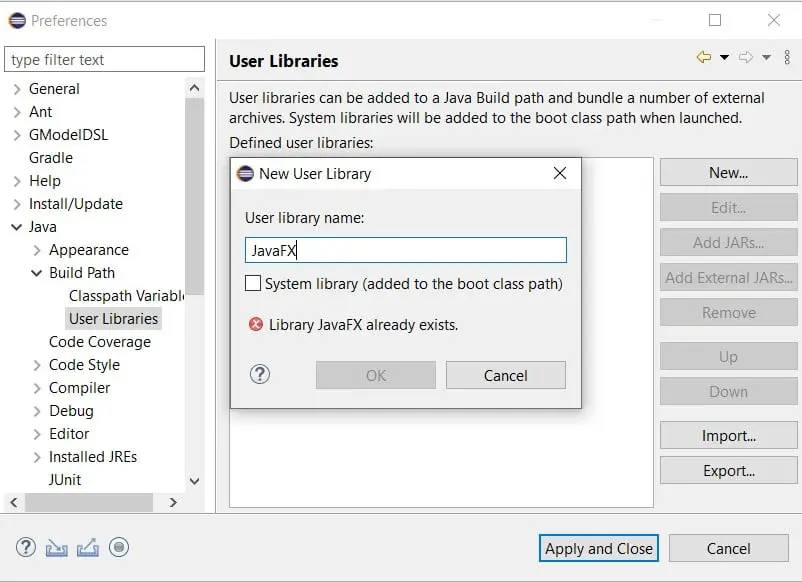
Navigate to the “User Libraries” tab, and then click on “New” to create a new user library. (I’m getting a “Library JavaFX already exists” error because have already made mine.
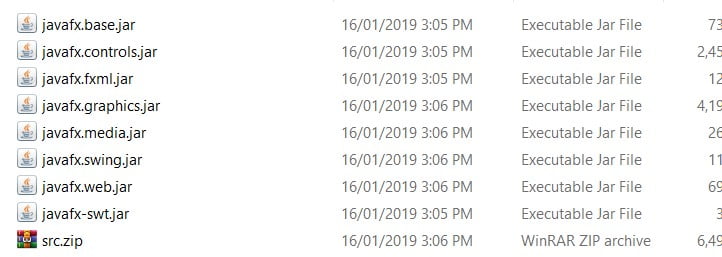
Once you’ve done this, don’t close the window. Click on the “Add External JAR’s option on the side and navigate to the folder where you downloaded JavaFX in the first step. You need to select the folder which contains the JAR’s shown in the image below.
Next, we need to actually add the User Library we created to our Build path. To do this, right click on your project, go to build path and then click on “Configure build path”.
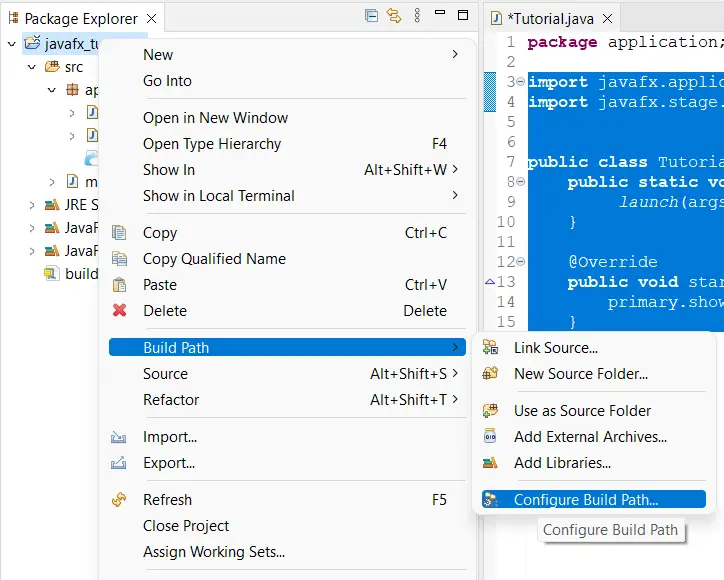
Click on Module Path -> Add Library -> User Library and then tick the User Library that you created earlier. It will appear with whichever name you created it (JavaFX in our case).
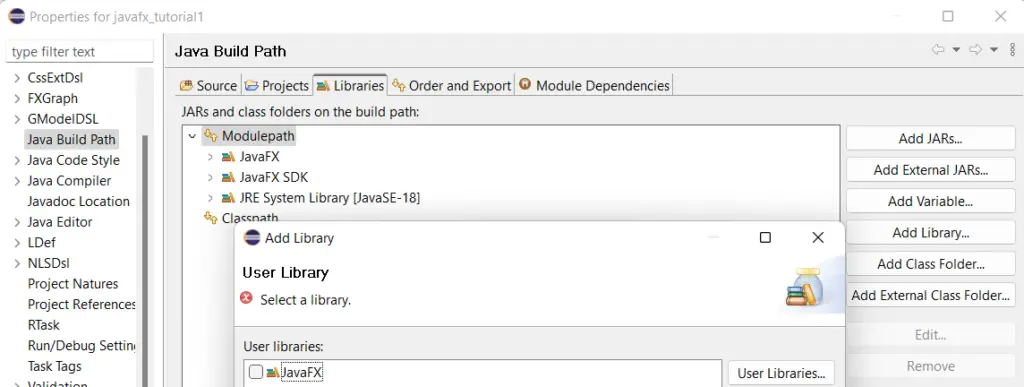
Note: If Module Path does not work, then try doing the same thing on Class Path.
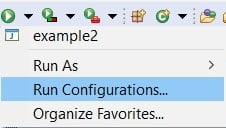
Next, we need to click on the “down-arrow” button next to the run button. When the drop down menu appears, click “Run configurations”.
Once this window appears, navigate to “Arguments” and type in the following text into “VM arguments”. Be sure to write the filepath to your external jars not the default text we put down below.
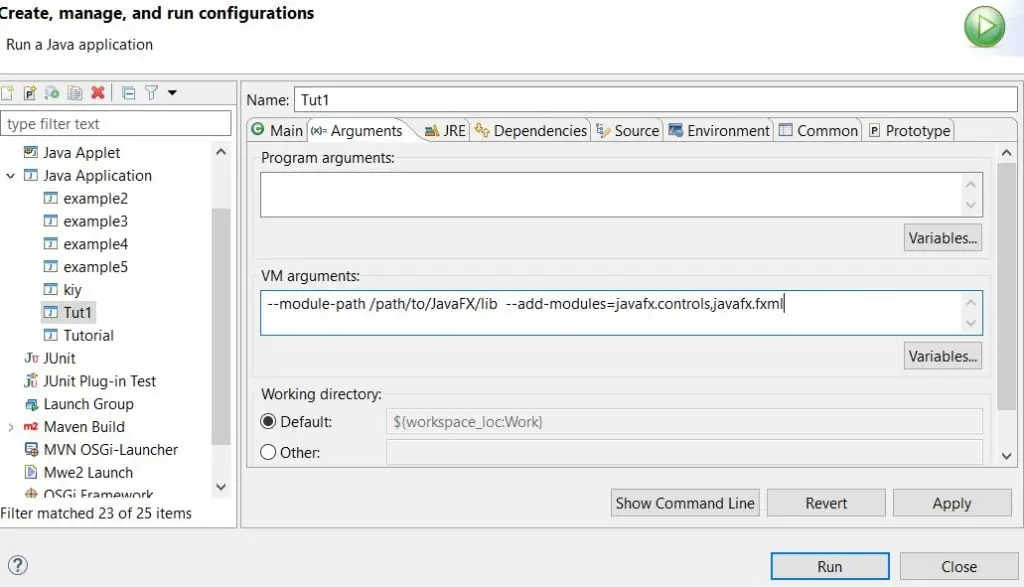
You can copy the code directly from here. Be sure to change the file path.
--module-path /path/to/JavaFX/lib --add-modules=javafx.controls,javafx.fxml(yes that’s a comma, not a full stop)
And now you’re done. You can begin coding using JavaFX code. To learn more about JavaFX and how to use it, head over to our tutorial series on JavaFX.
This marks the end of the Introduction with JavaFX tutorial. Any suggestions or contributions for CodersLegacy are more than welcome. Questions regarding the article content can be asked in the comments section below.
Thanks for this page, it helped me to start with JavaFX.
But I still get an error when I try your JavaFX Button example:
Exception in Application constructor
Exception in thread “main” java.lang.reflect.InvocationTargetException
at java.base/jdk.internal.reflect.NativeMethodAccessorImpl.invoke0(Native Method)
at java.base/jdk.internal.reflect.NativeMethodAccessorImpl.invoke(NativeMethodAccessorImpl.java:77)
at java.base/jdk.internal.reflect.DelegatingMethodAccessorImpl.invoke(DelegatingMethodAccessorImpl.java:43)
at java.base/java.lang.reflect.Method.invoke(Method.java:568)
at java.base/sun.launcher.LauncherHelper$FXHelper.main(LauncherHelper.java:1082)
Caused by: java.lang.RuntimeException: Unable to construct Application instance: class Tutorial.Tutorial
at javafx.graphics@19/com.sun.javafx.application.LauncherImpl.launchApplication1(LauncherImpl.java:891)
at javafx.graphics@19/com.sun.javafx.application.LauncherImpl.lambda$launchApplication$2(LauncherImpl.java:196)
at java.base/java.lang.Thread.run(Thread.java:833)
Caused by: java.lang.IllegalAccessException: class com.sun.javafx.application.LauncherImpl (in module javafx.graphics) cannot access class Tutorial.Tutorial (in module Tutorial) because module Tutorial does not export Tutorial to module javafx.graphics
at java.base/jdk.internal.reflect.Reflection.newIllegalAccessException(Reflection.java:392)
at java.base/java.lang.reflect.AccessibleObject.checkAccess(AccessibleObject.java:674)
at java.base/java.lang.reflect.Constructor.newInstanceWithCaller(Constructor.java:489)
at java.base/java.lang.reflect.Constructor.newInstance(Constructor.java:480)
at javafx.graphics@19/com.sun.javafx.application.LauncherImpl.lambda$launchApplication1$8(LauncherImpl.java:803)
at javafx.graphics@19/com.sun.javafx.application.PlatformImpl.lambda$runAndWait$12(PlatformImpl.java:484)
at javafx.graphics@19/com.sun.javafx.application.PlatformImpl.lambda$runLater$10(PlatformImpl.java:457)
at java.base/java.security.AccessController.doPrivileged(AccessController.java:399)
at javafx.graphics@19/com.sun.javafx.application.PlatformImpl.lambda$runLater$11(PlatformImpl.java:456)
at javafx.graphics@19/com.sun.glass.ui.InvokeLaterDispatcher$Future.run(InvokeLaterDispatcher.java:96)
at javafx.graphics@19/com.sun.glass.ui.win.WinApplication._runLoop(Native Method)
at javafx.graphics@19/com.sun.glass.ui.win.WinApplication.lambda$runLoop$3(WinApplication.java:184)
… 1 more
JavaFx menu does not show up after installation from “MaketPlace”
You need to wait after download, dont close the window and dont restart eclipse!
Hey, my eclipse continues to say “You are not running your eclipse instance with Java8. The JavaFX tooling is disabled because of this.Make Java8 the default system java or adjust your eclipse.ini to pass -vm pointing to your Java8 install”. I am currently running jdk-23 on my computer, and have followed all the necessary steps. What are the possible solutions to this issue?