
This a tutorial on Maven in Java.
Maven is a tool for managing and building Java Projects. It’s designed in such a way to make the build process easier for Java Developers by hiding the complexity of the build.
Most people just want to use Maven for it’s ability to add dependencies (which is also it’s most significant ability) to their Java project, which is what this tutorial is actually about. You can learn about Maven’s other uses from the vast resources available online.
The interesting thing to note is that Maven can be used for more than just Java. Other languages where it is used are C#, Ruby and Scala. Although Java remains the biggest user.
What are dependencies?
Dependency is a broad software engineering term used to refer when a piece of software relies on another one. Simply put, if Program A requires Program B to be able to run, Program A is dependent on Program B. This makes Program B a dependency of Program A.
It is to these various reasons, Java libraries like JavaFX and JFreeChart count as dependencies. And we’ll be discussing how you, the user can add these external libraries into your Java Project so you can use the features they offer.
This was a very brief look into dependencies, no more than a basic summary. If you want to learn more, you can read this article dedicated purely to explaining dependencies and their uses.
Adding dependencies with Java Maven
We’re going to be using the Eclipse IDE for this tutorial. It’s a pretty popular IDE used by Java Developers and for good reason. It has inbuilt support for Maven so you don’t have to install maven separately or anything.
Note: Even if you’re using another IDE like IntelliJ, you can still read this guide. The general steps are exactly the same. The only differences are within the “visual look”, like where the file button may be placed etc.
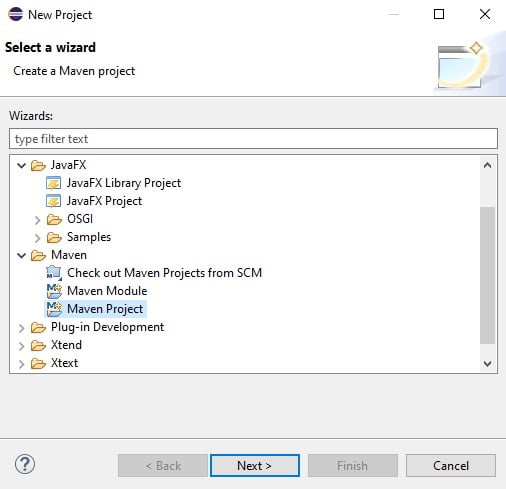
First step is to create a separate project entirely for Maven. To do so navigate to file and select project.

The following window should appear. Navigate to Maven and select Maven Project.
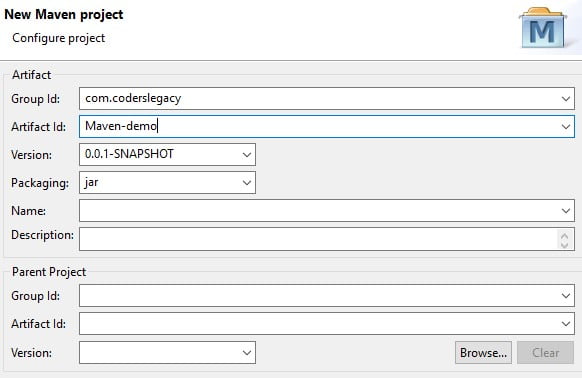
Continue till you see the below page. It’s not as complicated as it looks. Just fill in the first two fields with a proper name and continue. You can leave the rest of the fields.
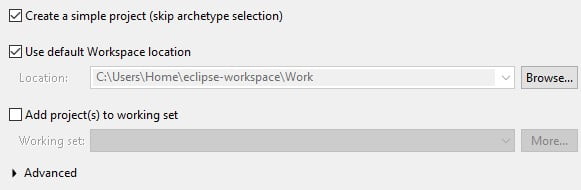
Next the following window should appear. Make sure you have the “simple project” checkbox active.
Once you finish the setup, the project will be complete and you will see the following file and folders appear (left hand side). The main folder is where your code will be written.
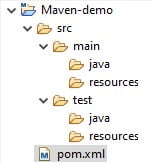
Double click the pom.xml located in the Maven folder (as shown above). You should see the following text appear in the window.

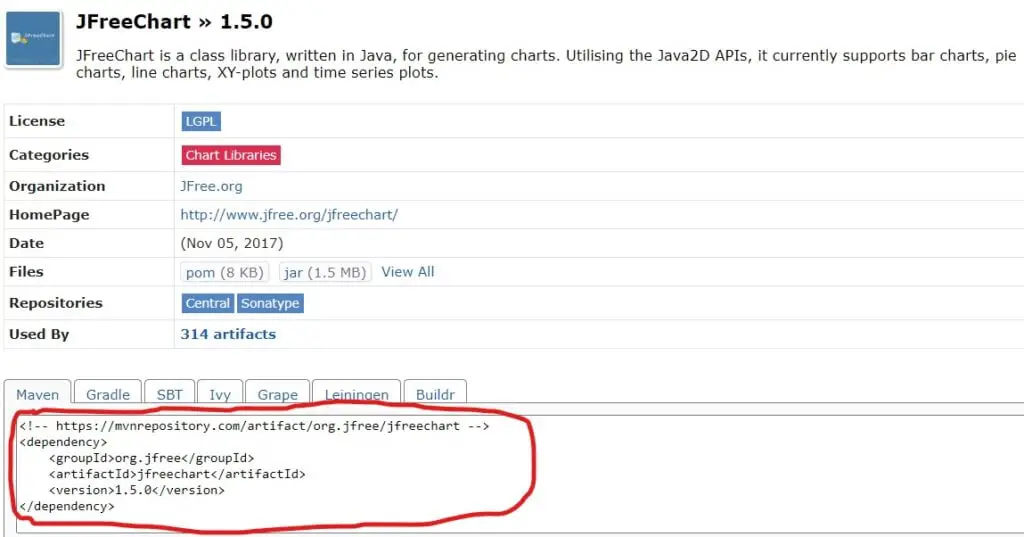
We’re almost done now. We just need the “dependency code” from the Maven repository. Head over to their website, and use the search bar to search for the library you wish to add. We’ll be using JFreeChart for our example.
Copy the code that appears (as shown in the image below) then close the site.
Head back over to your pom.xml file and add the code in the following manner. You’ll have to create the <dependencies> tag by yourself most likely.

And there, you’re done. Maven will begin downloading the required files and automatically insert them into the correct location so make sure you are connected to the internet.
You can now begin using any classes or functions from the JFreeChart library (or whatever library you just added) in your main project code.
This marks the end of the Java Maven Tutorial. Any suggestions or contributions for CodersLegacy are more than welcome. Questions regarding the article content can be asked in the comments section below.