
Pyinstaller is a popular tool used by Python developers to convert their Python code into a standalone executable file that can be run on any machine without the need for Python to be installed. When creating an executable using Pyinstaller, it is often necessary to include additional “data” files such as an image, configuration file, and other resources that are required by the application.
Add Image Files in –onedir Mode
Adding image files in --onedir mode is a straightforward process. Simply place the image file in the same directory as your Python script, and Pyinstaller will automatically include it in the output directory. However, it’s essential to ensure that the path to the image file is correct in your Python script. If the path is incorrect, the image will not be included in the output directory.
Here’s an example directory structure with a Python script and an image file named “image.png” in it:
myapp/
├── main.py
└── image.png
There is actually a more proper way of doing this, which is by using the --add-data option. Here’s an example using the --add-data option to include an image file located in the root directory of the project:
pyinstaller --onedir --add-data "image.png;." main.pyThis tells Pyinstaller to include the image.png file located in the root directory of the project and place it in the root directory of the output directory. The "." at the end of the string means we want to place it in the root folder. The ";" is the separator behind the source and destination paths.
But what if we don’t want it to go into the root directory of the EXE? We could just manually move it, but then why use --add-data in the first place then?
Here’s a solution.
For example, if we have an image file located in a subdirectory named images, we can use the --add-data option to include it in the output directory like this:
pyinstaller --onedir --add-data "images/image.png;images/" main.pyThis tells Pyinstaller to include the image.png file located in the images subdirectory and place it in a subdirectory named images in the output directory.
Note that the --add-data option uses a colon to separate the source and destination paths, and the source path is relative to the location of the Pyinstaller command. In this example, the . in "image.png:." specifies the current directory as the source path, which is the root directory of the project.
Sometimes (depending on the OS), you might have to use a colon ':' instead of a semi-colon ';'. Windows follows the semi-colon system (which is what i am using) whereas Linux follows the colon system.
How to add multiple Image Files in Pyinstaller
Here’s an example of how to include multiple image files located in a subdirectory named images:
pyinstaller --onedir --add-data "images/*.png:images/" main.pyThis will include all *.png files located in the images subdirectory and place them in a subdirectory named images in the output directory.
If you want to include files located in different directories, you can specify each file using a separate --add-data option. For example:
pyinstaller --onedir --add-data "images/*.png:images/" --add-data "sounds/*.mp3:sounds/" main.pyThis will include all *.png files located in the images subdirectory and place them in a subdirectory named images in the output directory, and all *.mp3 files located in the sounds subdirectory and place them in a subdirectory named sounds in the output directory.
Adding files like this is a pain though. Better to use a spec file and save yourself the trouble from having to write the same command out every time.
Add Images Files in –onefile Mode
Adding image files in onefile mode is a bit harder than onedir. You can always use the technique of manually placing the data files in the same directory as the Pyinstaller EXE for simple cases. However, this defeats of “onefile” mode, since the final application has many other files lying around in the root directory.
Let’s explore how to use the --add-data option! But first, we need to discuss some important theory on how onefile mode works.
Understanding –onefile Mode
In --onefile mode, Pyinstaller bundles all the files, including the image files, into a single executable file. When the executable is run, Pyinstaller extracts the bundled files into a temporary directory and runs the application from there. This unpacking operation takes some time, so onefile mode is slower than the default directory mode.
Any datafile you include will be located inside this temporary folder. However, there is a problem that frequently occurs.
Let’s assume you have included a file called “image.png” as a datafile in your application. Somewhere in your code, you have used this image as “image.png” (e.g like in a function call). This assumes that your image is located in the same directory as your Python script.
Here’s what it may look like in Pillow.
from PIL import Image

img = Image.open("image.png")
Now this code will run perfectly fine as a python (.py) file. But when you convert it to an executable with the --add-data option, then this will most likely not work. This is because the image gets moved to a temporary folder which may have a different file path.
This issue itself is a bit complex, and varies a bit depending on the system and OS. Luckily, the solution is fairly straightforward.
Here is the code snippet that you will be needing. Simply wrap all of your file paths with this function call, and you should be good to go. Basically what this does, is acquire the base path of the temporary folder (which is located in a system variable called _MEIPASS) and then joins this with the relative path you passed in, to get the combined full path.
import sys
import os

def resource_path(relative_path):
    """ Get absolute path to resource, works for dev and for PyInstaller """
    base_path = getattr(sys, '_MEIPASS', os.path.dirname(os.path.abspath(__file__)))
    return os.path.join(base_path, relative_path)
So after modifying your code, it should look like this.
from PIL import Image

img = Image.open(resource_path("image.png"))
Your code should now work perfectly, both as a regular Python script (.py) and a Python executable (.exe).
Adding a datafile in onefile mode (Example)
Now let’s apply this logic onto a proper code example. We will be writing the code for a PyQt6 Application. If all goes well, we should be able to display the image.
Here’s an example of how to add an image file to a PyQt6 application and compile it into a single executable using PyInstaller.
Assuming we have an image file named “image.png” located in the same directory as our Python script, we can load and display it in a PyQt6 application using the following code:
import sys
from PyQt6.QtWidgets import QApplication, QWidget, QLabel
from PyQt6.QtGui import QPixmap
import os

def resource_path(relative_path):
    base_path = getattr(sys, '_MEIPASS', os.path.dirname(os.path.abspath(__file__)))
    return os.path.join(base_path, relative_path)

class ImageDisplay(QWidget):
    def __init__(self, parent=None):
        super().__init__(parent)
        self.setWindowTitle("Image Display")
        self.setGeometry(100, 100, 500, 500)

        self.image_label = QLabel(self)
        pixmap = QPixmap(resource_path("image.png"))

        # Set the pixmap on the label
        self.image_label.setPixmap(pixmap)
        self.image_label.adjustSize()


if __name__ == '__main__':
    app = QApplication(sys.argv)
    window = ImageDisplay()
    window.show()
    sys.exit(app.exec())
This code creates a PyQt6 application with a single QLabel widget, loads the image file using QPixmap, and sets it as the label’s pixmap.
To compile this code into a single executable using PyInstaller, we can use the following command:
pyinstaller --onefile --add-data "image.png;." main.pyRunning the EXE gives us the following window.
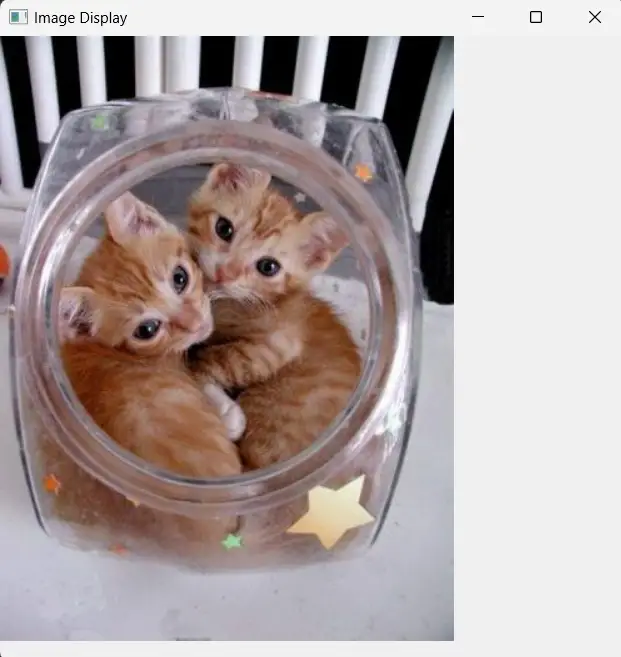
As you can see, our image has successfully been added to the EXE. We never copy pasted anything to the directory of the EXE. Here is a screenshot.

If we did this without the resource_path() function, we need to have the following structure.

This marks the end of the “How to add image (data) files in Pyinstaller EXE” Tutorial. Any suggestions or contributions for CodersLegacy are more than welcome. Questions regarding the tutorial content can be asked in the comments section below.
Bravo, and thanks a lot.
This page is very usefull and very clear.
I woud never find how to add data images in onefile by myself.
Hello
Thank’s a lot for this very clear explanation … nevertheless I do not succeed in including data when making the exe.
I read the Pyinstaller documentation, tried several things, look on the Web … but still without success.
May be you could help me ?
The directory structure is joined in a picture.
The usage of the image in the code is :
The pyinstaller command is :
(.venv) iMac-de-Candido:CCABRIDGE candido$ pyinstaller –onefile –add-data=”2c.gif:.” Bridge.py
And the result :
_tkinter.TclError: couldn’t open “2c.gif”: no such file or directory
Its certainly obvious but ….
Thank’s for your help.
Directory structure
Additionnel info : one file or one dir grives the same result.
Hope you can help .
This is an awesome tutorial!
I have a question, when we use resource_path(), we do not need to copy anyy data into current folder. This works well. And if we deliver this exe file to another computer, will this work? I find after I deliver this exe program to another computer, it fails