
This article covers the layout manager, VBox in JavaFX.
The JavaFX VBox layout component creates a layout which positions all the GUI components in it, in a vertical column on top of each other. In it’s Default state, the VBox layout is extremely simplistic and not very suitable to be used in an actual GUI program.
In this Tutorial we will go through the many different options and settings available to make our GUI layout more practical and appealing.
Creating a VBox Layout
We’ll be using three buttons to demonstrate how their position changes in the VBox layout. We haven’t added any functionality to the buttons, they are just for show.
Take a good look at the imports because they won’t be repeated in the code that comes after this.
package application;

import javafx.application.Application;
import javafx.geometry.Pos;
import javafx.geometry.Insets;
import javafx.stage.Stage;
import javafx.scene.Scene;
import javafx.scene.control.Button;
import javafx.scene.layout.VBox;


public class Tutorial extends Application  {
	public static void main(String args[]){
		 launch(args);
	}

	@Override
	public void start(Stage primaryStage) throws Exception {

		Button Button1 = new Button("Button1");
		Button Button2 = new Button("Button2");
		Button Button3 = new Button("Button3");

		VBox layout = new VBox(Button1, Button2, Button3);
		Scene scene = new Scene(layout, 300, 300);

		primaryStage.setTitle("CodersLegacy");
		primaryStage.setScene(scene);
		primaryStage.show();
    }
}
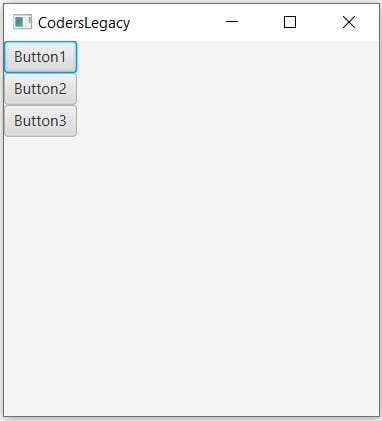
We passed all three buttons that we created into the VBox classes while we created it, automatically adding them to it’s layout. Alternatively you could have used the getChildren().add() method, but that takes longer.
This is how these three buttons look in the default VBox settings.
Alignment Options
You can control the alignment of the GUI components in the layout with the setAlignment() function. There are over a dozen options available so it’s best to experiment with them and try them out yourself. The format is quite simple as shown below.
layout.setAlignment(Pos.BASELINE_CENTER);A list of all the possible VBox alignment options in JavaFX that can be passed into the setAlignment() function.
- Pos.BASELINE_LEFT
- Pos.BASELINE_RIGHT
- Pos.BASELINE_CENTER
- Pos.BOTTOM_LEFT
- Pos.BOTTOM_RIGHT
- Pos.BOTTOM_CENTER
- Pos.CENTER_LEFT
- Pos.CENTER_RIGHT
- Pos.CENTER
- Pos.TOP_LEFT
- Pos.TOP_RIGHT
- Pos.TOP_CENTER
Spacing Options
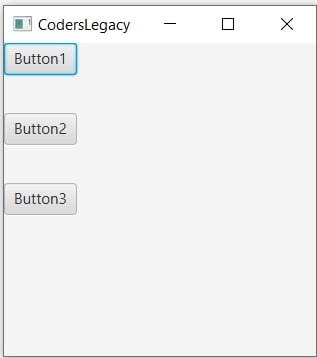
The Spacing property determines the amount of spacing between the GUI components in the layout. By default, this is set 0, but by using the setSpacing() function we can change it.
VBox layout = new VBox(Button1, Button2, Button3);
layout.setSpacing(30);

Scene scene = new Scene(layout, 250, 250);
VBox layout = new VBox(20, Button1, Button2, Button3);Instead of using the setSpacing() function you can instead pass the spacing as the first argument in the VBox class.
Margin Options
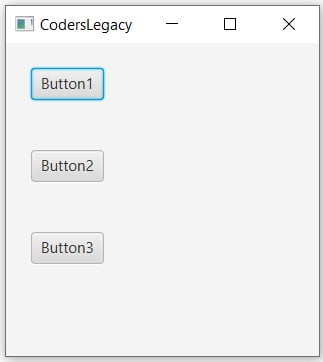
You can also set Margins to the components in the VBox layout using the setMargin() function. If you’ve studied CSS, this is the same thing as the padding property. Margins are useful to create some distance between the GUI components and the edge of the GUI window.
We’ll have to make use of the Insets class here, using 5 parameters which represent a GUI component and the 4 sides of our HBox layout. Notice, that we have to apply the setMargin() individually for each GUI component in the layout. It takes longer, but gives us more flexibility with each component.
VBox layout = new VBox(Button1, Button2, Button3);

VBox.setMargin(Button1, new Insets(20,20,20,20));
VBox.setMargin(Button2, new Insets(20,20,20,20));
VBox.setMargin(Button3, new Insets(20,20,20,20));

Scene scene = new Scene(layout, 250, 250);
Vgrow
The Vgrow property determines whether a GUI component will grow if there is vertical space available in the Window.
VBox.setVgrow(Button1, Priority.ALWAYS);
VBox.setVgrow(Button2, Priority.ALWAYS);
VBox.setVgrow(Button3, Priority.ALWAYS);
There are three different Priority settings that you may select from, each determining whether or whether not the GUI component will grow if there is space available.
- Priority.ALWAYS
- Priority.SOMETIMES
- Priority.NEVER
It’s rather complicated to actually pull this off due to the various height settings involved such as “Preferred Height”, “Maximum Height” and “Minimum Height” settings that each GUI component has. It’s best to actually practice with this to understand it.
You will likely see no effect of Vgrow in the layout until you actually begin changing (increasing) the Max Height property on the GUI components.
Tip: The default “Preferred Height” for the VBox is automatically set to the Preferred height of the largest GUI component.
Using CSS with VBox
A list of possible CSS styles that can be used with the VBox layout component.
| CSS Property | Description |
|---|---|
-fx-padding | Minimum distance between the outermost GUI component and the edge of the VBox. |
-fx-border-style | Defines the type of border around the VBox. By default there is none. |
-fx-border-width | Defines the width of the border in pixels. |
-fx-border-insets | Sets the inset values for the border. |
-fx-border-color | Determines the Color of the border. |
-fx-border-radius | Determines the curve of the corners of the border. |
Did you know? There is an alternate version of this Layout Manager called HBox Layout which stacks widgets horizontally.
This marks the end of the JavaFX VBox tutorial. Any suggestions or contributions for CodersLegacy are more than welcome. Questions regarding the article content can be asked in the comments section below.