
Learning how to create GUI applications can be quite confusing for beginners. With the right library and the right tutorial however, things can become much easier. In today’s tutorial we will walk you step by step through the process of making a Basic GUI Program in Tkinter.
Our aim will be to cover multiple aspects of Tkinter, such as Event Handling, Layout Management and taking Input from the User.
Here is the application we will be developing. Its a simple program with a singe line of text, a multiline text input area, and a button.
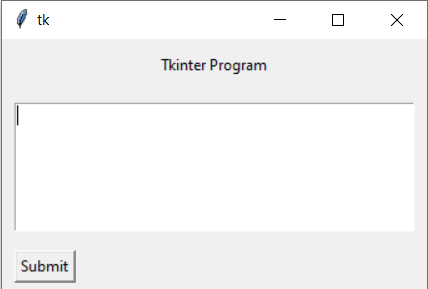
The purpose of this program is to collect input from the user, and then print it out on screen once he presses the submit button.
Creating a Basic Tkinter Application
The very first thing we will do in our Tkinter application is import the library. It is already a part of the Standard Library (it comes bundled with Python), so you do not need to download it separately.
from tkinter import *
Next we need to setup a basic Window. We can initialize our Tkinter application by calling the Tk() function. This returns to us an object which we can further use to customize our application and add more GUI elements (known as widgets in Tkinter).
from tkinter import *

root = Tk()
root.geometry("340x200")
root.mainloop()
The geometry() method is used to define a size for the Tkinter window. The mainloop() method is used to initialize the Tkinter application properly (the event system for example). It will create an infinite loop that exits only once the Tkinter window has been closed.
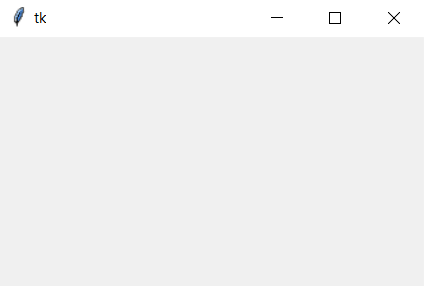
Here is our Tkinter window. Now lets begin adding some “widgets” into it.
The best way to create Tkinter applications is to use Classes. This allows for more reusability, and helps us in maintaining and scaling our code later on as our project gets bigger. We will create a Class called “Window” and create our first widget inside it.
from tkinter import *

class Window:
    def __init__(self, master):
        title = Label(master, text = "Tkinter Program")
        title.pack(pady = 10)

root = Tk()
root.geometry("340x200")
window = Window(root)
root.mainloop()
The label widget is used to display text on the screen. The first parameter it takes is the “parent”. Every widget needs to be in some sort of “container”, such as “root”. This helps Tkinter understand and create a hierarchy of widgets. We want our Label widget to be inside the main window, so we will pass in “master”, which is actually “root” (passed in as a parameter to our Class).
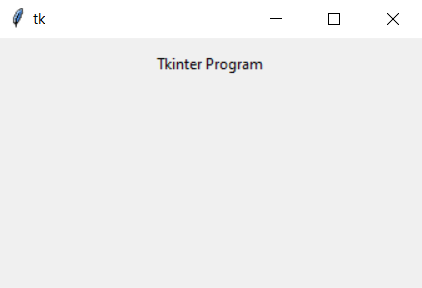
You can see our current output in the above image.
Managing Widgets and Layout
Now lets expand our knowledge a bit further. We will create a new “container” widget called the “Frame”. We often need to do this in our Tkinter applications to create various groups and divisions amongst the numerous widgets inside a window. This is also essential for managing the layout of widgets.
Now it is important to understand the parent-child hierarchy system. If we create a Frame, and designate the parent as “root” as shown below…
frame = Frame(master)
…then anything we put inside the Frame will also be inside “root”.
button = Button(frame, text="Submit")
The above button will appear inside our Tkinter window, because it is located inside “frame” which is located inside “root” (which represents our main tkinter window).
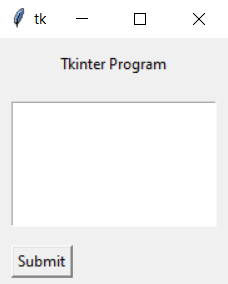
With this concept in mind, refer to the code below. We have created two basic widgets and placed them inside our Tkinter Program. Refer to our widgets tutorial to learn more about these widgets in detail.
from tkinter import *

class Window:
    def __init__(self, master):
        title = Label(master, text = "Tkinter Program")
        title.pack(pady = 10)

        frame = Frame(master)

        input = Text(frame, width=20, height=6)
        input.pack(padx=10, pady=10)

        button = Button(frame, text="Submit")
        button.pack(padx=10, pady=5, side=LEFT)

        frame.pack()

root = Tk()
root.geometry("340x200")
window = Window(root)
root.mainloop()
The pack() method is a layout method, that is necessary for a widget to actually appear inside the Window (there are other layout methods we can use too). The padx and pady parameters can be used to add in some padding to create some spacing between the widgets.
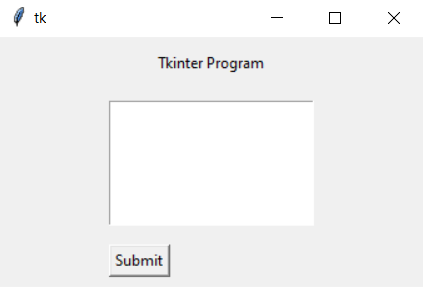
Here is our Window. (The side=LEFT parameter in the pack() method for the button was to left align it as shown above)
At this point we can also remove our “root.geometry("340x200")” line, and let the size of the Window adjust automatically based on the size of the widgets inside it.
Removing that line gives us the above output.
But we still have a problem that will occur when we resize the Window.
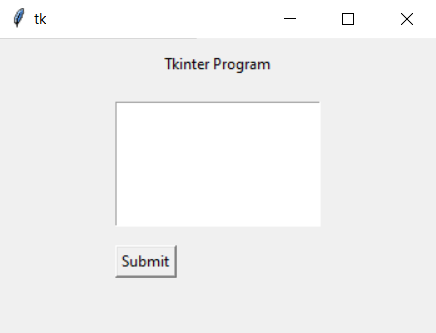
As you can see here, the size of the Window has been increased (by dragging the edges of the window). However, the size of the Text widget has not increased, and it looks rather awkward and out of place. This is because of the default nature of widgets, which disables resizing.
By passing expand=True and fill=BOTH, we can allow our widgets to expand. Keep in mind that only certain widgets respond well to these options. We will only be enabling this feature on our Text widget and the Frame. (It is necessary to do this on the frame as it is a wrapper around Text, so if it does not expand, neither will our Text input widget)
from tkinter import *

class Window:
    def __init__(self, master):
        title = Label(master, text = "Tkinter Program")
        title.pack(pady = 10)

        frame = Frame(master)

        input = Text(frame, width=20, height=6)
        input.pack(padx=10, pady=10, expand=True, fill=BOTH)

        button = Button(frame, text="Submit")
        button.pack(padx=10, pady=5, side=LEFT)

        frame.pack(expand=True, fill=BOTH)

root = Tk()
window = Window(root)
root.mainloop()
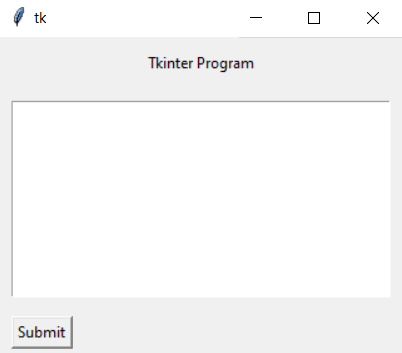
We now have our resizable Tkinter window!
Tkinter Event Handling
The last thing we want to show you in this tutorial is how to handle events in Tkinter. This is what the button is for. It has a parameter called command, into which we can pass a function name (without the brackets). Whenever the button is clicked, that function will be called.
In our code, we will print out the contents of the Text widget whenever the button is clicked. To access the contents of the Text Widget, we need to use the get() method, which takes a starting point and an ending point. To acquire the whole contents, we will pass in “1.0” (the first line) and “end” (the last character typed).
Here is the complete code.
from tkinter import *

class Window:
    def __init__(self, master):
        title = Label(master, text = "Tkinter Program")
        title.pack(pady = 10)

        frame = Frame(master)
        self.input = Text(frame, width = 20, height = 6)
        self.input.pack(padx=10, pady=10, expand=True, fill=BOTH)

        button = Button(frame, text="Submit", command=self.display)
        button.pack(padx=10, pady=5, side=LEFT)
        frame.pack(expand = True, fill = BOTH)

    def display(self):
        print(self.input.get("1.0", "end"))

root = Tk()
root.geometry("340x200")
window = Window(root)
root.mainloop()
Did you know that you can even bind keys, such as the mouse and keyboard keys to certain functions in Tkinter?
This marks the end of the “How to make a Basic Tkinter Program” Tutorial. Any suggestions or contributions for CodersLegacy are more than welcome. Questions regarding the tutorial content can be asked in the comments section below.