
This tutorial explains how to paste an image in Pillow
The paste() function in the Python Pillow Library allows us to paste one image over the other. You can use it as a way to combine two images together into one.
Pasting an Image in Pillow
We’ll be aiming to paste the crown on top of the Kitten’s head. There will be a total of 3 sections, where we work on pasting it as well as we can.
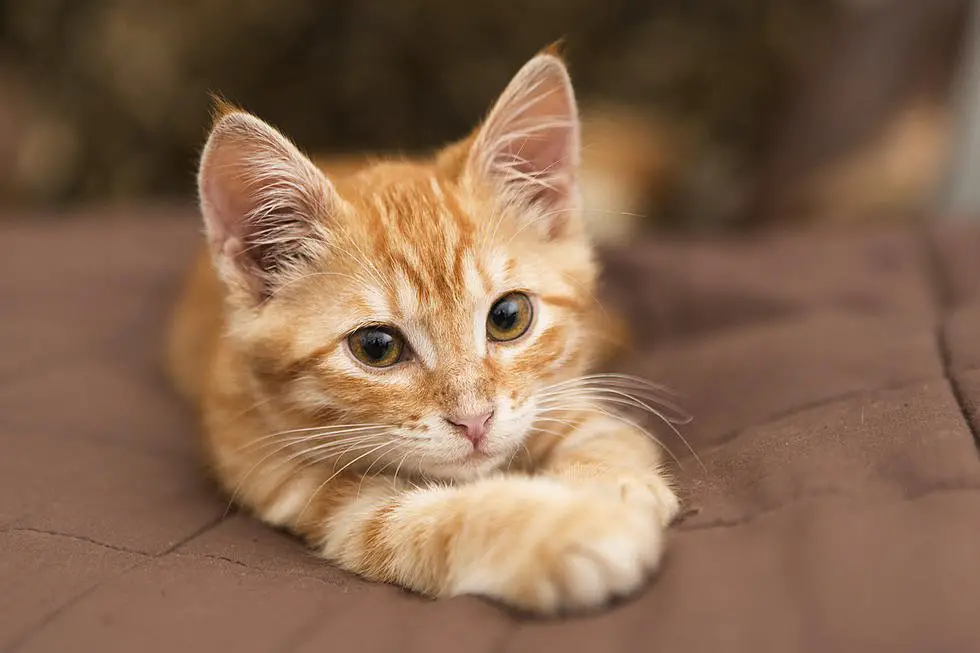
We’ll be using the two above images in this tutorial today.
Simple Paste
Let’s first try a simple image paste, without any extra parameters or options. If pillow detects different color modes, it will automatically convert the image being pasted to the mode of the image being pasted upon. (It’s basically an automatic use of the convert() function)
from PIL import Image

img1 = Image.open("kitten.jpg")
img2 = Image.open("crown.png")

img1.paste(img2)
img1.show()
It’s important to note that img1 has been directly modified. If you wish to preserve the original image, you should make a copy using the copy() function.
Output:
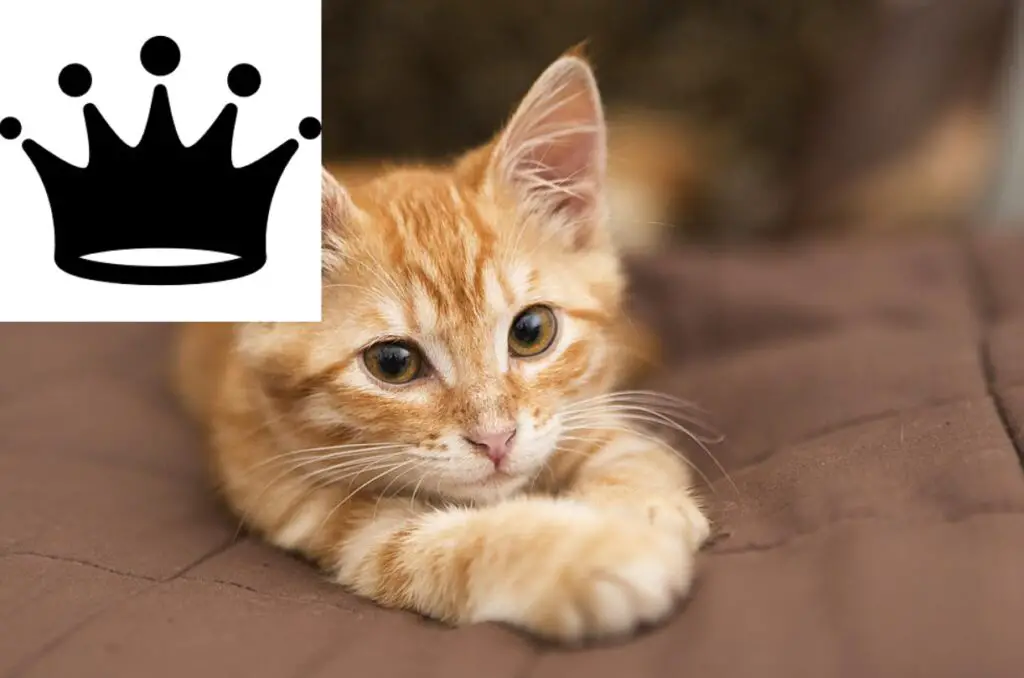
As we didn’t specify a coordinate, the image will automatically be pasted at the top-left corner, or the ( 0, 0 ) coordinate.
Pasting at specific Co-ordinates
In this section we’ll explain how to paste an image at a specific location.
from PIL import Image, ImageFilter

img1 = Image.open("kitten.jpg")
img2 = Image.open("crown.png")

img1.paste(img2, (250, 20))
img1.show()
Passing an extra parameter with the coordinate tuple will begin drawing the image from that coordinate.
Output:
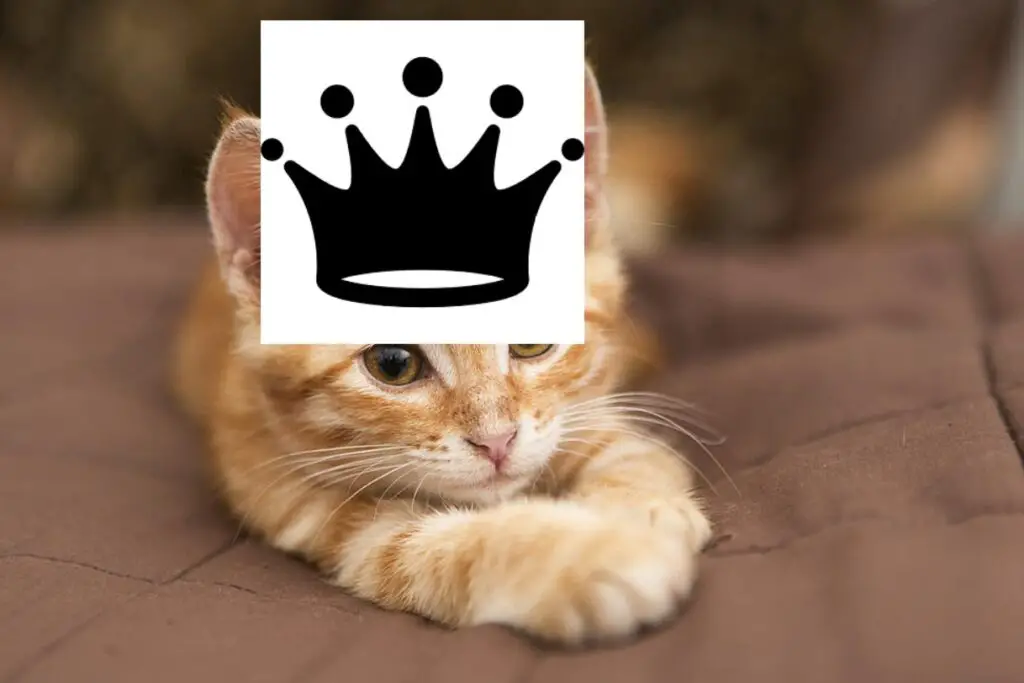
The above image has the crown on the right place, but it doesn’t look good due to the white background. This image is actually a transparent one, but Pillow is automatically converting into another format. We’ll discuss how to fix this in the next section.
Pasting Transparent Images in Pillow
Our crown image is being display with a white background due to Pillow’s default nature. We can get around this by using the concept of “masks”. A quick and easy way to implement it is shown below.
from PIL import Image, ImageFilter

img1 = Image.open("kitten.jpg")
img2 = Image.open("crown_trans.png")

img2 = img2.convert("RGBA")  # Including the "A" in RGB

img1.paste(img2, (270, 10), img2)
img1.show()
We just have to pass in the image with the transparent background into the third parameter, and Pillow will paste and display it correctly. We didn’t just convert it to RGB, just to be clear. The “A” has been included which represents the Alpha channel, which controls the transparency.
Output:
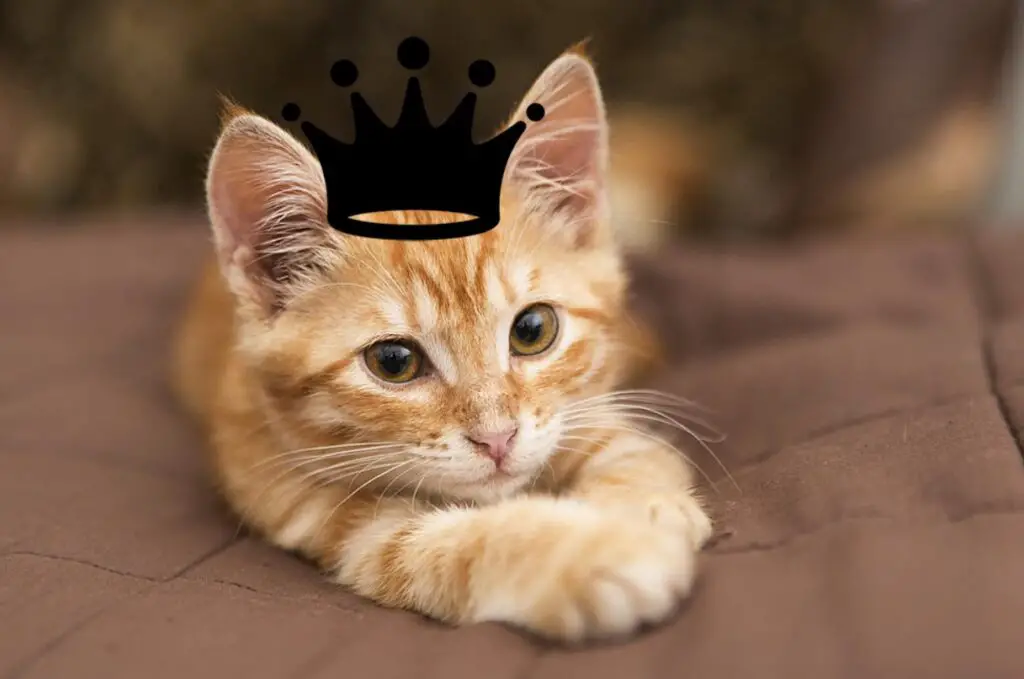
Note: This is not meant to remove backgrounds (though you could repurpose it to do so). The reason why the background disappeared in the above image is because that’s how our image originally looked. All we did was change Pillow’s default behavior when it’s dealing with images with transparent backgrounds.
Want to learn more about Pillow and Image Processing in Python? Check out our Pillow Tutorial Series!
This marks the end of the Pillow Image Paste Tutorial. Any suggestions or contributions for CodersLegacy are more than welcome. Questions regarding the tutorial content can be asked in the comments section below.
kitten is king pray the kittyyyyy!!!