
Tutorial number 2 in our Pygame RPG Tutorial Series
Background and Visuals are an integral part of any game regardless of it’s size and genre. The more interactive and dynamic the world is, the better. We won’t go into much depth in this tutorial, but will discuss how to change visuals later on in the series.
Materials used in this tutorial are available in a download link at the bottom of the page.
Creating the Background
The most important line of code in the background is where we load the image into a variable called self.bgimage. The pygame.image.load() takes the file path of the image to be added. If the image is in the same directory, only the name (and extension) is required.
class Background(pygame.sprite.Sprite):
      def __init__(self):
            super().__init__()
            self.bgimage = pygame.image.load("Background.png")
            self.bgY = 0
            self.bgX = 0

      def render(self):
            displaysurface.blit(self.bgimage, (self.bgX, self.bgY))
The self.bgY and self.bgX store the X and Y position of the background. We could have skipped this step, but this will come in handy later on if we choose to implement scrolling backgrounds.
Finally we create a method called render() which is used to display the background onto the pygame window. If you remember the previous tutorial, we created a variable called displaysurface which stores the pygame window object.
We are now going to use the blit() method on this displaysurface object. The blit() method takes two parameters, an image object and a tuple of two values, a X position and a Y position. In this case, the blit() method will draw the background image with ( 0 , 0 ) as the origin point. For reference, ( 0 , 0 ) is the top left corner of the pygame window.
Creating the Ground
Next up is filling out the Ground class. Most of the code is the same as the background class except for a new concept based around rect objects. Every object in a game must have a “rect” or rectangle around it in order to interact with other objects. This rectangle is used to define the borders of that object, allowing for collision detection to be possible.
class Ground(pygame.sprite.Sprite):
    def __init__(self):
        super().__init__()
        self.image = pygame.image.load("Ground.png")
        self.rect = self.image.get_rect(center = (350, 350))

    def render(self):
        displaysurface.blit(self.image, (self.rect.x, self.rect.y))
Using the get_rect() method on the image object will return a rectangle object of the same dimensions as the image. So if the image is 500 by 200, the rectangle representing it will also be 500 by 200. Passing the center argument into get_rect() determines the center position of the rect on the pygame window.
Keep in mind here that the we don’t need to have a variable for the X and Y position. Using self.rect.x and self.rect.y we can return the X and Y positions of the rectangle object to the blit() method. We could use the previous method like we did with the Background, but this might cause a mismatch between the location of the ground image, and the location of the rectangle.
Currently our “ground” has no way of interacting with anything walking on it such as the Player or an Enemy sprite. This is something we’ll discuss something later on when we discuss Player movement.
Rendering Visuals
Don’t get confused and assume that creating the class was all you had to do. We still have to first create the objects for both classes as shown below.
background = Background()
ground = Ground()
Remember, do not include the this code within the game loop, otherwise the objects will be recreated from scratch each time, with their base values (from the init method).
Note that first the background object’s render function is called, then the ground.
while True:
    for event in pygame.event.get():
        # Will run when the close window button is clicked
        if event.type == QUIT:
            pygame.quit()
            sys.exit()

        # For events that occur upon clicking the mouse (left click)
        if event.type == pygame.MOUSEBUTTONDOWN:
              pass

        # Event handling for a range of different key presses
        if event.type == pygame.KEYDOWN:
              pass

    # Render Functions ------
    background.render()
    ground.render()

    pygame.display.update()
    FPS_CLOCK.tick(FPS)
Remember that the order of rendering does matter. Assume that the background is the same size as the pygame window. Now, if you render the ground first, and then render the background, the background will draw itself over the ground, completing hiding it from view.
What’s the lesson to take out of this? Always render the background first, then the ground and then all the players and enemies on top of the ground.
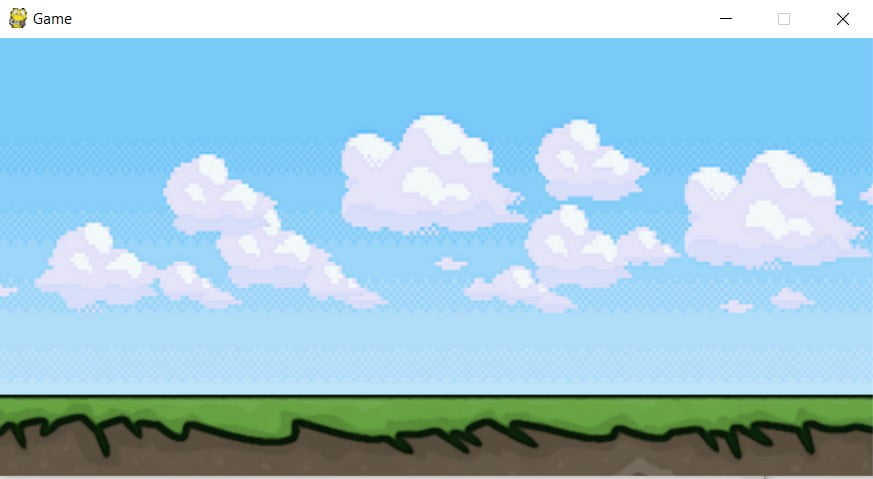
Below is what our program currently looks like when run. Simple, but decent looking. Perfect for the game we are making.
For those having trouble piecing the code together, and putting the images and code in the same directory, here is a download file with the whole code.
Next Section
Now that we’ve created the basic outline of our world, we can begin working on the characters that are going to populate it. The first such character will be the Player, who we will be controlling throughout this game.
This marks the end of the Pygame RPG “Building the World” Tutorial. Any suggestions or contributions for CodersLegacy are more than welcome. Questions regarding the article content can be asked in the comments section below.
Hi there,
I love your tutorial and I appreciate your work.
I copied all of the code and it worked perfectly fine until I reach the Creation of Background/Ground. I tried everything with the file path and I also downloaded the same Material. However, I only got a black screen. Sometimes I got reminded that the file doesn’t exist or they couldn’t find it. In the end, nothing works. What should I do? Is there a simple way to change that Problem?
Thank you
click download materials and put it in the folder
“In the folder”?
Which folder?
u probadly forgot
whileTrue:......background.render() <-----ground.render() <----pygame.display.update()FPS_CLOCK.tick(FPS)Hey Man love the passion but I also got a black screen and the images are in the same folder of the project
I’ve made some minor changes + added a download link for the code + materials of this article. There shouldn’t be any problems after this hopefully.
If you notice a problem in a later tutorial, inform me asap, and it will be fixed.
Good content, but too many ads make the entire page an asshole.
Really love this tutorial series, but a filter of advertisements may be suggested. Commercial ads are OK for me, however, some erotic pictures like big butt, makes reading this page at work an awkward experience.
Duly Noted. Despite already having filters on most NSFW ads, there appears to be one or two more categories that I should be black-listing.
With the for event in pygame.event.get(): part of the code, it just says that it needs more identification.. I can’t seem to fix it. Do you have any idea on how I can?
Can you copy paste the error here?
Where exactly am I suppose to put the background = Background() and the ground = Ground() because I keep getting errors
Please ignore what I wrote. I downloaded the code and I saw what I did wrong, thank you
Good to hear!
The code will load the background, but not the ground. I’ve put everything to do with ground after what’s to do with the background, but it won’t work! Can you help?
Hi,
I want to know which web to get free game icon