
This article covers the PyQt QCheckBox widget (PyQt6).
A Checkbox is an important part of any GUI, especially those which have “input forms”, where you want to present the User with a list of options to pick from. Unlike their counterparts, Radio buttons, you are allowed to select multiple Checkboxes, or even none at all.
You will find a complete list of methods and options available for QCheckBox at the end of this pyqt6 tutorial.
Creating a QCheckBox widget
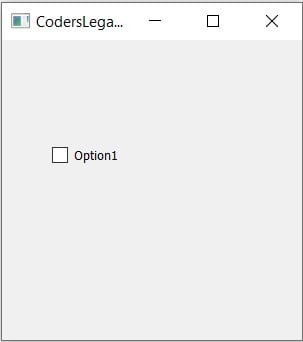
Below is the simplest example of a QCheckbox widget. Calling the QtWidgets.QCheckBox() function and passing the window (win) that we created into it’s parameters, creates a PyQt Checkbox.
To actually display and position it we’ve used the move() function to move it to a certain set of coordinates. For more advanced layout methods, look up our Pyqt5 layout management tutorial.
from PyQt5 import QtWidgets
from PyQt5.QtWidgets import QApplication, QMainWindow
import sys

app = QApplication(sys.argv)
win = QMainWindow()
win.setGeometry(400,400,300,300)
win.setWindowTitle("CodersLegacy")

check = QtWidgets.QCheckBox(win)
check.setText("Option1")
check.move(50,100)

win.show()
sys.exit(app.exec_())
The GUI output of the above code:
Retrieving QCheckBox values
Let’s try and find out two important details from the QCheckBox that we created. The text label on it, and whether it is selected or not.
You can use the text() method, which will return the text value you assigned to the Checkbox. To find out whether it’s selected, you can use isChecked(). This returns a Boolean value, representing whether it was checked or not.
Instead of using a Button, we are using the toggled signal, that is emitted whenever the CheckBox is toggled. To connect this signal to a function, we will use the connect() method, which takes the function to be called as a parameter. In the below example, we connect the showDetails() function to the toggled signal.
from PyQt6.QtWidgets import QApplication, QWidget, QCheckBox
import sys

class Window(QWidget):
    def __init__(self):
        super().__init__()
        self.resize(300, 250)
        self.setWindowTitle("CodersLegacy")

        self.radio = QCheckBox("Option 1", self)
        self.radio.toggled.connect(self.showDetails)
        self.radio.move(100, 100)

    def showDetails(self):
        print("Selected: ", self.sender().isChecked(),
              "  Name: ", self.sender().text())
        # self.sender() gives ref to widget that emitted signal

app = QApplication(sys.argv)
window = Window()
window.show()
sys.exit(app.exec())
Below is the output of the above code on the console. It has been clicked twice, once to select and once to de-select it.
Selected:  True   Name:  Option 1
Selected:  False   Name:  Option 1
False represents the “off” state and True represents the “on” state.
You can use an alternative method involving a button, that when clicked will return the appropriate values. You can find examples of this in other articles of our PyQt6 Tutorial Section.
CheckButtons Groups
Creating a Single Check Button often does not provide much functionality, so let’s take a look at how to create a “Group” of CheckButtons. To do this we need the help of a grouping widget like QGridLayout. This creates a connection between the check buttons that we can use later on.
Using addWidget(), we will add a widget to the Layout group. The first parameter represents the widget, and the last represents it’s unique position in Grid. (This is grid-based layout with rows and columns)
from PyQt6.QtWidgets import (
    QApplication, QWidget, QCheckBox, QGridLayout
)
import sys

class Window(QWidget):
    def __init__(self):
        super().__init__()
        self.resize(300, 300)
        self.setWindowTitle("CodersLegacy")

        layout = QGridLayout()
        layout.setContentsMargins(50, 80, 50, 80)
        self.setLayout(layout)

        self.check1 = QCheckBox("Option 1", self)
        self.check1.toggled.connect(self.showDetails)
        layout.addWidget(self.check1)

        self.check2 = QCheckBox("Option 2", self)
        self.check2.toggled.connect(self.showDetails)
        layout.addWidget(self.check2)


    def showDetails(self):
        print("Selected: ", self.sender().isChecked(),
              "  Name: ", self.sender().text())


app = QApplication(sys.argv)
window = Window()
window.show()
sys.exit(app.exec())
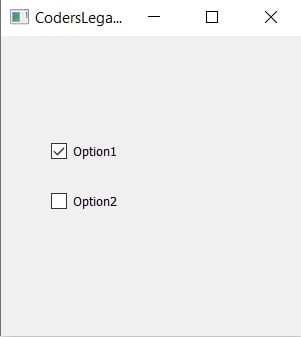
The output after clicking around on the Check Boxes a bit.
Selected:  True   Name:  Option 2
Selected:  True   Name:  Option 1
Selected:  False   Name:  Option 1
Can you guys which buttons we pressed? and in which order?
Methods Compilation
Below is a compilation of all the methods available for the QCheckButton widget.
| Method | Description |
|---|---|
checkState() | Checks the current state of the Checkbox. Returns values ranging from 0 – 2 depending on the state. |
setChecked() | Changes the state of the Checkbox to checked. |
setText() | Sets the text associated with the checkbox. |
text() | Retrieves the text value of the CheckBox. |
isChecked() | Checks to see if the checkbox is selected. |
setTriState() | Provides a third kind of state called “no change” state. |
This marks the end of the PyQt6 QCheckbox Article. Any suggestions or contributions for CodersLegacy are more than welcome. Questions regarding the PyQt6 can be asked in the comments section below.