
This article covers the PyQt6 widget, QMessageBox.
QMessageBox is a useful PyQt6 widget used to create dialogs. A dialog is a separate GUI window that gets spawned, either to take input from the User, or inform him of an event (e.g: an error) occurring. These dialogs can be used for a variety of purposes and customized in many ways to display different messages and buttons.
In this PyQt6 tutorial you’ll also find a complete list of all methods, buttons types and options for the QMessageBox widget.
Creating a QMessageBox
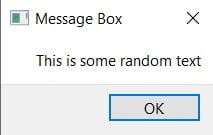
Let’s start off with a basic implementation of the QMessageBox widget in it’s default state. It’s going to be a bare-bone messagebox with no added features or customization. The QMessageBox Class can be found from the PyQt6 QtWidgets module.
In the below example we have created a GUI Window, that spawns message dialog when it is created. For now we will leave the main GUI Window blank.
from PyQt6.QtWidgets import QApplication, QWidget, QComboBox, QPushButton, QMessageBox
import sys

class Window(QWidget):
    def __init__(self):
        super().__init__()
        self.resize(300, 250)
        self.setWindowTitle("CodersLegacy")

        dialog = QMessageBox(parent=self, text="Hello World")
        dialog.setWindowTitle("Message Dialog")
        ret = dialog.exec()   # Stores the return value for the button pressed

app = QApplication(sys.argv)
window = Window()
window.show()
sys.exit(app.exec())
And below is the output.
Another approach you might want to take, is to create a button on the PyQt6 GUI Window, which triggers the code for the QMessageBox.
Now compare this simple messagebox to the advanced and feature-rich message-boxes we are going to create below.
QMessageBox Icons
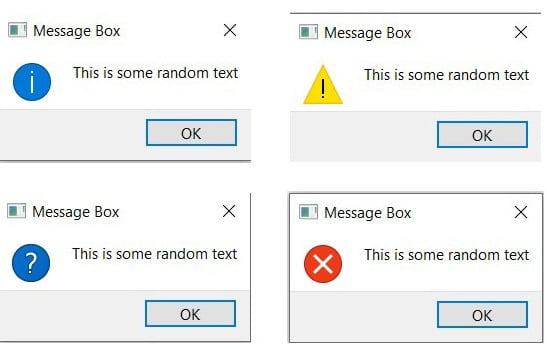
QMessageBox has 4 different types of icons that can be used by calling the setIcon() function. Decide which one to use depending on type of message you wish to display.
- QMessageBox.Icon.Question
- QMessageBox.Icon.Information
- QMessageBox.Icon.Warning
- QMessageBox.Icon.Critical
All you have to do is pass one of the above to the setIcon() function as shown below.
msg.setIcon(QMessageBox.Icon.Question)
Shown below are the four possible ICONS that can be displayed on the MessageBox Dialog.
QMessageBox Buttons
Uptil now we’ve been using the default “OK” button that QMessageBox offers. However, there are actually over a dozen different buttons that QMessageBox offers for our use. Using the setStandardButtons() function, we can pass several Button types into the dialog. (See the list for all button types below)
The below code shows a single function, where all of our Message Box Dialog code is stored.
    def show_popup(self):
        msg = QMessageBox(text="Hello and Good Morning!",parent=self)
        msg.setIcon(QMessageBox.Icon.Question)
        msg.setStandardButtons(QMessageBox.StandardButton.Retry|
                               QMessageBox.StandardButton.Ok|
                               QMessageBox.StandardButton.Cancel)
        msg.setInformativeText("This is some random text")
        ret = msg.exec()
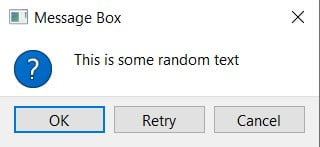
You may not have noticed this, but the order the buttons are passed in, has no impact on how they appear on the message box.
Default Button
Look at the above image again. You’l have noticed that there is a blue outline around the “OK” button. This is the symbol of the default button.
Using the setDefaultButton() function we can change the default button. Adding the following line to our code will cause the blue highlight to be around the “Cancel” button.
msg.setDefaultButton(QMessageBox.StandardButton.Cancel)
Here’s a complete list of different buttons types you can use with Messages.
- QMessageBox.StandardButton.Ok
- QMessageBox.StandardButton.No
- QMessageBox.StandardButton.Yes
- QMessageBox.StandardButton.Cancel
- QMessageBox.StandardButton.Close
- QMessageBox.StandardButton.Abort
- QMessageBox.StandardButton.open
- QMessageBox.StandardButton.Retry
- QMessageBox.StandardButton.Ignore
- QMessageBox.StandardButton.Save
- QMessageBox.StandardButton.Retry
- QMessageBox.StandardButton.Apply
- QMessageBox.StandardButton.Help
- QMessageBox.StandardButton.Reset
- QMessageBox.StandardButton.SaveAll
- QMessageBox.StandardButton.YesToAll
- QMessageBox.StandardButton.NoToAll
Detailed and Informative Text
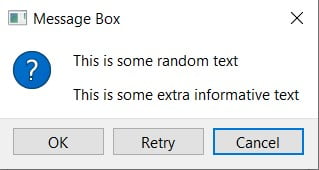
Normally you have just one small area where you can display text in the QMessageBox. There are actually two additional areas that we can take advantage of to display additional information.
The first is an additional text section located within the main Messagebox window itself. It’s an additional line of text you can add below the main text, referred to as “informative text“. You only need to call the setInformativeText(text) function to add this new area of text. (
The second is displayed on an area that expands from the QMessageBox. This is called “Detailed Text”. Activating this new section will automatically create a new button that displays this area when triggered. The setDetailedText(text) function is required to create this area.
from PyQt6.QtWidgets import QApplication,QWidget,QPushButton,QMessageBox
import sys

class Window(QWidget):
    def __init__(self):
        super().__init__()
        self.resize(300, 250)
        self.setWindowTitle("CodersLegacy")

        button = QPushButton("Click Me!", self)
        button.clicked.connect(self.show_popup)
        button.move(100, 100)

    def show_popup(self):
        msg = QMessageBox(text="Hello and Good Morning!",parent=self)
        msg.setIcon(QMessageBox.Icon.Question)
        msg.setStandardButtons(QMessageBox.StandardButton.Ok|
                               QMessageBox.StandardButton.Cancel)
        msg.setDefaultButton(QMessageBox.StandardButton.Ok)

        msg.setInformativeText("This is some extra informative text")
        msg.setDetailedText("Some Extra details.....\nCan be multi-line text")

        ret = msg.exec()

app = QApplication(sys.argv)
window = Window()
window.show()
sys.exit(app.exec())
In case it didn’t make sense before, look the code and compare to how the output below has changed.
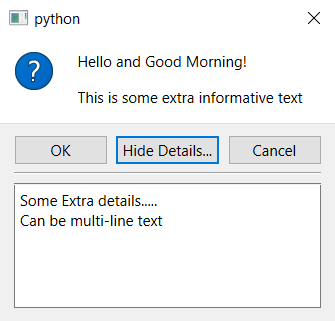
Clicking the Hide/Show Details button will hide/show the extra area below the messagebox respectively.
Retrieving QMessageBox Values
For example, if we have 3 different buttons on our messagebox, how will we know which one was pressed? This is what we’ll be exploring in this section. The code for this is shown below. Make sure to read it before moving forward.
from PyQt6.QtWidgets import QApplication, QWidget, QMessageBox
import sys

class Window(QWidget):
    def __init__(self):
        super().__init__()
        self.resize(300, 250)
        self.setWindowTitle("CodersLegacy")
        self.show_popup()

    def show_popup(self):
        msg = QMessageBox(text="Hello and Good Morning!",parent=self)
        msg.setIcon(QMessageBox.Icon.Question)
        msg.setStandardButtons(QMessageBox.StandardButton.Retry|
                               QMessageBox.StandardButton.Ok|
                               QMessageBox.StandardButton.Cancel)
        msg.buttonClicked.connect(self.output)
        ret = msg.exec()

    def output(self, button):
        print(button.text())

app = QApplication(sys.argv)
window = Window()
window.show()
sys.exit(app.exec())
Using the buttonClicked.connect() method, we can cause a function to be triggered whenever a button on the message box is clicked. In the above code, we have linked our messagebox to a function called output. Notice that popup() takes a parameter button.
When any of the messagebox buttons are triggered, the button was triggered is passed as a parameter to the function declared in buttonClicked.connect(). Calling the text() function on this button will return it’s text value.
Want to learn more about PyQt6? Head over to our GUI Tutorials Section for more dedicated tutorials!
This marks the end of the PyQt6 QMessageBox article. Any suggestions or contributions for CodersLegacy are more than welcome. Questions regarding the article content can be asked in the comments section below.