In this Python Tutorial, we will be exploring how to create Splash Screens for our Pyinstaller EXE.
Anyone who has used Pyinstaller for anything other than converting small scripts to an EXE, will know that the compiled EXE’s can take several seconds to load (at minimum).
Creating Splash Screens for Python Pyinstaller
Pyinstaller recently (in 2021) introduced a new feature which allows you to add a Splash Screen to your EXE in a very hassle free way. There is a way to create Splash-screens without using Pyinstaller’s feature, which allows for greater customization, but unfortunately its alot more complex.
Pyinstaller creates the Splash Screen by running it as a separate program, which loads before the main program begins loading.
We will be using the following image as our Splash Screen.

Go ahead and download this one (right-click and save) or use an image of your own.
There are three steps in total we need to follow.
- Import the pyi_splash module
- Call the
close()method on this module after the loading part of your code. - Pass an additional option/parameter to the Pyinstaller command when compiling your EXE, containing the filepath to your Splash Screen images.
First, we have include the following two lines somewhere near the top of our code. I have placed it right after the all the import statements in my code.
if getattr(sys, 'frozen', False):
    import pyi_splash
The reason for this extra “if” statement is to check whether this file is currently being executed as a regular Python file or a “frozen” executable. Only if it is executed as an executable, will be the pyi_splash module be imported.
This code will throw an error otherwise, if you import it normally and run the python file as a .py file. This is because Pyinstaller is the one who provides this module, and only does so once the EXE has been compiled.
Remember to have the “sys” module imported for this code to work.
Closing the Splash Screen
Next we need to specify when our Splash Screen should close. This should be done after all the “loading” in your main program. Like, if you need to connect to the internet, download some files, draw something to your tkinter window, etc.
You should also ideally hide your Tkinter window until it is ready to be displayed (instead of loading an empty screen initially).
root = tk.Tk()
window = Window(root)
if getattr(sys, 'frozen', False):
    pyi_splash.close()
root.mainloop()
We have placed this method between our Main Window initialization and before the mainloop() function is called.
Now for the final step. When converting your File to an EXE, add the following option to your pyinstaller command with the filepath to your Splash Screen.
--splash "C:/Users/CodersLegacy/Splash.png"So the whole command looks something like this:
pyinstaller --windowed --splash "C:/Users/CodersLegacy/Splash.png" graphingapp.pyAnd that’s it! You are all done.
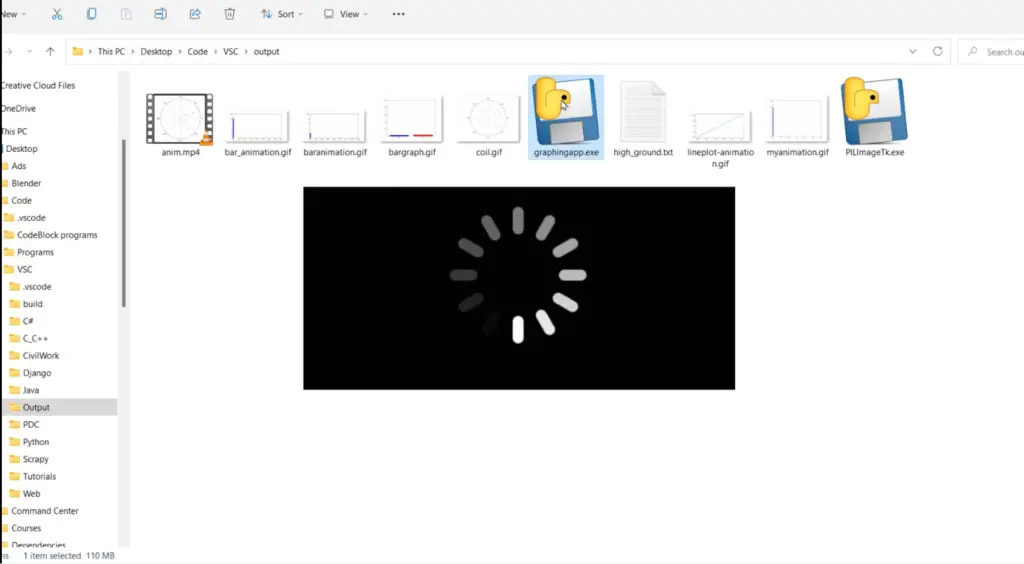
Here is a screen-shot of us clicking on our compiled EXE with the Pyinstaller Splash screen.

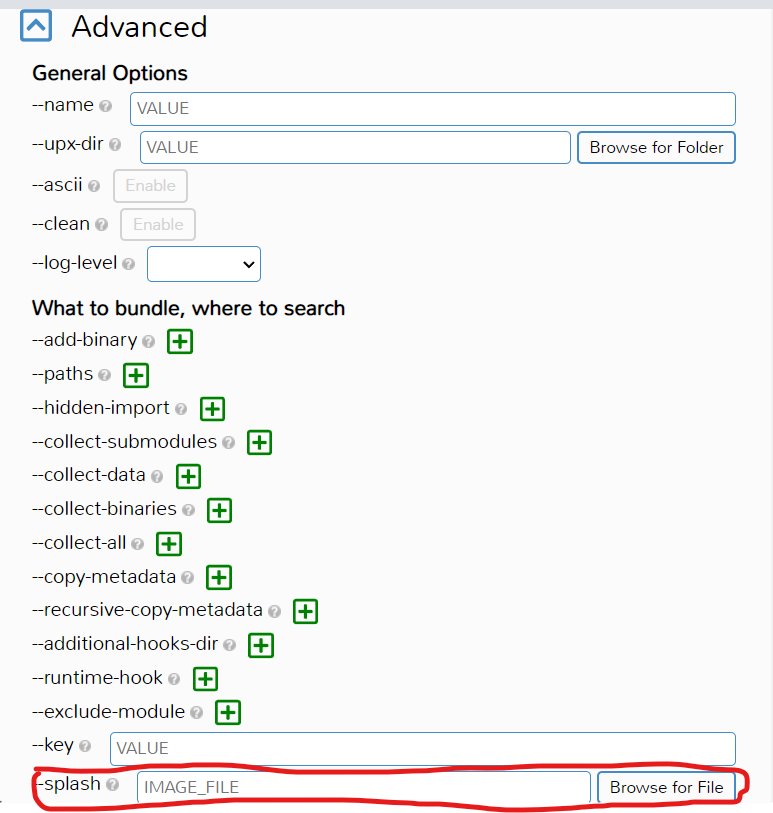
If you use Auto-py-to-Exe like I do, then you can find the option for the Splash Screen located at the bottom of the Advanced section.

This marks the end of the “Splash Screens for Pyinstaller EXE” Tutorial. Any suggestions or contributions for CodersLegacy are more than welcome. Questions regarding the tutorial content can be asked in the comments section below.
