
This tutorial covers the Python library Auto py to exe.
Introduction
When you normally write Python code you end up using many different libraries that you specially download and install. And most importantly, you need the actual Python interpreter to even be executing Python code in the first place.
The problem is that while you have all these libraries and Python installed on your PC, the person who you may want to share your program with, will likely not even have Python, much less any of it’s libraries. We call things like these dependencies, because we depend on them for our program to run successfully.
Auto py to exe is a special Python library that can convert a Python .py file to an executable with all dependencies packed. Another benefit is that the executable file produced by Auto py to exe is a compiled version of the source code, not the actual source code. This helps prevent people from stealing from your code.
In this Auto py to exe tutorial we’ll be explaining everything, from it’s installation to actually using it.
Prerequisites
Before you begin using auto-py-to-exe, you’ll need 2 two things installed in your PC. You’ll obviously need Python to execute the auto-py-to-exe code, and you’ll also require the Chrome web browser to be installed.
The reason for having the Chrome web browser is that the interface that Auto-py-to-exe creates is on Chrome. You’ll basically be interacting with Auto-py-to-exe through a chrome browser window.
Auto-Py-to-Exe Installation
There are two different methods through which we may avail Auto-Py-to-Exe’s features.
Method 1
This method involves using the pip to install the library using the pip install auto-py-to-exe command in the command prompt. You can use other package installers besides pip as well. Don’t forget to include the dashes.
Next you just have to type in auto-py-to-exe into the command prompt. This will automatically open up the interface for Auto-py-to-exe.
C:\Users\CodersLegacy> auto-py-to-exeFor this to work, you might have to have the file path of the Python exe added to Path. If you haven’t done this step already, you can learn how to do so from this Python installation guide. Otherwise you can try navigating to the Python installation yourself using the command prompt.
Method 2
If you’re having trouble with the 1st method, you can use this one as an alternate. In this method we won’t actually be installing Auto py to exe using pip or some other means. Instead, we’ll be directly downloading the source code for the library and running it manually.
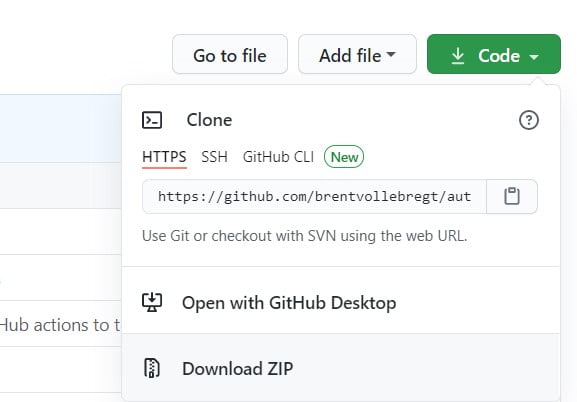
First visit the GitHub page for this library and download the code using the download ZIP option as shown in the image below.
Next extract the file, locate the python file called run.py and execute it (by clicking on it). This should open up the GUI interface for auto-py-to-exe (pictured below)
Auto-Py-to-Exe Settings
Once you’ve completed any of the above two methods, the following interface should open up. This is the Auto Py to Exe window through which we’ll be converting our files. We also have access to several settings like OneFile and Console Window.
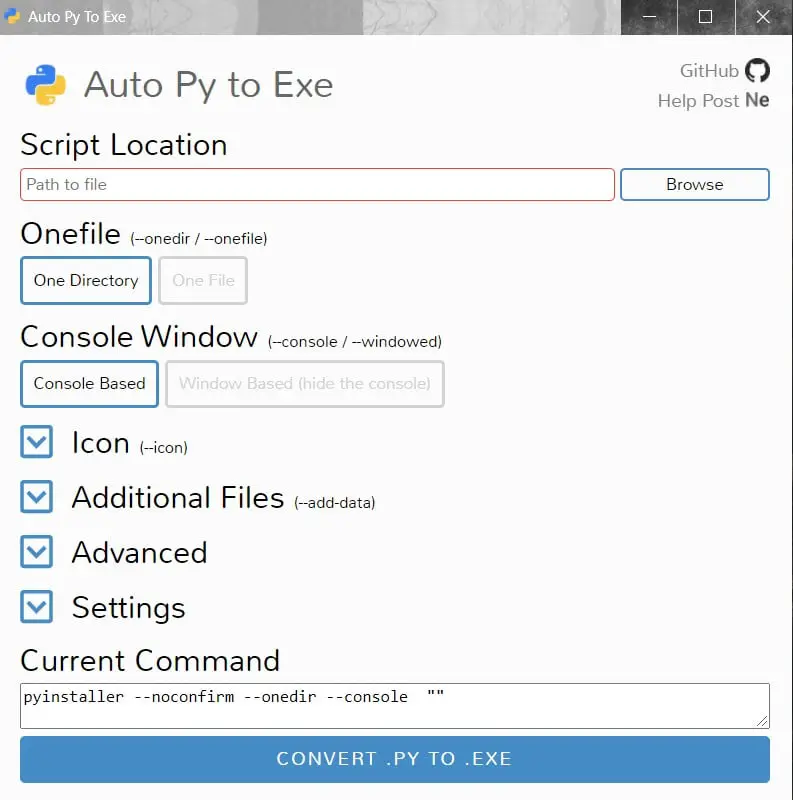
Script Location
The Script Location setting takes a simple file path of the .py which is to be converted. You can directly type in the file path or use the browse option to manually find the file on your computer.
OneFile
By default the setting on Auto-py-to-Exe is set to one-dir. This compiles all the related files and dependencies into many files located within a single directory.
Enabling the one-file instead will combine the files into a single bigger executable. If you’re experiencing an issue with either setting, try switching to the other.
Console Window
By default Auto-Py-to-Exe will open up a console window when the executable file is run. If your program is console based, you’ll need this console window to interact with the program.
If however your program is GUI based, you should switch to Window based. This will stop the console window from appearing. There’s not much point in having a console window when you have your own GUI to interact with.
Additional Files
Often when you’re making proper software, especially one’s with GUI’s you’ll end up using additional files like images, text files etc. Now obviously, you want them automatically bundled into the file produced by Auto-Py-to-Exe. Just add them using the add files or add folder setting and you’ll be good to go.
Icon
The default icon that appears on the Python executable file isn’t exactly very pretty. If you want your program to look more professional and better you can create your own custom Icon and link it’s file path to Auto-Py-to-Exe.
Output Directory
Located in settings, this option allows you the set a custom location for where the executable file is generated.
Once you’re done picking all the settings you want, just hit the “Convert” button. The process of converting the Python file will take about 5 – 10 mins. There will be several warnings and error messages in the output log, but don’t worry about those too much. It’s fairly normal.
Hope you enjoyed this Auto py to Exe Tutorial!
Alternatives to Auto-py-to-EXE
There are others options other than just Auto Py to Exe. You can also use Pyinstaller which is another pretty reliable library for creating Exe’s. And in-fact, Auto-py-to-Exe uses pyinstaller under the hood. Auto-py-to-Exe does not provide any new functionality. It just provides the GUI interface and makes things easier for the end-user.
Some other proper alternatives are:
- Nuitka compiler: A rather unique take on python deployment, which first converts Python to C code, then compiles it into Machine code. This produces an executable which can be shared, and also improves performance of your code substantially.
- cxFreeze: Another good library which has its faults, but also has certain pro’s over Auto-py-to-EXE / Pyinstaller. You can read about it’s pro’s and con’s here.
This marks the end of the Auto py to exe tutorial. Any suggestions or contributions for CodersLegacy are more than welcome. Questions regarding the article content can be asked in the comments section below.
Positive site, where did u come up with the information on this posting? I’m pleased I discovered it though, ill be checking back soon to find out what additional posts you include. download <a href=”https://softsnew.com/google-chrome-crack/” title= “google”>google</a>
How to included the databases
If we want to add an addition py file, should we add it in the addition file option.
Yes, that’s right!
[spoiler title=””] [spoiler title=”dsad”] [/spoiler] [/spoiler]
I downloaded python 3.13.2 and installed it
I tried method 1 and I get this message
“ERROR: Could not find a version that satisfies the requirement auto-py-to-exe (from versions: none)
ERROR: No matching distribution found for auto-py-to-exe”
I ran this
C:\Users\ME>python -m auto_py_to_exe
and got the result
C:\Users\ME\AppData\Local\Programs\Python\Python313\python.exe: No module named auto_py_to_exe
method 2
I downloaded from github and unzipped into its own folder
when I click run it flashes a terminal window and as fast as it appears it is gone before it cn be read.
It feels like a directoy issue but I have no idea PLease help!