
One of the major challenges you will face in Pygame is how to take input from the User. Normally in browsers or any other GUI application, you use a Text Input Box to take input. However, Pygame has no such built-in feature, so we need to make our own Text Input Box.
Luckily we have many important features such as the event system, rect objects and collision detection features which we can combine together to make the Text Input Box.
Let’s get started!
Creating the Text Input Box Class
First we need to make the required imports, and set up a basic display for our application.
import pygame
import sys

pygame.init()
display = pygame.display.set_mode((400, 300))
The next step is begin defining our Classes. We aren’t just trying to a create a means of taking input from the User here. We are defining a proper Class for such behavior. This approach is much more flexible and allows us to easily create as many Text Input Boxes as we want with minimal effort.
Shown below is the declaration of our TextInput Class. The only compulsory parameters at the x and y coordinates for it’s initial position. The rest have default values, so unless we want to customize it, we can leave them be.
class TextInput(pygame.sprite.Sprite):
    def __init__(self, x, y, width=100, height=50, color=(0, 0, 0),
                 bgcolor=(0,255,0), selectedColor=(0,0,255)):
        super().__init__()
        self.text_value = ""
        self.isSelected = False
        self.color = color
        self.bgcolor = bgcolor
        self.selectedColor = selectedColor

        self.font = pygame.font.SysFont("Verdana", 20)
        self.text = self.font.render(self.text_value, True, self.color)
        self.bg = pygame.Rect(x, y, width, height)
Here’s a short explanation for each attribute in the Class:
text_value: Stores the text that the user is entering. It is an empty string when initialized.isSelected: Used as an indicator for whether the Widget is selected by the user (i.e. If the user has clicked on it)color:Stores the RGB values for the text colorbgcolor: The color of the background (the box)selectedColor: The color of the background when it is selected.font: The Font that we are using for our text. (You can make this a parameter too)text: Stores a surface object representing the current text value. Needs to updated/re-rendered every time thetext_valueis changed.bg: A Rect object that represents the Boundaries and dimensions of the Box. Used for collision detection and storing size and position dimensions.
For now we have defined a single function in this Class.
    def render(self, display):
        self.pos = self.text.get_rect(center = (self.bg.x + self.bg.width/2,
                                                self.bg.y + self.bg.height/2))
        if self.isSelected:
            pygame.draw.rect(display, self.selectedColor, self.bg)
        else:
            pygame.draw.rect(display, self.bgcolor, self.bg)
        display.blit(self.text, self.pos)
This function positions the text in the center of the box, then draws the box (the background for the widget) and finally draws the text to the screen.
The get_rect() returns the size and positions coordinates from a surface object. This can be passed into the blit() function, which accepts rect objects.
Note: If you are looking for a simpler version of this, which doesn’t involve a fancy box, then refer to this tutorial on Pygame input. It focuses on simply handling input, and displaying it on the screen.
Modifying the Sprite Group Class
Now we need a “container” or “group” where we can store every TextInput object that we create. This will help us manage the various objects, especially when we have several of them.
Normally we would just use the Group() class from pygame.sprite module. However, I want to make a little modification to this Class, so I’ll make a new Custom Group Class which inherits from the Group() Class.
class CustomGroup(pygame.sprite.Group):
    def __init__(self):
        super().__init__()
        self.current = None
As you can see, the only difference is the addition of a new variable. We will use this variable to track the currently selected TextInput object. Although there may be many TextInput objects, only one of them can currently be selected for Input at any give point right?
Next we need to create a bunch of objects (one Group object and two TextInput objects), and setup our Game loop. We will also setup the event loop, retrieve the mouse coordinates and draw all of our sprites within the Game loop.
TextInputGroup = CustomGroup()
TextInputGroup.add(TextInput(x=100, y=100, width = 200))
TextInputGroup.add(TextInput(x=100, y=200, width = 200))

while True:
    mouse_pos = pygame.mouse.get_pos()
    for event in pygame.event.get():
        if event.type == pygame.QUIT:
            pygame.quit()
            sys.exit()

    for textinput in TextInputGroup:
        textinput.render(display)

    pygame.display.update()
In the above code you can see why having a Group for all these widgets is useful. Instead of having to call render() and each object separately, we can just iterate over the group instead.
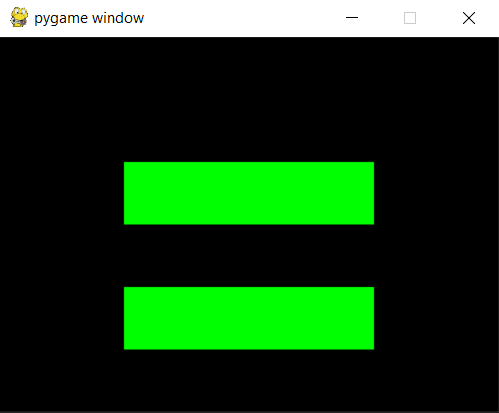
Here is our current progress. We have the Boxes rendering, now it’s time to handle the interaction.
Updating the Text-Input Box Class
We need to add two more functions into our Text Input Class. The first is called clicked(). We will call this function whenever we want to check whether the Widget is being clicked or not.
It returns True if the Mouse is in anywhere within the boundaries of the Text-Input Box, otherwise False. It also toggles whether it is selected or not. So if we click on it while it is not selected, it will become selected and vice versa.
    def clicked(self, mousePos):
        if self.bg.collidepoint(mousePos):
            self.isSelected = not(self.isSelected)
            return True
        return False

    def update_text(self, new_text):
        temp = self.font.render(new_text, True, self.color)
        if temp.get_rect().width >= (self.bg.width - 20):
            return
        self.text_value = new_text
        self.text = temp
The update_text() is responsible for two things. First it checks to ensure that the size of the new text isn’t larger than the Box (with some margins too). Secondly, it updates the value of text_value and renders a new surface object (text) in the text variable.
Handling Events
Now it’s time begin using the functions we defined earlier.
The first thing we need to do is begin registering Mouse Clicks. Whenever the mouse is pressed, we will iterate through each text-input box and test to see whether it was clicked or not using the clicked() function.
If a text-input box was clicked, we will do three things.
- First, “if” there is a text-input box that is currently selected, we shall set it’s
isSelectedvariable to False. - Secondly, the text-input box that was clicked will have it’s
isSelectedvariable set to True. - Lastly, we will set the text-input box as currently selected in the
TextInputGroupobject. This ensures that we have access to the currently selected widget at all times. Otherwise we will need to iterate through the whole group to find the currently selected widget again.
        if event.type == pygame.MOUSEBUTTONDOWN:
            for textinput in TextInputGroup:
                if textinput.clicked(mouse_pos):
                    if TextInputGroup.current:
                        TextInputGroup.current.isSelected = False
                    textinput.isSelected = True
                    TextInputGroup.current = textinput
                    break
Be sure to include the break statement up there. It will save us performance as it’s only possible for one widget to be clicked at a time, so we don’t need to continue the for loop.
One potential problem when taking keyboard input could be if the user pressed a button like “shift”, “alt” or “enter”. We obviously don’t want to include those in our input.
Luckily, we don’t have to filter these out ourselves. We can make use of the pygame.TEXTINPUT event which triggers only when an alphanumeric character is pressed.
        if event.type == pygame.TEXTINPUT:
            new_text = TextInputGroup.current.text_value + event.text
            TextInputGroup.current.update_text(new_text)
Using the .text attribute on the event will give us the entered text, which we can combine with the current value to get the new value. We will then pass this into the update_text() function of the currently selected Text Input Box to re-render the Text.
Note: The TEXTINPUT event is a pygame 2.0 feature, released in early 2020. Be sure to update your Python version!
There are two more keyboard presses we need to handle. First is the “Backspace” key, which will remove the last entered character. Handling this is easy. All we need to do is call update_text() with the current value, excluding the last character.
        if event.type == pygame.KEYDOWN:
            if event.key == pygame.K_BACKSPACE:
                TextInputGroup.current.update_text(TextInputGroup.current.text_value[:-1])

            if event.key == pygame.K_RETURN:
                if TextInputGroup.current:
                    print(TextInputGroup.current.text_value)
Another important event is the “Enter” or “Return” key which is used to submit information typically. For now all we do is print out the current value of the selected text-input box. (This is just a tutorial after all, we don’t have any place to actually this information)
Putting all the Code Together
Now let’s combine all these code snippets to produce the final result for our Text Input Box in Pygame. Try running it yourself and interact with the new Widgets we just created!
import pygame
import sys

pygame.init()
display = pygame.display.set_mode((400, 300))

class TextInput(pygame.sprite.Sprite):
    def __init__(self, x, y, width=100, height=50, color=(0, 0, 0),
                 bgcolor=(0,255,0), selectedColor=(0,0,255)):
        super().__init__()
        self.text_value = ""
        self.isSelected = False
        self.color = color
        self.bgcolor = bgcolor
        self.selectedColor = selectedColor

        self.font = pygame.font.SysFont("Verdana", 20)
        self.text = self.font.render(self.text_value, True, self.color)
        self.bg = pygame.Rect(x, y, width, height)

    def clicked(self, mousePos):
        if self.bg.collidepoint(mousePos):
            self.isSelected = not(self.isSelected)
            return True
        return False

    def update(self, mousePos):
        pass

    def update_text(self, new_text):
        temp = self.font.render(new_text, True, self.color)
        if temp.get_rect().width >= (self.bg.width - 20):
            return
        self.text_value = new_text
        self.text = temp

    def render(self, display):
        self.pos = self.text.get_rect(center = (self.bg.x + self.bg.width/2,
                                                self.bg.y + self.bg.height/2))
        if self.isSelected:
            pygame.draw.rect(display, self.selectedColor, self.bg)
        else:
            pygame.draw.rect(display, self.bgcolor, self.bg)
        display.blit(self.text, self.pos)

class CustomGroup(pygame.sprite.Group):
    def __init__(self):
        super().__init__()
        self.current = None

    def current(self):
        return self.current

TextInputGroup = CustomGroup()
TextInputGroup.add(TextInput(x=100, y=100, width = 200))
TextInputGroup.add(TextInput(x=100, y=200, width = 200))

ibeam = pygame.cursors.Cursor(pygame.SYSTEM_CURSOR_IBEAM)

while True:
    mouse_pos = pygame.mouse.get_pos()
    for event in pygame.event.get():
        if event.type == pygame.QUIT:
            pygame.quit()
            sys.exit()
        if event.type == pygame.MOUSEBUTTONDOWN:
            for textinput in TextInputGroup:
                if textinput.clicked(mouse_pos):
                    if TextInputGroup.current:
                        TextInputGroup.current.isSelected = False
                    textinput.isSelected = True
                    TextInputGroup.current = textinput
                    break
        if event.type == pygame.KEYDOWN:
            if event.key == pygame.K_BACKSPACE:
                TextInputGroup.current.update_text(TextInputGroup.current.text_value[:-1])

            if event.key == pygame.K_RETURN:
                if TextInputGroup.current:
                    print(TextInputGroup.current.text_value)
        if event.type == pygame.TEXTINPUT:
            TextInputGroup.current.update_text(TextInputGroup.current.text_value + event.text)

    for textinput in TextInputGroup:
        textinput.update(mouse_pos)
        textinput.render(display)
    if TextInputGroup.current and TextInputGroup.current.bg.collidepoint(mouse_pos):
        pygame.mouse.set_cursor(ibeam)
    else:
        pygame.mouse.set_cursor(pygame.cursors.Cursor())


    pygame.display.update()
Here is some sample output:
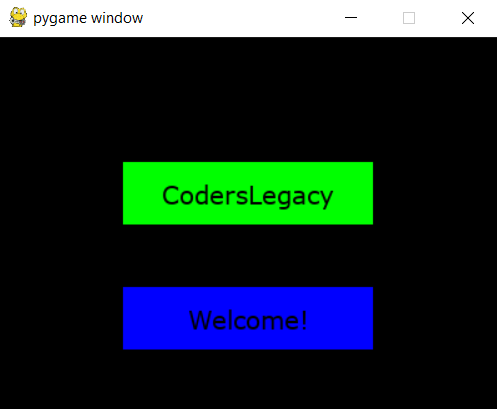
We also threw in a bonus feature into the above code. Did you notice it?
This marks the end of the How to make a Text Input Box in Pygame Tutorial. Any suggestions or contributions for CodersLegacy are more than welcome. Questions regarding the tutorial content can be asked in the comments section below.
coool