
The Canvas widget is one of the more unique and advanced widgets Tkinter has to offer in Python. It’s use of similar to that of a drawing board, which you can draw and paint on.
You can draw all kinds of things on the Canvas widget, such as graphs, plots, pie charts, lines, rectangles etc. One of it’s more interesting uses is with the Matplotlib library used for statistics. Matplotlib can create all kinds of graphs and plots, and you can directly attach these plots onto the Tkinter Canvas.
Canvas Syntax
mycanvas = Canvas(master, options...)Canvas Options
List of all options available for Canvas.
| No. | Option | Description |
|---|---|---|
| 1 | bg | Background color for the widget. |
| 2 | bd | Size of the border around the widget. Default value is 2 pixels. |
| 3 | confine | If True the canvas cannot be scrolled outside of the scroll region. Default value is True. |
| 4 | cursor | When the mouse is hovering over this widget, it can be changed to a special cursor type like an arrow or dot. |
| 5 | height | The height of the widget. |
| 6 | highlightcolor | The highlight color when the widget is under focus. |
| 7 | scrollregion | A tuple with the format (left, up, right, down) that defines the area over which the canvas can be scrolled. If the Canvas width is 300, and left value is 500, the canvas can be scrolled 200 pixels to the left. |
| 8 | relief | It specifies the type of the border. Default is Flat, other options include RAISED and SUNKEN. |
| 9 | width | Width of the Checkbutton. |
| 10 | xscrollcommand | Allows the user to scroll horizontally. |
| 11 | xscrollincrement | Decides by how much the x-scroll value is incremented with each scroll, such as clicking the arrow of the scroll bar. Make sure to use positive values. |
| 12 | yscrollcommand | Allows the user to scroll vertically. |
| 13 | yscrollincrement | Same as xscrollincrement, but for the Y-axis instead. Make sure to use positive values. |
Using the Tkinter Canvas Widget
We’ll now proceed to cover many different uses of the Canvas widget. The Canvas widget is pretty large and can be paired with many other widgets and libraries. As such what we have described below is only a portion of the Canvas’s widget’s total functionality.
If you’re further interested in Canvases, make sure to read up on it’s documentation for more.
The Canvas widget is very dependent on coordinates and positions, You should know that unlike a regular axis, the “origin point” or the coordinates (0,0) are located on the top left corner of the screen. The X values increase left to right and Y values increase from top to bottom.
Canvas with arcs
One of the most popular functions, create_arc() is used to draw arcs on the Tkinter Canvas. It takes a set of coordinates in the following format X0, Y0, X1, Y1.
What you’re actually doing is defining two points (like a line) and then drawing a circle using that line. The extent option takes values from 1 to 360, representing the 360 degrees of a circle. The start option determines where to start the arc from (in terms of degrees)
from tkinter import *

root = Tk()

frame=Frame(root,width=300,height=300)
frame.pack(expand = True, fill=BOTH)

canvas = Canvas(frame,bg='white', width = 300,height = 300)

coordinates = 20, 50, 210, 230
arc = canvas.create_arc(coordinates, start=0, extent=250, fill="blue")
arc = canvas.create_arc(coordinates, start=250, extent=50, fill="red")
arc = canvas.create_arc(coordinates, start=300, extent=60, fill="yellow")

canvas.pack(expand = True, fill = BOTH)

root.mainloop()
Since all the arcs have the same origin, we give them the same co-ordinates. Another thing to note is that the arc extends counter clockwise.

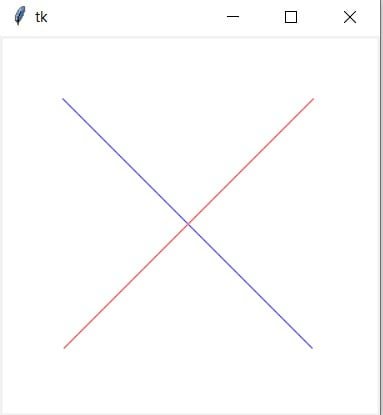
Canvas with Lines
The create_line() function is pretty simple. It takes a set of coordinates for two points in the format X0, Y0, X1, Y1 and draws a line between them.
from tkinter import *

root = Tk()

frame=Frame(root,width=300,height=300)
frame.pack(expand = True, fill=BOTH)

canvas = Canvas(frame,bg='white', width = 300,height = 300)

coordinates = 50, 50, 250, 250
arc = canvas.create_line(coordinates, fill="blue")

coordinates = 250, 50, 50, 250,
arc = canvas.create_line(coordinates, fill="red")

canvas.pack(expand = True, fill = BOTH)

root.mainloop()
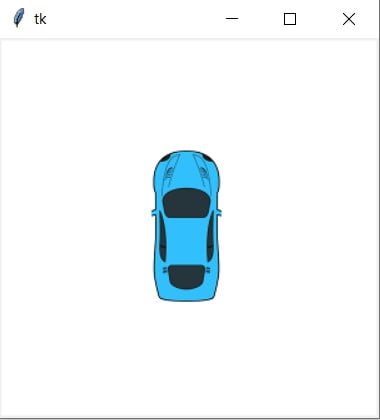
Canvas with Image
Using the PhotoImage class you can import photos and turn them into a format compatible with other libraries such as Tkinter.
The syntax is pretty simply, you simply pass the filepath to the option “file”. You can then pass this file object into the canvas.create_image() function’s image option.
The two numbers you see, 150 and 150 represent the X and Y location of the origin of the image. Since we set the origin to the center of the canvas, the image shows up in the center.
from tkinter import *

root = Tk()

frame=Frame(root,width=300,height=300)
frame.pack(expand = True, fill=BOTH)

canvas = Canvas(frame,bg='white', width = 300,height = 300)

file = PhotoImage(file = "download.png")
image = canvas.create_image(150, 150, image=file)

canvas.pack(expand = True, fill = BOTH)

root.mainloop()
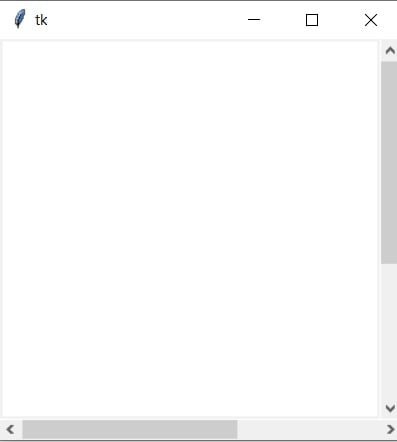
Canvas with Scrollbar
You can also use Canvas with another Tkinter widget called Scrollbar. To learn more about scrolling in Canvases, follow the link to the Scrollbar widget.
from tkinter import *
root = Tk()

frame=Frame(root,width=300,height=300)
frame.pack(expand = True, fill=BOTH)

canvas = Canvas(frame,bg='white', width = 300,height = 300,
              scrollregion=(0,0,500,500))

hbar = Scrollbar(frame,orient = HORIZONTAL)
hbar.pack(side = BOTTOM, fill = X)
hbar.config(command = canvas.xview)

vbar = Scrollbar(frame,orient = VERTICAL)
vbar.pack(side = RIGHT, fill = Y)
vbar.config(command = canvas.yview)

canvas.config(xscrollcommand=hbar.set, yscrollcommand=vbar.set)
canvas.pack(side=LEFT, expand = True, fill = BOTH)

root.mainloop()
Video Code
The Code from our Video on the Tkinter Canvas Widget on our YouTube Channel for CodersLegacy. (You will need an image called “castle.png” for this to work)
import tkinter as tk


class Window:
    def __init__(self, master):
        self.master = master

        self.frame = tk.Frame(self.master)
        self.frame.pack()

        self.scrollbary = tk.Scrollbar(self.frame, orient = tk.VERTICAL)
        self.scrollbary.pack(side = tk.RIGHT, fill = tk.Y)
        self.scrollbarx = tk.Scrollbar(self.frame, orient = tk.HORIZONTAL)
        self.scrollbarx.pack(side = tk.BOTTOM, fill = tk.X)

        self.canvas = tk.Canvas(self.frame, width = 300, height = 300, bg = "white", scrollregion = (0, 0, 500, 500),
                                yscrollcommand = self.scrollbary.set, xscrollcommand = self.scrollbarx.set)
        self.canvas.pack()

        self.scrollbary.config(command = self.canvas.yview)
        self.scrollbarx.config(command = self.canvas.xview)

        img = tk.PhotoImage(file = "castle.png")
        self.master.img = img
        self.canvas.create_image(200, 200, image = img)


root = tk.Tk()
window = Window(root)
root.mainloop()
This marks the end of the Python Tkinter Button Widget article. Any suggestions or contributions for CodersLegacy are more than welcome. Questions regarding the material in the article can be asked in the comments section below.
Head back to the main Tkinter Article to learn about the other great widgets!
I tried running the code under ‘Canvas with Image’ but i get an error message “TclError: image “pyimage14″ doesn’t exist”. Any ideas on what’s going wrong?
Looks like an issue with file paths. In that code, we are using an image called “download.png”, which is located at the same directory as our python file. You have to do the same, or modify the code to point to a new image.
You can try to use a different format of photo. I can’t upload jpg images, but it is going ok with png