
Scrollbars are a common feature in modern GUI’s. Most often you’ll see them in the GUI for “Terms and Agreements” where you scroll down hundreds of lines to reach the “I accept” button. The Tkinter Scrollbar is a way for us to bring the scroll feature in our Python software.
Most of the time, the reason you’ll want a Tkinter Scrollbar is because there is a large text area in your GUI and you want to conserve space. You don’t want your text taking up all the space in the GUI after all.
Tkinter Scrollbar Syntax
from tkinter import *
scroll = Scrollbar(master, options...)
Scrollbar Options
List of all relevant options available for the Tkinter Scrollbar.
| No. | Option | Description |
|---|---|---|
| 1 | activebackground | Color of the widget background when it is under focus. (when the mouse is hovering it) |
| 2 | bg | Background color for the widget. |
| 3 | bd | Size of the border around the widget. Default value is 2 pixels around the slider and none around the trough. |
| 4 | command | If the state of this widget is changed (moved), this procedure is called. |
| 5 | cursor | When the mouse is hovering over this widget, it can be changed to a special cursor type like an arrow or dot. |
| 6 | elementborderwidth | The width of the borders around the arrowheads and slider |
| 7 | highlightbackground | The highlight color when the widget is notunder focus. |
| 8 | highlightcolor | The highlight color when the widget is under focus. |
| 9 | highlightthickness | The thickness of the highlight, default is 1. |
| 10 | jump | Controls the behavior of the command option. Normally, moving the slider will trigger the command function multiple times. Setting it to 1 only triggers command once the user releases the scrollbar. |
| 11 | orient | Takes two values, HORIZONTAL and VERTICAL for horizontal and vertical alignment respectively. |
| 12 | repeatdelay | This options decides the duration for which the button is to be pressed before the slider begins moving it that direction repeatedly. Default value is 300 milliseconds. |
| 13 | repeatinterval | The repeatinterval has a default value of 100 milliseconds. |
| 14 | takefocus | Used to tab focus on the scrollbar, assign value of 0 to disable. |
| 15 | troughcolor | The color of the trough. |
| 16 | width | Width of the scrollbar. Default value is 16 pixels. |
The first thing to know is that you can’t use the scrollbar on every Tkinter widget. There are only certain widgets which have the scroll capability and they are listed below.
The requirement is that a widget must have the yscrollcommand and/or xscrollcommand option.
We’ll be exploring the Listbox and Canvas widgets here, since they are the most commonly used with the scrollbar. If you have any trouble understanding any of these other widgets, follow the links their respective articles to learn more.
Listbox Scrollbar
The first thing to do is create the scrollbar. This scrollbar is then used in the creation of the listbox by passing it into the yscrollcommand parameter. If you wanted scroll the listbox in the X direction you would use xscrollcommand instead.
We then generated 100 values and inserted them into listbox. The scrollbar won’t trigger unless the size of values is greater than the container they are in.
Finally we call the config and assign an additional option called command. The mylist.yview function activates the listbox’s scroll feature. Use xview or xview depending on the orientation of your widgets (Horizontal or vertical).
from tkinter import *

root = Tk()
root.geometry("200x250")

mylabel = Label(root, text ='Scrollbars', font = "30")
mylabel.pack()

myscroll = Scrollbar(root)
myscroll.pack(side = RIGHT, fill = Y)

mylist = Listbox(root, yscrollcommand = myscroll.set )
for line in range(1, 100):
    mylist.insert(END, "Number " + str(line))
mylist.pack(side = LEFT, fill = BOTH )

myscroll.config(command = mylist.yview)

root.mainloop()
We’ve displayed the output of the above code in the form of a GIF, shown below.
Be careful when packing the Scrollbar. Since typically Scrollbars are on the right, use the side = RIGHT option and to ensure the scrollbar fills the screen, use the fill = Y (though you may want to alter this in some scenarios)
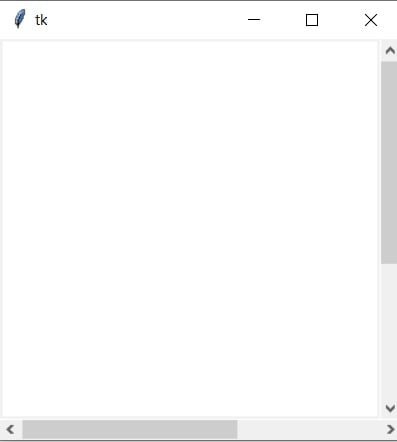
Canvas Scrollbar
As a bonus, we’ve created two scroll bars this time, just to show you it’s possible. You likely won’t be using this in an actual GUI.
Notice the many expand = True options. Try re-sizing the Tkinter frame with these on, then remove them and try again.
The last new feature here is the scroll region for the Canvas. It’s total size is technically 500 by 500, but only 300 by 300 is viewable at any given time. The scroll region should always be larger than the width and height. Ruins the purpose otherwise.
from tkinter import *

root = Tk()

frame=Frame(root,width=300,height=300)
frame.pack(expand = True, fill=BOTH)

canvas = Canvas(frame,bg='white', width = 300,height = 300,
              scrollregion=(0,0,500,500))

hbar = Scrollbar(frame,orient = HORIZONTAL)
hbar.pack(side = BOTTOM, fill = X)
hbar.config(command = canvas.xview)

vbar = Scrollbar(frame,orient = VERTICAL)
vbar.pack(side = RIGHT, fill = Y)
vbar.config(command = canvas.yview)

canvas.config(width=300,height=300)
canvas.config(xscrollcommand=hbar.set, yscrollcommand=vbar.set)
canvas.pack(side=LEFT, expand = True, fill = BOTH)

root.mainloop()
The above code produces the below GUI.
Video Code
The Code from our Video on Tkinter Scrollbar on our YouTube Channel for CodersLegacy.
import tkinter as tk


class MainWindow:
    def __init__(self, master):
        self.master = master

        self.frame = tk.Frame(self.master)
        self.frame.pack()

        self.label = tk.Label(self.frame, text = "ScrollBar Demo")
        self.label.pack()

        self.yscrollbar = tk.Scrollbar(self.frame, orient = tk.VERTICAL)
        self.yscrollbar.pack(side = tk.RIGHT, fill = tk.Y)

        self.xscrollbar = tk.Scrollbar(self.frame, orient = tk.HORIZONTAL)
        self.xscrollbar.pack(side = tk.BOTTOM, fill = tk.X)

        self.canvas = tk.Canvas(self.frame, width = 300, height = 300, scrollregion = (0, 0, 500, 500),
                                xscrollcommand = self.xscrollbar.set, yscrollcommand = self.yscrollbar.set,
                                bg = "white")
        self.canvas.pack()

        self.yscrollbar.config(command = self.canvas.yview)
        self.xscrollbar.config(command = self.canvas.xview)


root = tk.Tk()
window = MainWindow(root)
root.mainloop()
This marks the end of the Python Tkinter Scrollbar article. Any suggestions or contributions for CodersLegacy are more than welcome. Relevant questions regarding the article material can be asked in the comments section below.
Learnt about other amazing widgets from the Tkinter Homepage!