
This tutorial covers the Tkinter Toplevel widget
Tkinter works with a hierarchical system, where there is one root window from where all other widgets and windows expand from. Calling the Tk() function initializes the whole Tkinter application.
Often while creating a GUI, you wish to have more than just one window. Instead of calling the Tk() function again (which is the incorrect way) you should use the Tkinter Toplevel widget instead.
Difference between Tk() and Toplevel()
Calling the Tk() function creates a whole Tkinter instance, while calling the Toplevel() function only creates a window under the root Tkinter instance.
Destroying the Tk() function instance will destroy the whole GUI, whereas destroying the Toplevel() function only destroys that window and it’s child widgets, but not the whole program.
Toplevel syntax
window = Toplevel(options.....)If you have imported Tkinter as “tk” (which is a fairly common approach), you will need to do tk.Toplevel().
Tkinter Toplevel Options
List of all relevant options available for the Toplevel widget.
| No. | Option | Description |
|---|---|---|
| 1 | bg | Background color for the area around the widget. |
| 2 | bd | Size of the border around the widget. Default value is 2 pixels. |
| 3 | cursor | When the mouse is hovering over this widget, it can be changed to a special cursor type like an arrow or dot. |
| 4 | font | The type of font to be used for this widget. |
| 5 | fg | The color for the text. |
| 6 | height | The height of the widget in terms of text lines. |
| 7 | relief | It specifies the type of the border. Default is Flat, other options include RAISED and SUNKEN. |
| 8 | width | Width of the Checkbutton. |
Toplevel Widget Example in Tkinter
This is a simple Toplevel function example simply to demonstrate how it works. Just by calling the TopLevel() Class, a new window will popup, just like when we call Tk().
from tkinter import *

root = Tk()
window = Toplevel()

root.mainloop()
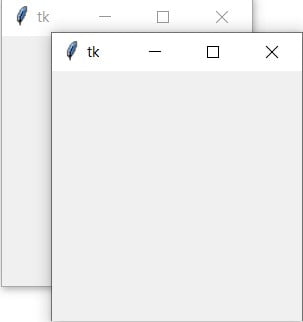
This isn’t a very practical approach though, so lets discuss a more real life scenario in the next example.
Toplevel Widget Example#2
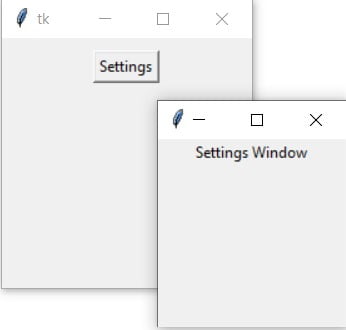
In this example we’ll show you another way calling a new window. In most software, you start off with one window and can spawn multiple windows such as a “Settings Window”. This is in contrast to the previous example where we started directly with 2 windows.
The code below creates a button, that when clicked calls a function that creates a new Toplevel window with a widget in it. You might find this approach more suitable for your GUI.
from tkinter import *

def NewWindow():
    window = Toplevel()
    window.geometry('150x150')
    newlabel = Label(window, text = "Settings Window")
    newlabel.pack()


root = Tk()
root.geometry('200x200')

myframe = Frame(root)
myframe.pack()

mybutton = Button(myframe, text = "Settings", command = NewWindow)
mybutton.pack(pady = 10)

root.mainloop()
Only use multiple windows when it makes sense to have more than one. It makes sense to have a separate window dedicated to settings, especially when it’s a large software when dozens of different settings.
Tkinter Toplevel Methods
Another benefit of using Toplevel is the dozen different methods available to it that provide extra functionality.
Amongst the most useful these methods are withdraw() and deiconify() which can be used to withdraw and display the window respectively. Useful if you want to make the window disappear without destroying it. And also the resizable, maxsize(), minsize() and title methods. Explanations mentioned below in the table.
Most of these methods are self-explanatory enough that you shouldn’t require any explanation beyond what is written here. The rest will be covered in another article soon, or you can always google it if you ever need it.
| No. | Method | Description |
|---|---|---|
| 1 | deiconify() | Used to display the Toplevel window. Only use after using either the withdraw() or iconify() methods. |
| 2 | frame() | Returns a system-specific window identifier. |
| 3 | group(window) | Two windows are involved here. The window passed into the group() gets added to the group in which the window on which the method was used, is. |
| 4 | iconify() | Turns the window into an icon. Sort of like minimizing. |
| 5 | protocol(name, function) | Links a function to a name, which can be used to call it. |
| 6 | state() | Used to get the current state of the window. Possible values are normal, iconic, withdrawn, and icon. |
| 7 | resizable(width, height) | Controls whether, or how much the toplevel window can be resized. |
| 8 | withdraw() | Withdraws the function (causing it to disappear) without actually destroying it, or any of the widgets in it. |
| 9 | title(string) | Defines a title for the toplevel window. |
Further Reading…
There are many questions you might have about the Toplevel widget, or problems that you may face while using it. Here are some related tutorials you might find interesting.
- How to properly close a TopLevel Window
- Passing values from Toplevel to Main Window (and vice versa)
- Using tkraise to swap between Windows (instead of creating a new one)
- Keeping a TopLevel on top of the Main Window
This marks the end of the Python Tkinter Toplevel article. Any suggestions or contributions for CodersLegacy are more than welcome. Relevant questions regarding the article material can be asked in the comments section below.
To learn about other awesome widgets in Tkinter, follow this link!