
This tutorial covers the JavaFX Button.
The JavaFX button is a widget that causes a specific action or “event” to occur when clicked. It’s a way of making the GUI more interactive and responsive for the user. One of the most common widgets you’ll see in GUI’s is the button widget.
To use button objects in your JavaFX program, import the following: javafx.scene.control.Button.
Table of Contents:
- Creating a Button
- Button Event Handlers
- Button Methods
- CSS styles for Buttons
You don’t have to learn all of this in a single day. It’s OK to learn it bit by bit!
Creating a Button in JavaFX
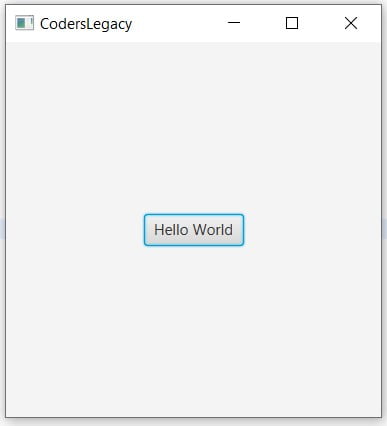
Using the below code we create a Button object called button. The text in the parameters of Button determine the text that appears on the button in the GUI.
Always remember to add the button to the appropriate layout. Without this step, the button would not appear on the Scene.
import javafx.application.Application;
import javafx.stage.Stage;
import javafx.scene.Scene;
import javafx.scene.control.Button;
import javafx.scene.layout.StackPane;


public class Tutorial extends Application  {
	public static void main(String args[]){
		 launch(args);
	}

	@Override
	public void start(Stage primaryStage) throws Exception {
		StackPane layout = new StackPane();

		Scene scene = new Scene(layout, 300, 300);

		Button button = new Button("Hello World");

		layout.getChildren().addAll(button);

		primaryStage.setTitle("CodersLegacy");
		primaryStage.setScene(scene);
		primaryStage.show();
    }
}
The button we just created has no purpose. It’s just an empty button and clicking it will not cause anything to happen.
Alternate way: Instead of Button("Hello World"), you can split it up into two different lines.
Button button = new Button();
button.setText("Hello World");
It’s a bit lengthier, but more simplified and easy to understand.
Event Handling in Buttons
A button that doesn’t do anything is a useless button. That’s what our current button is like. It’s time to add some functionality to it, so that when it is clicked an “event” occurs.
We are going to give buttons this functionality with the setOnAction() function. This function is used to connect the button to an action that will occur when the button is pressed.
There are going to be alot of new imports in this section. If you’re using an IDE like Eclipse, they should automatically appear, but if you aren’t be sure to type them in manually.
There a total of three different methods which you can use in order implement Event Handling. Since they are all important and widely used, we’ll go through all of them. You can pick the one which you find most convenient and simplest.
The first method is the hardest, and the third is the easiest. Skip ahead directly to the third method if the first two are boring you.
1# Creating a Handle method
import javafx.application.Application;
import javafx.event.ActionEvent;
import javafx.event.EventHandler;
import javafx.stage.Stage;
import javafx.scene.Scene;
import javafx.scene.control.Button;
import javafx.scene.layout.StackPane;

public class Tutorial extends Application implements EventHandler<ActionEvent> {
	Button button;

	public static void main(String args[]){
		 launch(args);
	}

	@Override
	public void start(Stage primaryStage) throws Exception {
		StackPane layout = new StackPane();

		Scene scene = new Scene(layout, 300, 300);

		button = new Button("Hello World");
		button.setOnAction(this);

		layout.getChildren().addAll(button);

		primaryStage.setTitle("CodersLegacy");
		primaryStage.setScene(scene);
		primaryStage.show();
    }

	public void handle(ActionEvent event) {
		if(event.getSource() == button) {
			System.out.println("Hello World");
		}
		//if(event.getSource() == button2) {
			//System.out.println("A commented out code block");
		//}
	}
}
The first two things you should notice is the implements EventHandler<ActionEvent> addition to the class and the Button button line. The first adds functionality for the Event handler for buttons and the second declares the button object in such a manner that it’s accessible to any method in the class.
Next is the following line.
button.setOnAction(this);
This indicates to the EventHandler that the method to be called when the button is pressed is located in the same class as the button. If you create a separate class, you’ll have to link to that class instead.
Next up is this method we created.
	public void handle(ActionEvent event) {
		if(event.getSource() == button) {
			System.out.println("Hello World");
		}
		//if(event.getSource() == button2) {
			//System.out.println("A commented out code block");
		//}

	}
It takes an argument the Action event that occurs. This method creates a separate function entirely where all the events occurred by the buttons in the GUI are handled. Using the getSource() function along with an if statement allows us to create a unique scenario for each button, else all the buttons would be executing the same code.
Just to make things more clear, we included a second if statement for a hypothetical situation where we have another button called button2.
I like this method due to how orderly it is. If you had multiple buttons, all of them would be compiled in one place, making it easy to make any adjustments or changes.
2# Using an anonymous inner class
This method allows us to handle the event without creating a separate function.
import javafx.application.Application;
import javafx.event.ActionEvent;
import javafx.event.EventHandler;
import javafx.stage.Stage;
import javafx.scene.Scene;
import javafx.scene.control.Button;
import javafx.scene.layout.StackPane;

public class Tutorial extends Application {
	Button button;

	public static void main(String args[]){
		 launch(args);
	}

	@Override
	public void start(Stage primaryStage) throws Exception {
		StackPane layout = new StackPane();

		Scene scene = new Scene(layout, 300, 300);

		button = new Button("Hello World");

		button.setOnAction(new EventHandler<ActionEvent>() {
			@Override
			public void handle(ActionEvent event) {
				System.out.println("Hello World");
			}
		});

		layout.getChildren().addAll(button);

		primaryStage.setTitle("CodersLegacy");
		primaryStage.setScene(scene);
		primaryStage.show();
    }
}
It’s roughly the same thing as the first method, but within the parameters of setOnAction().
This method may be preferred by some who are only creating one or two buttons and want to keep things simple. I don’t consider this method very appropriate for a GUI with many buttons due to how bloated the code will look. It’s better to look at the next method as an alternative.
3# Using an anonymous function V2
Starting from Java 8, a new feature was released to simplify the usage of lambdas and anonymous functions in Java. Instead of having to write all the code shown in the previous example, we just have to use e and the arrow operator ( -> ).
Button button = new Button("Hello World");
button.setOnAction(e -> System.out.println("Hello World"));
This is easily my most favorite way due to how simple and easy it is. A single one liner is all you need. It’s not just restricted to single lines either. With the help of curly brackets you can include multiple lines.
button = new Button("Hello World");
button.setOnAction(e -> {
	System.out.println("Hello World");
	System.out.println("Hello World Again");
});
With this method, you don’t have to worry about any code or imports regarding event handlers either so that’s another bonus.
Unless you downloaded Java before 2015, you don’t have to worry about not having this feature.
Button Methods
A compilation of the methods for the button widget. Most of these methods are related to the size of the button. The size of the JavaFX window is what determines what size of the button is picked.
| Method | Description |
|---|---|
button.setDisable() | Pass True to disable the button, and False to un-disable (enable) it. |
button.setMinWidth() | Sets the minimum possible width of the button. |
button.setMaxWidth() | Sets the maximum possible width of the button. |
button.setPrefWidth() | Sets the preferred width of the button. This is the width that the button will have if there is enough space available, else minimum width. |
button.setMinHeight() | Sets the minimum possible height of the button. |
button.setMaxHeight() | Sets the maximum possible height of the button. |
button.setPrefHeight() | Sets the preferred height of the button. This is the height that the button will have if there is enough space available, else maximum width. |
button.setMinSize(width, height) | Sets the minimum possible width and height. |
button.setMaxSize(width, height) | Sets the maximum possible width and height. |
button.setPrefSize(width, height) | Sets the preferred possible width and height. |
The Size() methods are like combinations of the respective Height and Width function. setMinSize() is the equivalent to setMinWidth and setMinHeight.
CSS Styles for Buttons
A list of different CSS styles for buttons. The names are pretty self-explanatory. Using these you can change the background color, border color, border width etc for a button.
-fx-border-width
-fx-border-color
-fx-background-color
-fx-font-size
-fx-text-fill
Use the setStyle() method on the button object to set a CSS Style. Below are some examples and their corresponding output.
You can set multiple Styles in one setStyle() function as long as you keep them separated with semi-colons (;). Do not try and set each Style individually. The last Style will override the others.
button.setStyle("-fx-border-color: yellow; -fx-text-fill: blue; -fx-border-
                width: 3px; -fx-font-size: 30px;");
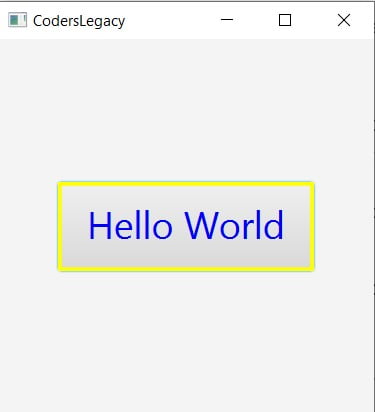
The size of the font in the button affects it’s size.
You can also just use HTML color codes instead of writing down a color name like yellow or green.
This marks the end of the JavaFX Button Tutorial. Any suggestions or contributions for CodersLegacy are more than welcome. Questions regarding the article content can be asked in the comments section below.