
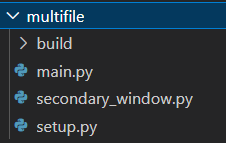
In this tutorial, we will explore how to use cx_Freeze to handle Python applications consisting of multiple files.
cx_Freeze is a powerful and widely-used tool for converting Python scripts into standalone executables, allowing developers to distribute their applications without requiring users to have Python or any dependencies installed. cx_Freeze also offers a seamless approach to handle multiple Python files, in the event that your project comprises of multiple files.
There is also a secondary instance to consider, such as when you want cx_Freeze to generate multiple EXE’s in one go (e.g. your project consists of various independent components). We will be discussing both scenarios in this tutorial.
Understanding the Example Application
Before diving into the cx_Freeze setup, let’s take a quick look at the example application that we’ll be using throughout the tutorial.
main.py
import tkinter as tk
from secondary_window import SecondaryWindow

class MainWindow(tk.Tk):
    def __init__(self):
        super().__init__()
        self.title("Main Window")

        # Create and pack widgets for the main window
        label = tk.Label(self, text="Welcome to the Main Window")
        label.pack(pady=20)

        open_secondary_window = tk.Button(self, text="Open Secondary Window",
                                               command=self.open_secondary_window)
        open_secondary_window.pack()

    def open_secondary_window(self):
        SecondaryWindow(self)


if __name__ == "__main__":
    app = MainWindow()
    app.mainloop()
secondary_window.py
import tkinter as tk

class SecondaryWindow(tk.Toplevel):
    def __init__(self, master):
        super().__init__(master)
        self.title("Secondary Window")

        # Create and pack widgets for the secondary window
        label = tk.Label(self, text="This is the Secondary Window")
        label.pack(pady=20)

        button_close = tk.Button(self, text="Close",
                                      command=self.destroy)
        button_close.pack(pady=10)


if __name__ == "__main__":
    root = tk.Tk()
    app = SecondaryWindow(root)
    root.mainloop()
The application consists of two files: “main.py” and “secondary_window.py“. “main.py” defines the main window of the tkinter application, and “secondary_window.py” defines a supporting secondary window that opens when the “Open Secondary Window” button is clicked.
Installing cx_Freeze
Before proceeding, ensure that you have cx_Freeze installed. If you don’t have it installed, you can install it using pip:
pip install cx_FreezeOnce we are done with the installation, we can begin converting our Python file to an EXE.
Configuring cx_Freeze
There are two ways to configure cx_Freeze for your Python application. We will be opting for the easier method which involves building a setup.py file using the quickstart command provided by cx_Freeze.
Open a terminal, navigate to the directory where you have your main Python file located (in our example case, this file is main.py), and run the following command:
cxfreeze-quickstart This will proceed to ask you some questions about your project, as shown below:
Project name: multifile-test
Version [1.0]: 1.0
Description: Tutorial for showing multifile capability
Python file to make executable from: main.py
Executable file name [main]: main
(C)onsole application, (G)UI application, or (S)ervice [C]: G
Save setup script to [setup.py]:

Setup script written to setup.py; run it as:
    python setup.py build
Run this now [n]? yes
The stuff you see in the square brackets is the default option that gets used when you press enter (without entering anything).
Running the Executable
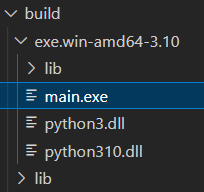
Once the compilation has completed, you will see an additional folder called “build”, which contains your compiled code and EXE. There will be another file, called setup.py which contains all our configuration settings.
Now you can try running your executable, main.exe (the name of the exe will be the name of the file you used to compile the code).
Running this executable will run our tkinter code, which we can interact with to spawn our additional window.
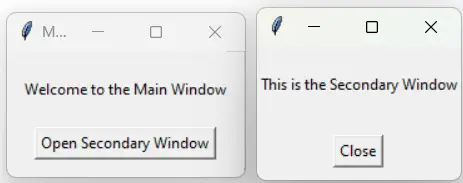
As you can see, both of our files “main.py” and “secondary_window.py” have been included successfully. If either was missing, one of the above windows would be missing.
Configuring cx_Freeze for creating multiple Executables
In section we will discuss a slightly different scenario. When distributing games or software, it is not uncommon to ship multiple executables to the user.
If we take a game as an example, there are three commonly observed executables:
- The game launcher
- An update tool
- An uninstall tool
Instead of compiling each of these individually, it is more efficient to have cx_Freeze compile them all together, which prevents duplication of dependencies.
Here is some new code, which we have modified slightly to make the main.py and secondary_window.py files completely exclusive from each other.
main.py
import tkinter as tk

class MainWindow(tk.Tk):
    def __init__(self):
        super().__init__()
        self.title("Main Window")

        # Create and pack widgets for the main window
        tk.Label(self, text="Welcome to the Main Window").pack(pady=20)

if __name__ == "__main__":
    app = MainWindow()
    app.mainloop()
secondary_window.py
import tkinter as tk

class SecondaryWindow(tk.Toplevel):
    def __init__(self, master):
        super().__init__(master)
        self.title("Secondary Window")

        # Create and pack widgets for the secondary window
        tk.Label(self, text="This is the Secondary Window").pack(pady=20)
        tk.Button(self, text="Close", command=self.destroy).pack(pady=10)


if __name__ == "__main__":
    root = tk.Tk()
    app = SecondaryWindow(root)
    root.mainloop()
After this, we need to run the following command:
cxfreeze-quickstart If you have already run this command earlier, or have a setup file, then there is no need to run this again. The main purpose of this command is to generate a setup.py file.
Your setup file should look something like the following:
from cx_Freeze import setup, Executable

# Dependencies are automatically detected, but it might need
# fine tuning.
build_options = {'packages': [], 'excludes': []}

import sys
base = 'Win32GUI' if sys.platform=='win32' else None

executables = [
    Executable('main.py', base=base)
]

setup(name='multifile-test',
      version = '1.0',
      description = 'Tutorial for showing multifile capability',
      options = {'build_exe': build_options},
      executables = executables)
Our main goal here is to edit a certain part of this file, to account for more than one executable. We are mainly concerned with this code snippet here:
executables = [
    Executable('main.py', base=base)
]
This code defines a single executable called “main.py” which we defined using the quickstart command. We need to edit this code to include our second file, secondary_window.py as an additional executable as shown below:
executables = [
    Executable('main.py', base=base),
    Executable('secondary_window.py', base=base)
]
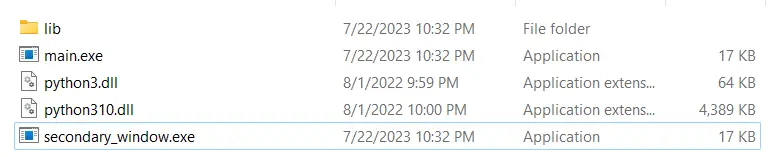
Once these changes have been made, we will run the following command to run a new compilation which will generate a new “build” folder:
python setup.py buildWe can open our newly generated build folder, and verify that there are now two new executables in here, each displaying a unique windowl.
With this, our goal has been achieved.
This marks the end of the “How to handle multiple Python files with cx_Freeze” Tutorial. Any suggestions or contributions for CodersLegacy are more than welcome. Questions regarding the tutorial content can be asked in the comments section below.