
Plotting static graphs in Matplotlib is what we normally do. We have a fixed amount of data, which we then plot using one of the various plotting mechanics in Matplotlib. But what if our data is dynamic, and constantly changing? What if we need to be plotting data in Real time in Matplotlib?
Plotting Data in Real Time
We will be using the matplotlib animation module in order to achieve our goal.
The animation module has a special function called FuncAnimation, which periodically executes a given function at given intervals. Inside this function, we will updating the graph by adding a new value to it.
import matplotlib.pyplot as plt
from matplotlib.animation import FuncAnimation
from random import randrange
Here are a few important imports that we have to make. We are also importing the random module because we will use it later for adding random values to the graph.
fig = plt.figure(figsize=(6, 3))
x = [0]
y = [0]
Here we create a basic matplotlib figure, using the dimensions (6, 3). I’m basically doing this to make the resulting graph twice as wide as the height (2:1 ratio).
We also initialize the x and y lists to 0 as an initial point. These two lists will be used as the dataset for our matplotlib graph.
ln, = plt.plot(x, y, '-')
plt.axis([0, 100, 0, 10])
The plt.plot() returns a special Line object, used for drawing line graphs. The first two parameters are the lists for the x and y axis of the graph.
We can modify the third parameter to alter the appearance of the graph. ‘-‘ produces a regular blue graph. Changing it to ‘*’ will make it more like a scatter plot, with asterisk as points instead of circles. There are also color codes, such as ‘g’ for green, which produces a green line graph.
def update(frame):
    x.append(x[-1] + 1)
    y.append(randrange(0, 10))
    ln.set_data(x, y)
    return ln,
This is a function called update where we will append a new value to both the x and y lists. For the x-axis, we just increment the count by 1, (x[-1] refers to the last element) and for the y-axis we add a random value ranging from 0 to 9.
Lastly we use set_data to update the values in the graph.
animation = FuncAnimation(fig, update, interval=500)
plt.show()
Here is the driver code, which actually calls the FuncAnimation() function. The first parameter is the matplotlib figure we created earlier. Second parameter is the function we wish to call, and the third is the interval after which we want to execute the function. Our update function will execute every 0.5 seconds.
Code
The complete code for our example on real-time plotting in matplotlib:
import matplotlib.pyplot as plt
from matplotlib.animation import FuncAnimation
from random import randrange
fig = plt.figure(figsize=(6, 3))
x = [0]
y = [0]
ln, = plt.plot(x, y, '-')
plt.axis([0, 100, 0, 10])
def update(frame):
x.append(x[-1] + 1)
y.append(randrange(0, 10))
ln.set_data(x, y)
return ln,
animation = FuncAnimation(fig, update, interval=500)
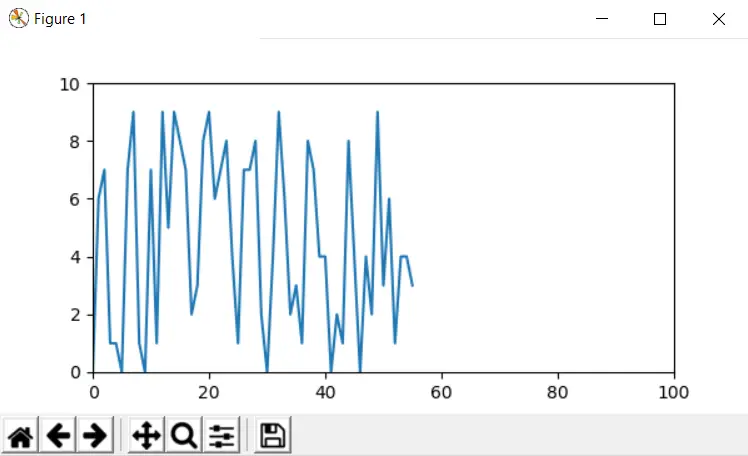
plt.show()This is a screenshot of the graph taken after about 20 seconds of it’s execution.
This approach however, may not be suitable for certain situations. For instance, let’s say the data you have is infinite, or you know very little about the range of values you will be plotting. If you get the “x” value of “200”, it will not be shown anywhere on the graph, because the x-axis is only defined uptil 100.
This approach is great so long as you have a rough idea about the data you will be working with. In the next section we will discuss another approach that you can use instead.
Auto-scaling and Resizing your Matplotlib Graph
We will be making a few minor changes in our code from earlier. In short, our goal is to have the graph resize itself automatically based off the range of values being added to it. No matter what values you enter, the graph will adjust its axis’s automatically.
First of all, remove the line where we defined the axis’s, and then add the following two lines of code at the end of the update() function.
fig.gca().relim()
fig.gca().autoscale_view()
The complete code:
import matplotlib.pyplot as plt
from matplotlib.animation import FuncAnimation
from random import randrange

fig = plt.figure(figsize=(6, 3))
x = [0]
y = [0]
ln, = plt.plot(x, y, '-')

def update(frame):
    x.append(x[-1] + 1)
    y.append(randrange(0, 10))
    ln.set_data(x, y)
    fig.gca().relim()
    fig.gca().autoscale_view()
    return ln,

animation = FuncAnimation(fig, update, interval=500)
plt.show()
Try running the code yourself to see the magic!
This marks the end of the Real time plotting with Matplotlib in Python Tutorial. Any suggestions or contributions for CodersLegacy are more than welcome. Questions regarding the tutorial content can be asked in the comments section below.