
This article covers the QComboBox widget in (PyQt6).
The QComboBox widget in PyQt6 is used to Combo Box, which displays a drop-down list of options, which the user can select any option from. The advantage of this widget is that it takes up very little space on the screen, making it suitable for smaller GUI windows.
You can find a complete list of QComboBox methods and options at the end of this tutorial.
Creating a QComboBox
Let’s create a basic QComboBox widget using the QComboBox Class in the QtWidgets module from PyQt6. Inside the parameters for QComboBox, pass the window object as a parameter (self) otherwise it won’t be displayed properly.
In order to extra new “Options” or “Items” to the QComboBox, use the addItem() method on our QComboBox object. Remember, you can only add String values to a Combobox!
from PyQt6.QtWidgets import QApplication, QWidget, QComboBox
import sys
class Window(QWidget):
def __init__(self):
super().__init__()
self.resize(300, 250)
self.setWindowTitle("CodersLegacy")
combo = QComboBox(self)
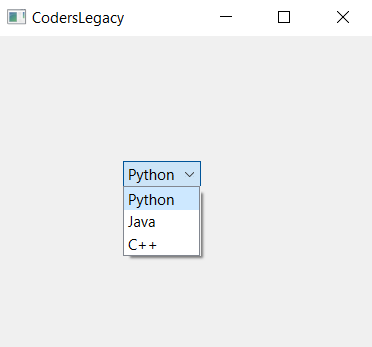
combo.addItem("Python")
combo.addItem("Java")
combo.addItem("C++")
combo.move(100,100)
app = QApplication(sys.argv)
window = Window()
window.show()
sys.exit(app.exec())
The output for the above code:
You can use the addItems() instead to pass a list of different options at once. It’s better to use this generally in order to conserve space and save time while coding (especially when you have alot of options to add!).
combo.addItems(["Python", "Java", "C++"])
Retrieving QComboBox Values
We’ve created a basic QComboBox widget, but how to find out which option the user picked? Using the currentText() method on the widget will return it’s current selected value. But now we have another problem, how to call this function once the User has selected the option?
A very common solution is to use a button that acts as a “Submit” button. The button, when clicked calls a functions that prints the value of the combobox to screen using the currentText() method.
from PyQt6.QtWidgets import QApplication, QWidget, QComboBox, QPushButton
import sys

class Window(QWidget):
    def __init__(self):
        super().__init__()
        self.resize(300, 250)
        self.setWindowTitle("CodersLegacy")

        self.combo = QComboBox(self)
        self.combo.addItems(["Python", "Java", "C++"])
        self.combo.move(100,100)

        button = QPushButton("Submit", self)
        button.clicked.connect(self.display)
        button.move(100,200)

    def display(self):
        print(self.combo.currentText(), f"({self.combo.currentIndex()})")


app = QApplication(sys.argv)
window = Window()
window.show()
sys.exit(app.exec())
Below is a picture of the GUI output, as well as the console output. The console output was produced by selecting the three options randomly (one at a time of course).
Python (0)
Java (1)
C++ (2)
If you wish to display the output on the GUI itself, you can use the QLabel widget to do so.
Note: If you want to eliminate the QPushButton from the GUI Window, and have a function a execute whenever the user selects an option automatically, you must make use of the QComboBox Signals.
QComboBox Methods
We covered the most important and common methods in detail above, but here is a complete list of all them.
| Method | Description |
|---|---|
addItem() | Adds an item. |
addItems() | Adds several items in the form of a list. |
Clear() | Deletes all the items. |
count() | Returns an integer representing the number of items. |
currentText() | Retrieves the text of currently selected item |
itemText(index) | Returns the text at the specified index. |
currentIndex() | Returns the index of the selected option. |
setItemText(index,text) | Changes the text of the item at the specified index. |
setFixedWidth() | Defines the size of the widget in pixels. |
Want to learn how to add CSS styles into PyQt6 widgets? Follow the link to our tutorial!
This marks the end of the PyQt6 QComboBox article. Any suggestions or contributions for CodersLegacy are more than welcome. Questions regarding the article content should be asked in the comments section below.