
This pyq6 tutorial covers the pyqt6 QTableWidget.
Tables and Spreadsheets are a very common type of widget/component in GUI windows. Often, we see entire GUI applications based around just Tables and Spreadsheets. Microsoft excel is one such software. In order to facilitate our needs, PyQt6 provides us with the QTableWidget which has the functionality required to create such spreadsheets and tables.
Tables are created from a combination of rows and columns. The intersection between rows and columns creates cells. Each cell in the QTableWidget editable and can be interacted with, as we will show in today’s tutorial.
Creating a TableView in PyQt6
In this section we will create a basic TableView widget in PyQt6. Let’s do this step by step, one code-block at a time.
from PyQt6.QtWidgets import (
    QApplication, QWidget, QTableWidget, QTableWidgetItem
)
import sys
The first thing we need to do is make the required imports. We’re importing the bare minimum of widgets required to create the PyQt6 GUI window and the QTableView widget.
class Window(QWidget):
    def __init__(self):
        super().__init__()
        self.setWindowTitle("PyQt6 SpreadSheet")
        self.CreateTable()
        self.show()
Next, we need to make our Window Class that’s going to be holding all our code. The above code includes the first method, __init__. It’s a basic method, which sets the title and defines the geometry of the GUI window. Since we are inheriting from QWidget (for it’s features and methods) we need to initialize it’s constructor, which is what the super().__init__() command does.
It is also responsible for calling any other functions that are needed immediately, such as CreateTable() method (in the next example) and the show() method (used to display the window).
    def CreateTable(self):
        self.table = QTableWidget()
        self.table.setRowCount(5)
        self.table.setColumnCount(3)

        self.vBox = QVBoxLayout()
        self.vBox.addWidget(self.table)
        self.setLayout(self.vBox)
The above code is for the CreateTable() method in the Window class where we will be writing our QTableWidget code. It first creates a QTableWidget object, using the QTableWidget() Class. Next we set the number of rows and columns using the setRowCount() and setColumnCount() methods on the table object.
The last three lines are meant for the layout of our window. We’re going to be using the PyQt6 VBox Layout here, although it doesn’t matter much since we only one widget (so far).
Note: You can also choose to pass in the rows and columns into the QTableWidget() Constructor, as shown below:
self.table = QTableWidget(rows = 5, columns = 3)
app = QApplication(sys.argv)
window = Window()
sys.exit(app.exec())
These are the three lines of code which aren’t in the class. They are responsible for creating the QApplication, the class object and ensuring a clean exit for the window.
Finally, the output:
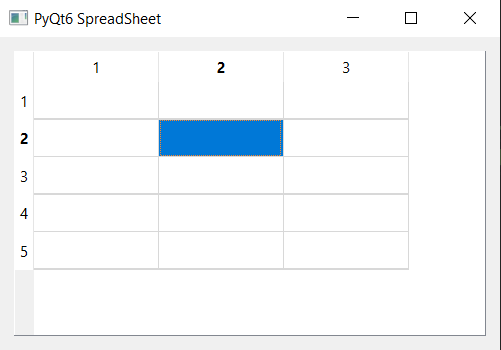
Expanding the PyQt6 QTableWidget
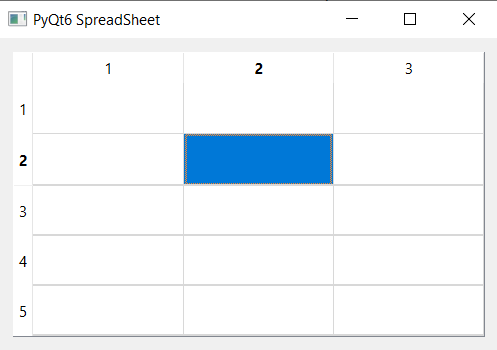
You may have noticed, that in the above image the Table we created does not expand automatically to fill up all available space. In case this is a feature you want, you can use either one or both of the below commands to make the Table expand.
from PyQt6.QtWidgets import (
    QApplication, QWidget, QTableWidget,
    QTableWidgetItem, QVBoxLayout, QHeaderView
)
import sys
        self.table.horizontalHeader().setSectionResizeMode(QHeaderView.ResizeMode.Stretch)      self.table.verticalHeader().setSectionResizeMode(QHeaderView.ResizeMode.Stretch)
The first one is for Horizontal expansion, and the second is for Vertical expansion.
PyQt QTableView – Complete Example
In the previous example we simply created an empty Table. In this example we’ll be creating a PyQt QTableWidget filled with values as well. You’ll understand how the layout of the TableWidget works in this example.
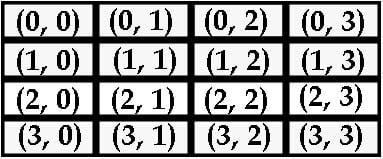
This example will mainly be featuring the below method, setItem(). It takes three main arguments, the row index, the column index, and a QTableWidgetItem object.
The row and column index determine the position of the Item in the layout of the Table. See the image below for reference. The QTableWidgetItem determines the string value to be stored in that cell.
self.tableWidget.setItem(0,0, QTableWidgetItem("Name"))
You can use the below image as reference for the layout and indexes. It should help build your understanding about how to correctly access the various cells in a Table.
Created below is a complete example of the QTableWidget:
from PyQt6.QtWidgets import (
    QApplication, QWidget, QTableWidget,
    QTableWidgetItem, QVBoxLayout, QHeaderView
)
import sys

class Window(QWidget):
    def __init__(self):
        super().__init__()
        self.setWindowTitle("PyQt6 SpreadSheet")
        self.resize(400, 250)
        self.CreateTable()
        self.show()

    def CreateTable(self):
        self.table = QTableWidget(5, 3)
        self.table.setHorizontalHeaderLabels(["Name", "Age", "Gender"])

        self.table.setItem(0,0, QTableWidgetItem("Oz"))
        self.table.setItem(0,1, QTableWidgetItem("14"))
        self.table.setItem(0, 2 , QTableWidgetItem("Male"))
        self.table.setColumnWidth(0, 150)

        self.table.setItem(1,0, QTableWidgetItem("John"))
        self.table.setItem(1,1, QTableWidgetItem("24"))
        self.table.setItem(1,2, QTableWidgetItem("Male"))

        self.table.setItem(2, 0, QTableWidgetItem("Lucy"))
        self.table.setItem(2, 1, QTableWidgetItem("19"))
        self.table.setItem(2, 2, QTableWidgetItem("Female"))

        self.table.setItem(3, 0, QTableWidgetItem("Subaru"))
        self.table.setItem(3, 1, QTableWidgetItem("18"))
        self.table.setItem(3, 2, QTableWidgetItem("Male"))

        self.table.setItem(4, 0, QTableWidgetItem("William"))
        self.table.setItem(4, 1, QTableWidgetItem("60"))
        self.table.setItem(4, 2, QTableWidgetItem("Male"))

        self.vBox = QVBoxLayout()
        self.vBox.addWidget(self.table)
        self.setLayout(self.vBox)


app = QApplication(sys.argv)
window = Window()
sys.exit(app.exec())
The GUI output of our Code:
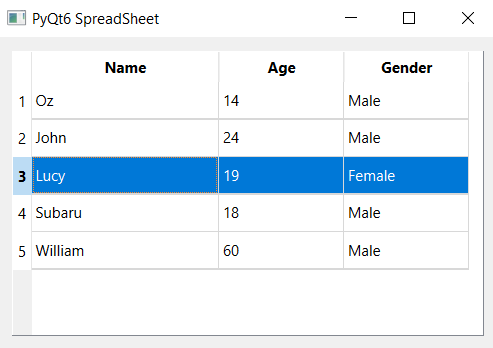
You can further extend the functionality by adding a few button widgets as well, which can act as “save” and “load” buttons. This will allow you to save any changes you make to the Table into a file, as well as load the data into the table at a later date.
This marks the end of the QTableWidget with PyQt6 Tutorial. Any suggestions or contributions for CodersLegacy are more than welcome. Questions regarding the article content can be asked in the comments section.
Confusing with the interchange of (Q)TableWidget and (Q)TableView. My understanding is that they are different.