
In this Python Tkinter Tutorial, we will discuss how to create and correctly use the OptionMenu Widget.
The OptionMenu Widget is a simple widget that is used to display a dropdown list/menu of options in a Tkinter window. Its appearance is that of a regular button, and upon clicking it the list of options is displayed below it.
Creating the OptionMenu Widget
The first thing we need to do is create all the base code for a Tkinter window on which we will create and display our OptionMenu widget.
from tkinter import *


class MainWindow:
    def __init__(self, master):
        self.master = master
        self.frame = Frame(self.master)

        self.frame.pack(expand = True, fill = BOTH)


root = Tk()
root.geometry("200x150")
window = MainWindow(root)
root.mainloop()
Next we need to create our OptionMenu Widget.
self.values = ["red", "blue", "green", "grey"]
The first thing we need to do is create a list of values to be displayed on the dropdown menu.
self.var = StringVar(value = self.values[0])
Next we create a StringVar. This is a special type of Variable used to store values meant for Widgets like OptionMenu. We’ve initialized it to the first value in the self.values list. (Otherwise it would not have a default value in the start and show up blank)
self.optionMenu = OptionMenu(self.frame, self.var, *self.values)
Here we create the actual widget. The second parameter is the StringVar we created earlier, and the third is the list of values we created earlier.
Remember to include that little ” * ” before the list. Otherwise you would have to create the OptionMenu widget like this:
self.optionMenu = OptionMenu(self.frame, self.var, "red", blue", "yellow", "grey")
The * operator is used to unpack a list into individual values. Very useful in situations like this.
Here’s the full code required to make the Tkinter OptionMenu Widget.
from tkinter import *


class MainWindow:
    def __init__(self, master):
        self.master = master

        self.frame = Frame(self.master)

        self.values = ["red", "blue", "green", "grey"]
        self.var = StringVar()

        self.optionMenu = OptionMenu(self.frame, self.var, *self.values)
        self.optionMenu.pack(padx = 50, pady = 50)

        self.frame.pack(expand = True, fill = BOTH)

root = Tk()
root.geometry("200x150")
window = MainWindow(root)
root.mainloop()
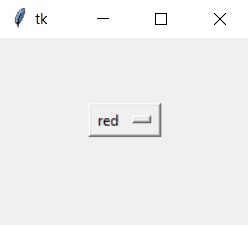
The output of the above code:
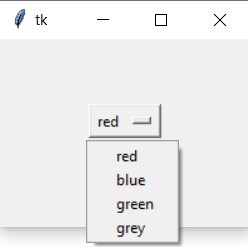
After clicking on the Button:
Changing Background Color with OptionMenu
In this part we’ll explore how to retrieve the input of the currently selected value in the OptionMenu Widget, and how to actually use that value in our Tkinter window.
        self.optionMenu = OptionMenu(self.frame, self.var, *self.values,
                                     command = self.color)
The first thing we do is add a new parameter called command into our OptionMenu widget and pass into it the name of a Class method we’ll be creating later, self.color. This will cause the self.color function to be called, every time we pick a value from the OptionMenu widget.
Alternatively, we could also use a button for the same purpose.
    def color(self, value):
        self.frame.config(bg = self.var.get())
Next we actually create the function, which takes in an additional parameter that the OptionMenu Widget automatically passes in. (More on this later).
We then use the current value of the StringVar we created earlier, to update the bg (background color) of the frame. (The StringVar’s value is automatically updated by the OptionMenu widget).
The Config function is used to change values of widgets after they are declared.
The Full Code for our example:
from tkinter import *


class MainWindow:
    def __init__(self, master):
        self.master = master

        self.frame = Frame(self.master)

        self.values = ["red", "blue", "green", "grey"]

        self.var = StringVar(value = self.values[0])

        self.optionMenu = OptionMenu(self.frame, self.var, *self.values, command = self.color)
        self.optionMenu.pack(padx = 50, pady = 50)

        self.frame.pack(expand = True, fill = BOTH)

    def color(self, value):
        self.frame.config(bg = self.var.get())


root = Tk()
root.geometry("200x150")
window = MainWindow(root)
root.mainloop()
As an alternative, we can also do this, where value is a string of the current option that was selected.
    def color(self, value):
        self.frame.config(bg = value)
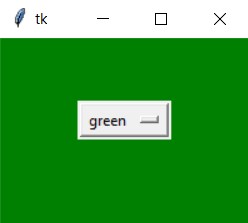
Either way, this is the output of our Tkinter window after we run and the code and select the green option from the OptionMenu widget:
This marks the end of the Python Tkinter OptionMenu Widget Tutorial. Any suggestions or contributions for CodersLegacy are more than welcome. Questions regarding the tutorial content can be asked in the comments section below.