
This is a tutorial on the JavaFX BorderPane layout.
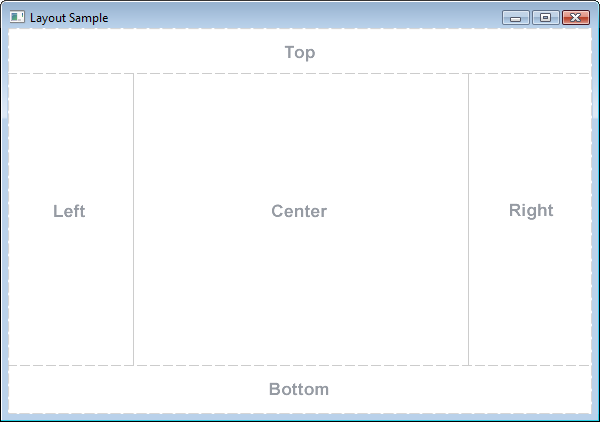
The JavaFX BorderPane layout is unique because unlike the (most) others it has pre-defined locations for where the components are to be set. Your 5 choices are the Top, Bottom, Center, Left and Right.
The slight disadvantage here is that you only get 5 slots in total to place your components. However, a smart way to get around this is create another layout manager (Like HBox), insert multiple components into it and then insert the layout manager into the BorderPane layout. This way it will only count as one.
JavaFX BorderPane Example
An image describing the BorderPane layout from the documentation.
Passing a single child component into the BorderPane class will automatically center it. When you pass all 5 components (or nodes), they get set in the following order, center, top, right, bottom and left.
Alternatively , you can set each component into the layout individually using the following 5 methods.
setBottom(node)setCenter(node)setLeft(node)setRight(node)setTop(node)
package application;

import javafx.application.Application;
import javafx.geometry.Insets;
import javafx.stage.Stage;
import javafx.scene.Scene;
import javafx.scene.control.Button;
import javafx.scene.control.Label;
import javafx.scene.layout.BorderPane;


public class Tutorial extends Application  {
	public static void main(String args[]){
		 launch(args);
	}

	@Override
	public void start(Stage primaryStage) throws Exception {

		Label label1 = new Label("This is the Center section");
		Label label2 = new Label("This is the Top-most section");
		Label label3 = new Label("This is the Right section");
		Label label4 = new Label("This is the Bottom section");
		Label label5 = new Label("This is the Left section");

		BorderPane layout = new BorderPane(label1, label2, label3, label4, label5);
		layout.setPadding(new Insets(20, 20, 20, 20));

		Scene scene = new Scene(layout, 500, 300);

		primaryStage.setTitle("CodersLegacy");
		primaryStage.setScene(scene);
		primaryStage.show();
    }
}
The GUI output of the above example:
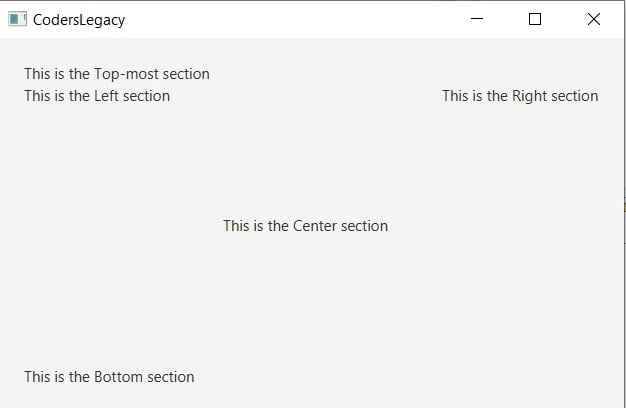
Both the Top and Bottom section labels appear to be in the left column because by default, they are left-aligned. You can change this using the setAlignment(Node, Pos) method though.
BorderPane Alignment and Position
A small section focused alignment and positions.
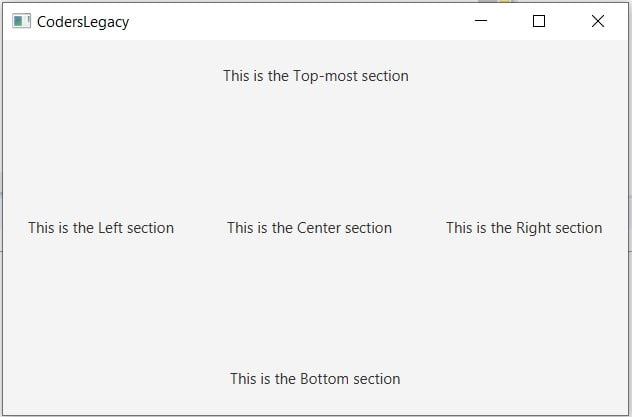
Adding these four lines to our code will center all the labels in their respective sections. We don’t need to try to center the center-section label.
        layout.setAlignment(label2, Pos.CENTER);
        layout.setAlignment(label3, Pos.CENTER);
        layout.setAlignment(label4, Pos.CENTER);
        layout.setAlignment(label5, Pos.CENTER);
The output:
Using the following 5 methods, you can return the component/node at the section of your choice.
getCenter()getTop()getRight()getBottom()getLeft()
Be sure to take a look at the other amazing layout managers in JavaFX:
This marks the end of the JavaFX BorderPane layout tutorial. Any suggestions or contributions for CodersLegacy are more than welcome. Questions regarding the article content can be asked in the comments section below.