
In this tutorial we will take a look at Layout Management in wxPython, and explain we can use advanced features and sizers to correctly position widgets inside the wxPython window.
Instead of “Absolute Positioning”, we will use wxPython’s “Sizers”, which were designed to help place widgets in a specific manner/layout. There are a total of 5 sizers in wxPython, each discussed briefly here with an example.
For more detailed tutorials with complete lists of styles/options, refer to the individual tutorials for each Sizer by following the links.
Absolute Positioning
Absolute positioning, also known as fixed positioning is the use of the coordinate system when placing widgets. This results in a “fixed position” of the widget, which will not adapt to any changes in the screen size.
Furthermore, making changes to the layout with absolute positioning is trickier once you have alot of widgets in your window. On the other hand, with Sizers you just need to change the Sizer’s settings, and all the widgets in it will be effected as well.
Another major advantage of Sizers, is that you can place a Sizer within another, allowing for complex layouts patterns.
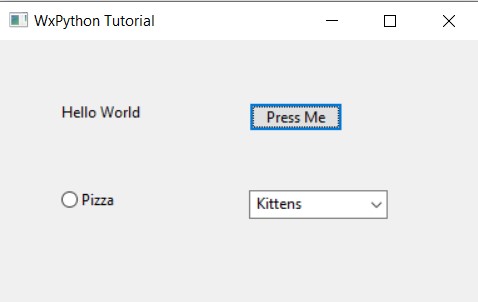
A small example using absolute positioning.
import wx

class Window(wx.Frame):
    def __init__(self, title):
        super().__init__(parent = None, title = title)
        self.panel = wx.Panel(self)

        text = wx.StaticText(self.panel, label= "Hello World", pos=(50, 50))
        button = wx.Button(self.panel, label = "Press Me", pos=(200, 50))
        rb = wx.RadioButton(self.panel, label = "Pizza", pos=(50, 120))
        cb = wx.ComboBox(self.panel, value = "Kittens", pos=(200, 120))

        self.Centre()
        self.Show()

app = wx.App()
window = Window("WxPython Tutorial")
app.MainLoop()
The output:
If you have trouble understanding how some of the widgets in this tutorial are being created, refer to our wxPython Widget Guide.
Creating a wxPython Sizer
The steps for creating a basic Sizer are fairly simple.
- First create the Sizer you want.
- Create a few widgets.
- Insert them into the Sizer using the
Add()function.
Remember, you can create “nested sizers” by simply creating multiple sizers and inserting them into a single sizer. This allows for greater flexibility and customizability in widget layouts. The below example will demonstrate this.
Furthermore, the Add() function has three parameters which you’ll find on almost all Sizers. The first is proportion, which controls how much the widgets grows if the window is re-sized. If the proportion is zero, then it won’t change. If it’s 1 or above, it will. Values above 1 are used to decide the ratio with which the widget will grow, relative to the others.
The Flag parameter is used to enable certain options, whereas the border parameter is used to define the padding between widgets/rows/columns in the sizers. The border requires the flag parameter to have certain flags enabled to actually work (such as wx.ALL, wx.BOTTOM etc).
wxPython BoxSizer
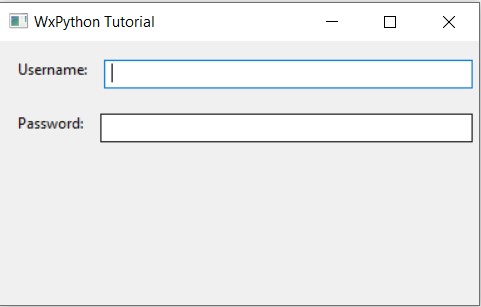
An example on how to use the wxPython BoxSizer (Follow link for full tutorial and explanation).
import wx

class Window(wx.Frame):
    def __init__(self, title):
        super().__init__(parent = None, title = title)
        self.panel = wx.Panel(self)

        sizer = wx.BoxSizer(wx.VERTICAL)

        #-----------------------
        sub_sizer1 = wx.BoxSizer(wx.HORIZONTAL)

        text1 = wx.StaticText(self.panel, label = "Username: ")
        sub_sizer1.Add(text1, flag = wx.ALL, border = 5)

        text2 = wx.TextCtrl(self.panel)
        sub_sizer1.Add(text2, proportion = 1, flag = wx.ALL, border = 5)
        #-----------------------


        #-----------------------
        sub_sizer2 = wx.BoxSizer(wx.HORIZONTAL)

        text3 = wx.StaticText(self.panel, label = "Password: ")
        sub_sizer2.Add(text3, flag = wx.ALL, border = 5)

        text4 = wx.TextCtrl(self.panel)
        sub_sizer2.Add(text4, proportion = 1, flag = wx.ALL, border = 5)
        #-----------------------

        sizer.Add(sub_sizer1, flag = wx.TOP|wx.LEFT|wx.EXPAND, border = 10)
        sizer.Add(sub_sizer2, flag = wx.TOP|wx.LEFT|wx.EXPAND, border = 10)

        self.panel.SetSizer(sizer)

        self.Centre()
        self.Show()


app = wx.App()
window = Window("WxPython Tutorial")
app.MainLoop()
The output:
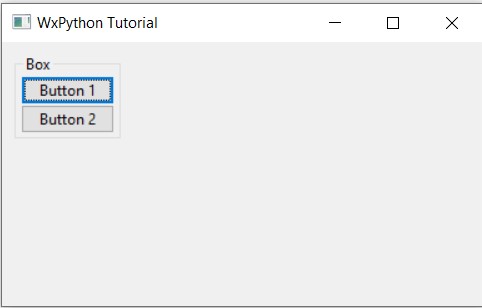
wxPython StaticBoxSizer
An example on how to use the wxPython StaticBoxSizer (Follow link for full tutorial).
import wx

class Window(wx.Frame):
    def __init__(self, title):
        super().__init__(parent = None, title = title)
        self.panel = wx.Panel(self)

        hsizer = wx.BoxSizer(wx.VERTICAL)

        sizer = wx.StaticBoxSizer(wx.StaticBox(self.panel, -1, "Box"), wx.VERTICAL)

        button1 = wx.Button(self.panel, label = "Button 1")
        sizer.Add(button1)

        button2 = wx.Button(self.panel, label = "Button 2")
        sizer.Add(button2)

        hsizer.Add(sizer, flag = wx.ALL, border = 10)

        self.panel.SetSizer(hsizer)

        self.Centre()
        self.Show()


app = wx.App()
window = Window("WxPython Tutorial")
app.MainLoop()
The output:
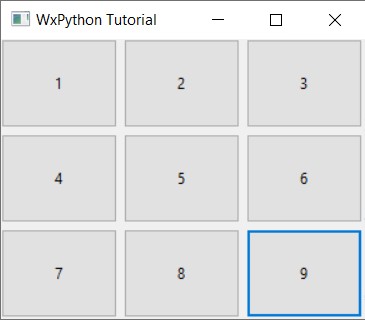
wxPython GridSizer
An example on how to use the wxPython GridSizer (Follow link for full tutorial).
import wx

class Window(wx.Frame):
    def __init__(self, title):
        super().__init__(parent = None, title = title)
        self.panel = wx.Panel(self)

        grid = wx.GridSizer(3, 3, 5, 5)

        grid.AddMany( [ (wx.Button(self.panel, label = "1"), 0, wx.EXPAND),
                        (wx.Button(self.panel, label = "2"), 0, wx.EXPAND),
                        (wx.Button(self.panel, label = "3"), 0, wx.EXPAND),
                        (wx.Button(self.panel, label = "4"), 0, wx.EXPAND),
                        (wx.Button(self.panel, label = "5"), 0, wx.EXPAND),
                        (wx.Button(self.panel, label = "6"), 0, wx.EXPAND),
                        (wx.Button(self.panel, label = "7"), 0, wx.EXPAND),
                        (wx.Button(self.panel, label = "8"), 0, wx.EXPAND),
                        (wx.Button(self.panel, label = "9"), 0, wx.EXPAND)] )

        self.panel.SetSizer(grid)

        self.Centre()
        self.Show()

app = wx.App()
window = Window("WxPython Tutorial")
app.MainLoop()
The output:
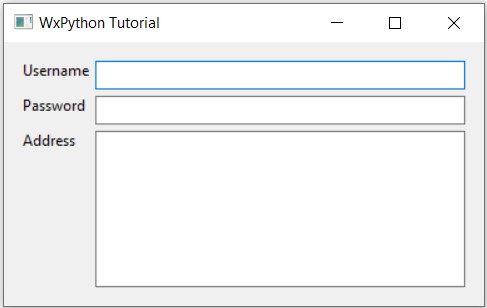
wxPython FlexGridSizer
An example on how to use the wxPython FlexGridSizer (Follow link for full tutorial).
import wx

class Window(wx.Frame):
    def __init__(self, title):
        super().__init__(parent = None, title = title)
        panel = wx.Panel(self)

        wrapper = wx.BoxSizer(wx.VERTICAL)

        sizer = wx.FlexGridSizer(3, 2, 5, 5)

        sizer.AddMany([(wx.StaticText(panel, label = "Username")),
                       (wx.TextCtrl(panel), 0, wx.EXPAND),
                       (wx.StaticText(panel, label = "Password")),
                       (wx.TextCtrl(panel), 0, wx.EXPAND),
                       (wx.StaticText(panel, label = "Address")),
                       (wx.TextCtrl(panel, style=wx.TE_MULTILINE|wx.TE_NO_VSCROLL), 0, wx.EXPAND) ])

        sizer.AddGrowableRow(2, 1)
        sizer.AddGrowableCol(1, 1)

        wrapper.Add(sizer, 1, flag = wx.ALL | wx.EXPAND, border = 15)

        panel.SetSizer(wrapper)

        self.Centre()
        self.Show()


app = wx.App()
window = Window("WxPython Tutorial")
app.MainLoop()
The output:
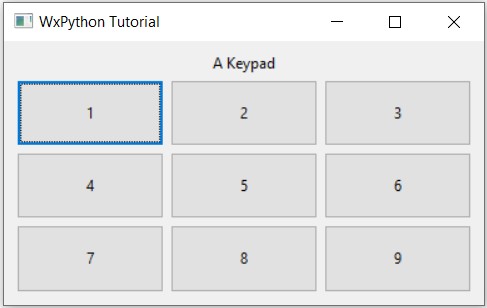
wxPython GridBagSizer
An example on how to use the wxPython GridBagSizer (Follow link for full tutorial).
import wx

class Window(wx.Frame):
    def __init__(self, title):
        super().__init__(parent = None, title = title)
        panel = wx.Panel(self)

        wrapper = wx.BoxSizer(wx.VERTICAL)
        sizer = wx.GridBagSizer(5, 5)

        sizer.Add(wx.StaticText(panel, label = "A Keypad"), flag = wx.ALIGN_CENTRE, pos = (0, 1))

        sizer.Add(wx.Button(panel, label = "1"), flag = wx.EXPAND, pos = (1, 0))
        sizer.Add(wx.Button(panel, label = "2"), flag = wx.EXPAND, pos = (1, 1))
        sizer.Add(wx.Button(panel, label = "3"), flag = wx.EXPAND, pos = (1, 2))
        sizer.Add(wx.Button(panel, label = "4"), flag = wx.EXPAND, pos = (2, 0))
        sizer.Add(wx.Button(panel, label = "5"), flag = wx.EXPAND, pos = (2, 1))
        sizer.Add(wx.Button(panel, label = "6"), flag = wx.EXPAND, pos = (2, 2))
        sizer.Add(wx.Button(panel, label = "7"), flag = wx.EXPAND, pos = (3, 0))
        sizer.Add(wx.Button(panel, label = "8"), flag = wx.EXPAND, pos = (3, 1))
        sizer.Add(wx.Button(panel, label = "9"), flag = wx.EXPAND, pos = (3, 2))

        sizer.AddGrowableRow(1)
        sizer.AddGrowableRow(2)
        sizer.AddGrowableRow(3)
        sizer.AddGrowableCol(0)
        sizer.AddGrowableCol(1)
        sizer.AddGrowableCol(2)

        wrapper.Add(sizer, 1, wx.EXPAND | wx.ALL, 10)
        panel.SetSizer(wrapper)

        self.Centre()
        self.Show()


app = wx.App()
window = Window("WxPython Tutorial")
app.MainLoop()
The output:
This marks the end of the wxPython Layout Management with Sizers Tutorial. Any suggestions or contributions for CodersLegacy are more than welcome. Questions regarding the tutorial content can be asked in the comments section below.